 |
| 1984 Miyata 710 Preservation - Bicycle After |
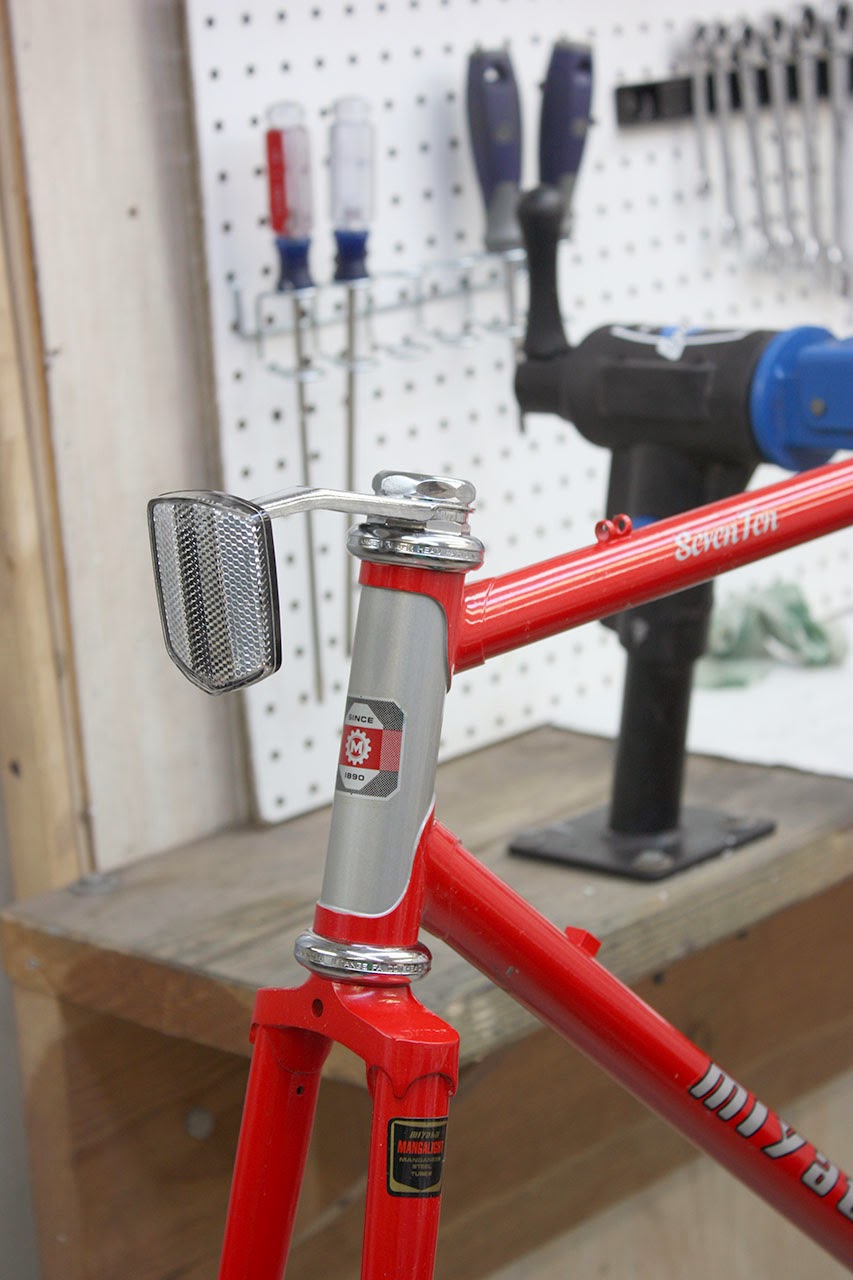
This is John's 1984 Miyata 710 that he purchased on Monday. It is an incredible jewel that he found. The condition is amazing, the paint is perfect, the alloy still shines, very impressive find!! It does not need a restoration by any means however it will be given a mechanical overhaul, new bearings and grease, new cables and cable housings, new brake pads and new handlebar tape. It will be ready to ride for a lifetime a head.
I will not be polishing any alloy surfaces they are already in amazing condition, polishing would just add a little bit to the surfaces but it would be a shame to loose the original condition.
There is hardly and wear on it, there is some dirt in hard to reach areas and the paint has some swirl marks from wiping it down and washing it through the years.
I wasn't planing on tearing the Miyata 710 down to the frame but a few things came up. The very first bolt i started with is frozen in place and stripped, that bolt is the bolt the bolt that holds the rear derailleur cable to the rear derailleur, kind of an important bolt! Next the seat post bolt was also stuck and took some doing to loosen, another important bolt to be able to loosen. Finally the rear brake nut was frozen which is also pretty important to adjusting the brake!
The seat post bolt and rear brake nut I got loose with a little work and no problems. The rear derailleur bolt is a little more trouble, I am not exactly sure how I am going to attack it just yet, it is a larger 5 mm hex bolt, I may have to drill it, use an extractor and replace the bolt.
It shows no matter how mint a bicycle is something can always get stuck with out proper lubrication and a little time.
Below are the before photos, it really hard to tel they are before photos! I think we will call it a preservation.
 |
| 1984 Miyata 710 Preservation - Bicycle Before |
 |
| 1984 Miyata 710 Preservation - Handlebars Before |
 |
| 1984 Miyata 710 Preservation - Brake Levers - Before |
 |
1984 Miyata 710 Preservation
Front Brake Caliper - Before |
 |
| 1984 Miyata 710 Preservation - Front Wheel Hub - Before |
 |
| 1984 Miyata 710 Preservation - Front Wheel Rim - Before |
 |
1984 Miyata 710 Preservation
Stem Before |
 |
1984 Miyata 710 Preservation
Crank Before |
 |
1984 Miyata 710 Preservation
Rear Brake Before |
 |
1984 Miyata 710 Preservation
Rear Derailleur - Before |
 |
| 1984 Miyata 710 Preservation - Rear Wheel - Before |
Again, I wasn't going to tear the bike down to the frame but with the first bolt stuck I thought maybe I should just to make sure no other bolts where stuck or frozen. With the Miyata down to the frame I cleaned the frame, then cleaned the paint, polished out the swirl marks and was shooting for the liquid look, I got it no problem! I also applied some protective wax at this time. Absolutely beautiful and amazing!!
This might be meaningless but their are before photos and after photos below of the frame polishing.
 |
| 1984 Miyata 710 Preservation - Frame Before Polishing |
 |
| 1984 Miyata 710 Preservation - Frame Before Polishing |
 |
| 1984 Miyata 710 Preservation - Frame Before Polishing |
 |
| 1984 Miyata 710 Preservation - Frame Before Polishing |
 |
| 1984 Miyata 710 Preservation - Frame Before Polishing |
 |
| 1984 Miyata 710 Preservation - Frame Before Polishing |
 |
| 1984 Miyata 710 Preservation - Frame Polished |
 |
1984 Miyata 710 Preservation
Frame Polished Bottom Bracket |
 |
1984 Miyata 710 Preservation
Frame Pollished - Head Tube |
 |
1984 Miyata 710 Preservation
Frame Polished - Seat Stays |
 |
1984 Miyata 710 Preservation
Frame Polished - Fork |
At this time I got the headset and bottom bracket bearings into the crock pot for cleaning, the bearings will be replaced but I will reuse the bearing cages, cages are always fine unless damaged and its a lot cheaper to just replace the bearings. I love the shape of the headset and the bottom bracket is pretty nice quality, they will clean up nice. There was some slight corrosion on the bottom bracket and I mean very slight, the bearing grease of the headset and bottom bracket was also pretty dry so it is a perfect time for this preservation.
 |
1984 Miyata 710 Preservation
Headset - Before |
 |
| 1984 Miyata 710 Preservation - Bottom Bracket - Before |
I am a little farther along then this but still need to get the photos prepared. Also I have not attacked the rear derailleur bolt yet. Check back soon!
I decided how I was going to attack the stripped derailleur cable anchor bolt late late last night. I decided to drill a small home and use a screw extractor. It was a surprise that the bolt was actually an Allen key nut, from every angle it looked like an Allen Key socket bolt with a clamp plate on the other end.
For such a refined, beautiful and high quality derailleur this was an absolutely stupid way of making the cable anchor. The Allen key nut had such a shallow socket and made out of such a soft alloy of course it was going to strip!!
This is where the real fun started! I searched for hours through every bicycle hard ware company, every nut and bolt company, every widget company and could not find anything remotely close to the Allen Key nut. They just don't make nuts with Allen key sockets. I tried cylinder nuts, Chicago screws, barrel (A.K.A. Sex bolts, look it up!) and everything in between. So if you can't find a replacement make one!
This is where a lot of thought came in, I thought of replacing the nut with a bolt and a nut on the other side but the original bolt is so specialized to fit in a notch that that was not an option so i had to think of a way to be able to use a nut to fit in the socket and still be able to turn the nut.
My solution is a tall acorn nut that I rounded the hex off and cut a slot for a flat head screw driver. It turned out very well functionally! I need to make another with a better centered slot and polishing where I ground off the hex nut shape. So I need to make it cosmetically nice along with the function.
Below are the photos.
 |
| 1984 Miyata 710 Preservation - Made Replacement Nut |
 |
| 1984 Miyata 710 Preservation - Made Nut Before & After |
 |
| 1984 Miyata 710 Preservation - Made Nut Installed |
I posted this from being on brake from class, on Thursday I have design classes from 9:00 a.m. to 10:00 p.m. It is a long day so this will be all for today.
I finished the Miyata 710 this morning. There really is not much to say individually about the components so I am going to let the photos do the talking. I am not even sure its worth showing before photos. In the before photo of the stem you can see rust starting to form, in a year or two the chances are the stem would be stuck so it is the perfect time for this preservation.
Each parts was cleaned and run through the sonic cleaner for a brightening up. everything turned out fantastic, this Miyata is amazing.
 |
1984 Miyata 710 Preservation - Headset & Bottom Bracket
Cleaned & New Bearings |
 |
| 1984 Miyata 710 Preservation - Bearings Packed |
 |
1984 Miyata 710 Preservation
Bottom Bracket Complete |
 |
1984 Miyata 710 Preservation
Headset Complete |
 |
| 1984 Miyata 710 Preservation - Brake Calipers - Before |
 |
| 1984 Miyata 710 Preservation - Brake Calipers - After |
 |
1984 Miyata 710 Preservation
Front Caliper - Installed |
 |
1984 Miyata 710 Preservation
Rear Caliper - Installed |
 |
| 1984 Miyata 710 Preservation - Rear Derailleur - Overhaul |
 |
| 1984 Miyata 710 Preservation - Rear Derailleur - Complete |
 |
| 1984 Miyata 710 Preservation - Front Derailleur - Before |
 |
| 1984 Miyata 710 Preservation - Front Derailleru - After |
 |
| 1984 Miyata 710 Preservation - Shift Levers - Before |
 |
| 1984 Miyata 710 Preservation - Shift Levers - Installed |
 |
| 1984 Miyata 710 Preservation - Handlebars - Before |
 |
1984 Miyata 710 Preservation
Stem & Handlebars - Installed |
 |
1984 Miyata 710 Preservation
Stem & Handlebars - Installed |
 |
1984 Miyata 710 Preservation
Crank - Before |
 |
1984 Miyata 710 Preservation
Crank - Installed |
 |
| 1984 Miyata 710 Preservation - Brake Levers - Before |
 |
| 1984 Miyata 710 Preservation - Brake Levers - After |
 |
| 1984 Miyata 710 Preservation - Main Body - Complete |
The wheels where in fantastic shape, the grease was getting sticky but not to bad. The cones where set way to tight. Setting bearing cones is a bit of an art, a lot of feel involved, now the wheels spin beautifully! Only new tubes installed.
 |
1984 Miyata 710 Preservation
Rear Wheel - Before |
 |
| 1984 Miyata 710 Preservation - Rear Wheel Hub - Before |
 |
| 1984 Miyata 710 Preservation - Rear Wheel - Old Grease |
 |
| 1984 Miyata 710 Preservation - Rear Wheel - New Grease & Bearings |
 |
1984 Miyata 710 Preservation
Front Wheel - Before |
 |
| 1984 Miyata 710 Preservation - Front Wheel Hub - Before |
 |
| 1984 Miyata 710 Preservation - Front Wheel - Old Grease |
 |
| 1984 Miyata 710 Preservation - Front Wheel - New Grease & Bearings |
 |
| 1984 Miyata 710 Preservation - Front Wheel Hub - Installed |
 |
| 1984 Miyata 710 Preservation - Wheels - Complete |
Last to do is install the new cables, cable housings and handlebar tape. The handlebar tape is a synthetic black leather with a gel strip. It is the best of both worlds, comfort and classic style. The handlebar tape is also great quality, it installed perfectly.
 |
| 1984 Miyata 710 Preservation - New Bits & Pieces |
 |
| 1984 Miyata 710 Preservation - Handlebar Tape - Installed |
 |
1984 Miyata 710 Preservation
Handlebar Tape - Installed |
I forgot to show the pedals above so here they are. Might be the best condition for 30 year old pedals you will ever see.
 |
| 1984 Miyata 710 Preservation - Pedals - Before |
 |
| 1984 Miyata 710 Preservation - Pedals - After |
The Miyata 710 is amazing bicycle. The condition is incredible, I found two scratches on it and those are hard to find. It was also caught just in time before it start to deteriorate, a few things where starting to corrode but they have been taken care of. It is a true time capsule.
I love the paint scheme with the red, silver head tube and white outline of the silver against the lugs. The new black brake cable housings really make the bike pop. the black synthetic handlebar tape is the perfect look for the Miyata, I love this bicycle, I wish it was about 12 cm larger and mine!
Sorry for the final photos, the sun was not helping and there is no where else to take the photos in the winter from hell.
 |
| 1984 Miyata 710 Preservation - Bicycle Complete |
 |
| 1984 Miyata 710 Preservation - Bicycle Complete |
 |
| 1984 Miyata 710 Preservation - Bicycle Complete - Handlebars |
 |
1984 Miyata 710 Preservation
Bicycle Complete - Head Tube Detail |
 |
| 1984 Miyata 710 Preservation - Bicycle Complete - Stem |
 |
1984 Miyata 710 Preservation
Bicycle Complete - Front Half |
 |
| 1984 Miyata 710 Preservation - Bicycle Complete - View of the Paint |
 |
| 1984 Miyata 710 Preservation - Bicycle Complete - Drive Train |
 |
1984 Miyata 710 Preservation
Bicycle Complete - Rear Brake Caliper |
 |
| 1984 Miyata 710 Preservation - Bicycle Complete - Rear Wheel Hub |
Thanks for the interest,
John Z.
John Z, thanks for doing such an amazing job on my bike, you are awesome. I cannot wait to get this out on the trail this spring, thanks again!
ReplyDeleteJohn, I had been in the market for a project bike. After mulling the possibility of picking up an old Peugeot or Raleigh to join my stable, I decided to look across the pacific instead. I came across a 1982 Miyata 710, beautiful fire engine red; sold stripped down to the frame for $75. I'd be lying if I said your article didn't influence my decision! It was a local seller so I checked it out in person. No dents, frame was straight as an arrow, and the seller included a box of components. Everything to make the bike whole was in the box, and in working order, as well as a few aftermarket parts: brifters, hollow BB and crank. I've just finished inventory on it all and have begun to clean up the frame and components. I read your article last night, and drooled over all the pictures; then picked up my new frame today and part box today! The paint isn't nearly as pristine as the 710 in your article, but it's not too bad. I had initially wanted to strip and repaint it if I could find Miyata decals, but once all the grease and dust had been wiped away, I noticed the very fine gold detailing around the lugs. In no way are my hands steady enough to replicate that! I may end up matching the paint and touching up the scuffs and scratches (love marks); but more likely I'll lay down a clear coat over the whole thing as it is. It is a 37 year old bicycle after all that has seen its fair share of use!
ReplyDeleteThat's an incredible Miyata 710! Preservation is definitely the move here since it's in original mint condition. Skip any modern overhauls; keeping it classic maintains its soul. Though, if vintage bikes had complex circuits, you’d need bga assembly capabilities to fix them. Stick to fresh grease instead!
ReplyDelete