|
| Miyata Mixtie - Bike Finished |
 |
| Miyata Mixtie - Bicycle Before |
Hello again,
This is Emmett's brother Ishmael's gift to his girlfriend for her graduation. It is a Miyata mixtie frame. the frame is in beautiful condition, the components are dirty and dull but seem to be in descent condition. The bike is going to receive a restoration and a few updates. First will be wider knobby cross tires for riding road and trails, second will be a set of cork grips with a shellac coat. Also the usually new brake cables and housings, shift cable and housings and new brake pads.
Please continue to check out the posts of Emmett's Miyata touring bicycle and the Purple Fuji fixed gear. They will be updated as things happen but I am going to finish the Miyata mixtie for Ishmael first.
|
| Miyata Mixtie - Bicycle Before |
 |
| Miyata Mixtie - Front Wheel Before |
 |
| Miyata Mixtie - Front Rim Before |
 |
| Miyata Mixtie - Crank Before |
 |
| Miyata Mixtie - Rear Derailleur Before |
 |
| Miyata Mixtie - Front Brake Before |
 |
| Miyata Mixtie - Bicycle Before - Handlebar View |
I stripped the frame of components, the frame is in really nice shape, just very dirty, greasy and a few nicks and chips. I cleaned the frame then used a paint cleaning polish and a paint polish. I am impressed with the color and polish of the paint.
 |
| Miyata Mixtie - Frame Stripped of Components - Dirty |
 |
| Miyata Mixtie - Frame Before Polishing - Bottom Bracket Area |
 |
| Miyata Mixtie - Frame Before Polishing - Drop Outs |
 |
| Miyata Mixtie - Frame Before Polishing - BB Area |
 |
Miyata Mixtie - Frame Before Polishing
Head Tube Area |
 |
| Miyata Mixtie - Frame Polished |
 |
| Miyata Mixtie - Frame Polished - Bottom Bracket |
 |
| Miyata Mixtie - Frame Polished - Seat Tube |
 |
| Miyata Mixtie - Frame Polished - Angle View |
 |
| Miyata Mixtie - Fork Polished |
With the frame cleaned and polished I got to work on the headset and bottom bracket components. Besides dirty and old grease the components are in good shape. I placed all the components in the crock pot with soapy water on low for a day and then wiped them down and polished the components on the polishing wheel.
The bearings where repacked in fresh grease and both the headset and bottom bracket assembled easily and both turn very smoothly. I am pleased with the results.
 |
| Miyata Mixtie - Headset Before |
 |
| Miyata Mixtie - Bottom Bracket - Before |
 |
| Miyata Mixtie - Headset & Bottom Bracket - Polished |
 |
| Miyata Mixtie - Headset Cups - Pressed |
 |
| Miyata Mixtie - Headset Bearings Packed |
 |
| Miyata Mixtie - Headset Complete |
 |
| Miyata Mixtie - BB Bearings Packed |
 |
Miyata Mixtie - Bottom Bracket
Complete - Drive Side |
 |
Miyata Mixtie - Bottom Bracket
Complete - Non drive Side |
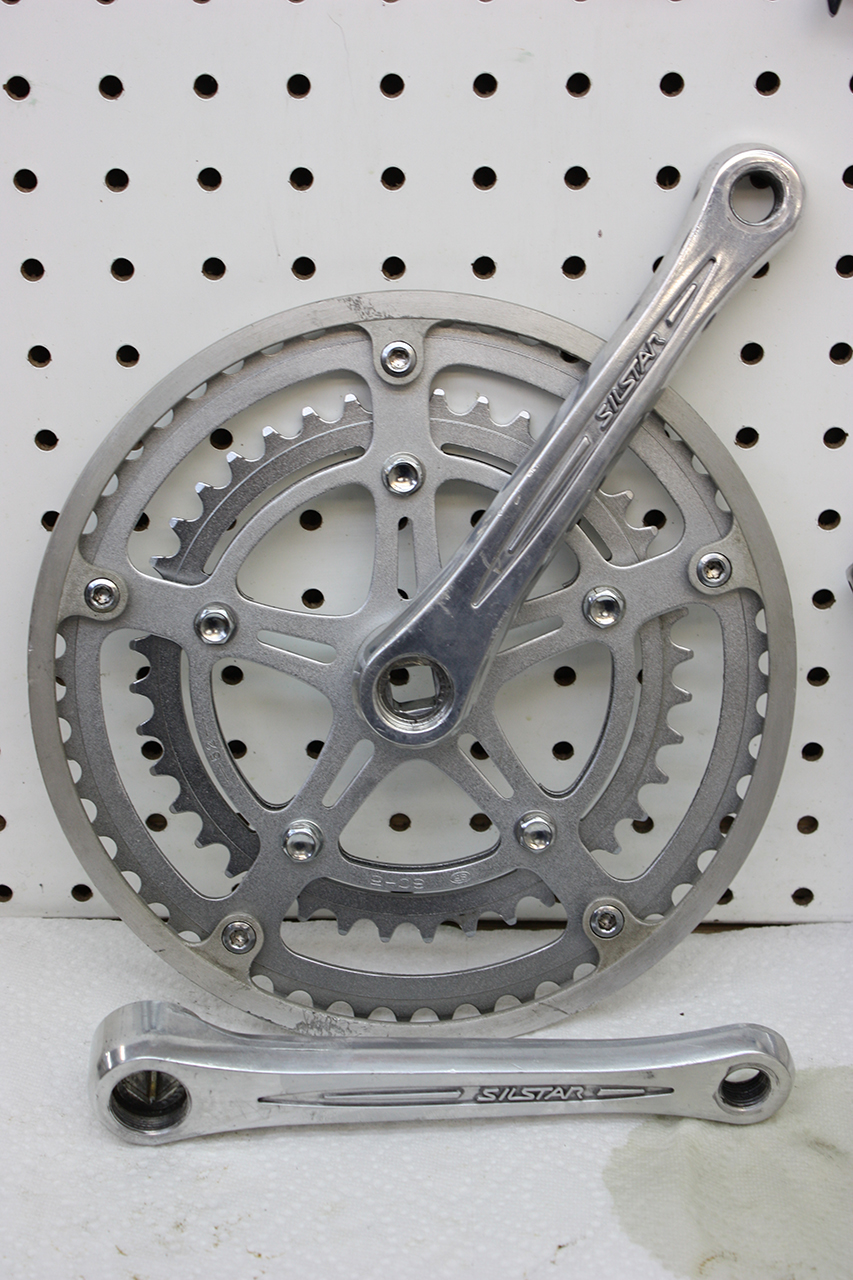
With the headset and bottom bracket complete I got started on the crank and crank arms. The crank is an interesting crank, it is not the highest end crank but a very nice crank. I polished the crank arms but the chain rings have a textured finish and does not get polished, just cleaned. I disassembled the crank and cleaned the chain rings and polished the crank arms.
I really like the look of this crank, I like the textured finish and the crank is surprisingly light. With the crank assembled I installed the crank on the bicycle.
 |
Miyata Mixtie - Crank Before
Cleaning & Polishing |
 |
Miyata Mixtie - Crank Disassembled - Before Cleaning
& Polishing |
 |
Miyata Mixtie - Crank Cleaned & Polished
Disassembled |
 |
Miyata Mixtie - Crank Cleaned & Polished
Assembled |
 |
| Miyata Mixtie - Crank Installed |
Next I started work on the rear wheel. The rear wheel looks rougher then it really is, mainly a lot of dried grease and grime. The free wheel removed easily with the right tool. The bearings are in good shape under all the dried grease. I put the hub components into the crock pot on low for a little while and the old grease wiped off easily. A little polishing of the components, new grease, hub and rim along with a truing off the wheel and it looks great. New Kenda 27 x 1 3/8" cross tires have been installed for road and a little trail riding, I am very pleased with the results.
 |
| Miyata Mixtie - Rear Wheel - Before |
 |
Miyata Mixtie - Rear Wheel Hub
Disassembled |
 |
Miyata Mixtie - Rear Wheel Hub
Polished |
 |
Miyata Mixtie - Rear Wheel Rim
Polished |
 |
| Miyata Mixtie - New Kenda Cross Tires |
The link above is an illustration of how quickly bicycle component price change and go up and down. When I ordered the tires the best price I could find anywhere was $12. Today they are $7.63, but shipping is $5, I got free shipping so in the end all is equal.
 |
| Miyata Mixtie - Rear Wheel Isntalled |
 |
| Miyata Mixtie - Rear Wheel - Polished & Installed |
 |
| Miyata Mixtie - Bike to this Point |
With the rear wheel complete I started work on the front wheel. The front wheel was in good shape, just very dirty with dried grease. The components cleaned up nice in the crock pot on low and everything else polished nicely. After overhauling and truing the wheel spins beautifully. As the rear, the Kenda 27 x 1 3/8" cross tire was installed. I am impressed with the look of the cross tires on the mixtie, it has a real mean look to it.
 |
| Miyata Mixtie - Front Wheel Hub - Cleaned & Polished |
 |
Miyata Mixtie - Front Wheel Rim
Before |
 |
Miyata Mixtie - Front Wheel Rim
Polished |
 |
Miyata Mixtie - Front Wheel Installed
Love the Chrome |
 |
| Miyata Mixtie - Wheels Installed |
Next I polished the stem, handle bars and brake levers. All the components are in good shape just dull. Took the bench top buffer and some hand polishing and the components look great. I grease and installed the stem along with the handle bars. The brake levers took a lot of hand polishing because there are a lot of nooks and crannies. With the handlebars installed it is really starting to look like a bike. I am pleased with the results.
 |
| Miyata Mixtie - Handle Bars & Stem - Before |
 |
| Miyata Mixtie - Stem Installed |
 |
| Miyata Mixtie - Brake Levers - Installed |
 |
| Miyata Mixtie - Handlebars - Complete |
Now with the bicycle looking like a bike its time to start on all the smaller components like the brakes and derailleurs. The derailleurs took a lot of work, functionally the front derailleur was fine but covered in a thick very hard coat of old grease and dirt. It took a lot of cleaning and lubrication to get to move freely. In the end the front derailleur looks great and functions smoothly.
The rear derailleur is another story. Same very hard old grease and grime but also the jockey wheel cage was frozen into place and had no tension in the action that supplies tension to the chain. I had to completely disassemble the derailleur and scrape the grease of with wire brushes and dental picks. The rod that connects the jockey wheel cage to the derailleur body was stuck in place from the old grease and the tension spring was covered in the old grease and was not in the correct position to be tension-ed. After cleaning, polishing and assembly the rear derailleur looks good and still need some work to function properly, the jockey wheel caged worked great now but the derailleur body pivot points where not. It took a lot of penetrating oil to clean the pivot points and a lot of working the oil in and out. Now the derailleur works as good as new!
 |
| Miyata Mixtie - Brake Calipers & Derailleurs - Before |
 |
Miyata Mixtie - Rear Derailleur
Before |
 |
| Miyata Mixtie - Front Derailleur - Installed |
 |
| Miyata Mixtie - Rear Derailleur - Installed |
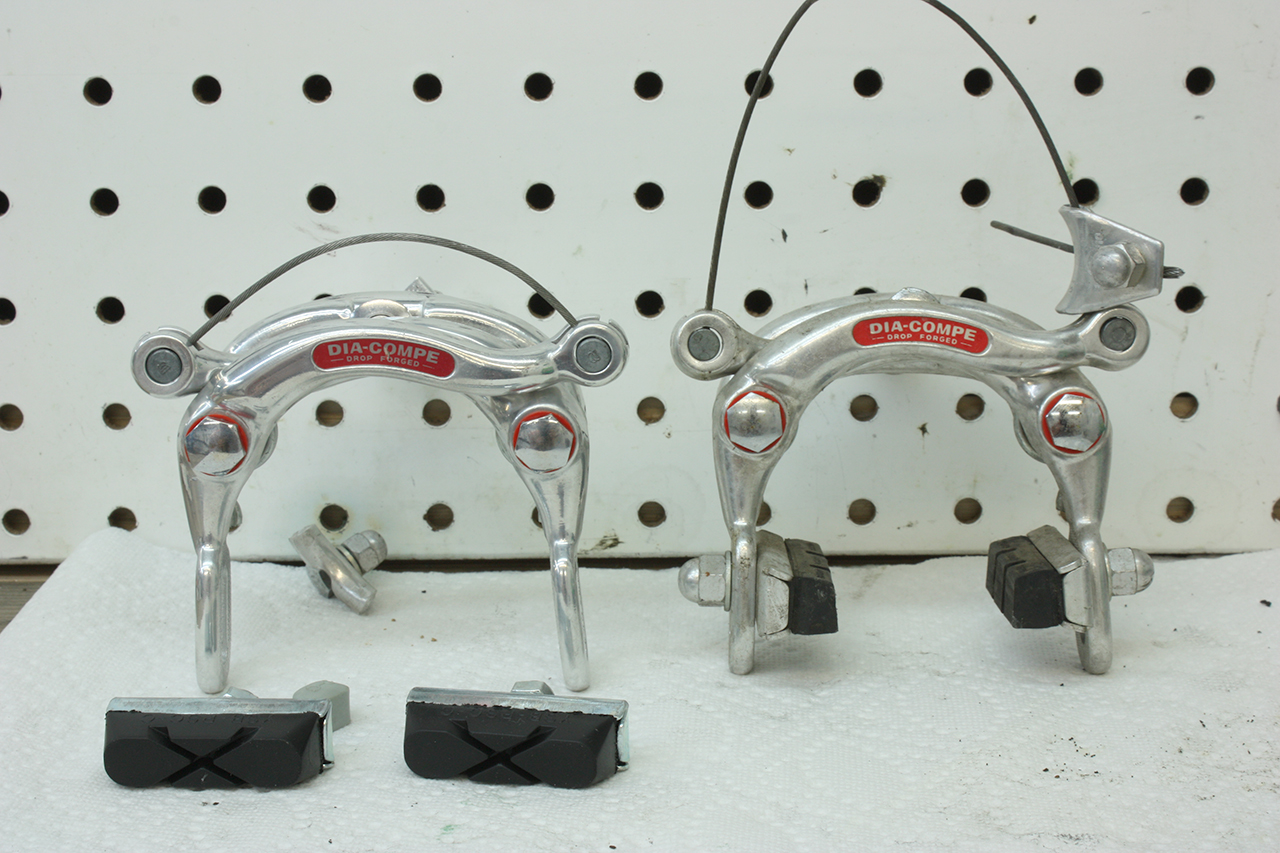
Work on the brake calipers is going well. The front brake caliper cleaned up nice and polished well. The only way to get a brake caliper properly polished and restored is to disassemble it. After re-assembly the front caliper function wonderfully and looks even better. This is the point that I really get excited for the bike, all the chrome and shine is coming together.
 |
| Miyata Mixtie - Brake Calipers Before - Exploded View |
 |
| Miyata Mixtie - Brake Calipers - After Left - Before Right |
 |
Miyata Mixtie - Front Brake - Installed
Really Like the Shine against the Cross Tires |
The rear brake caliper is about half done. At this point the bicycle is beautiful!! Usually paint colors like this, the metallic 70's and 80's colors are not my favorites, I like bright, solid primary colors but this bicycle is beautiful! The paint shines and the blue metallic is very subtle, I really really like it. I think its going to look great with new white cable housings and shellac cork grips and the gum wall tires add to the effect.
I had to see the cork handle bar grips on the Miyata.
 |
Miyata Mixtie - Cork Handle Bar Grips
Looking Good! |
The rear brake is finished, It looks great, It does not get seen much as on a mixtie the brake is tucked in under the second chain stays.
 |
| Miyata Mixtie - Rear Brake Caliper - Installed |
With the brakes and derailleur installed its time to start running cables and housings. But first I had to polish and lubricate the gear shift levers. Levers cleaned and polished really nice and look great installed. The Miyata is getting white cable housings to go with the soft blue of the frame. The cables and housings went great and everything functions nicely on the stand but that is the stand, always need to make adjustments on the test ride. In the photo below you can see the front reflector, the front reflector needs to be installed before the cables because the front brake cable runs through the center of the reflector.
 |
| Miyata Mixtie - Misc. Parts |
 |
Miyata Mixtie - Cables and Housings
Installed |
 |
| Miyata Mixtie - Cables Installed |
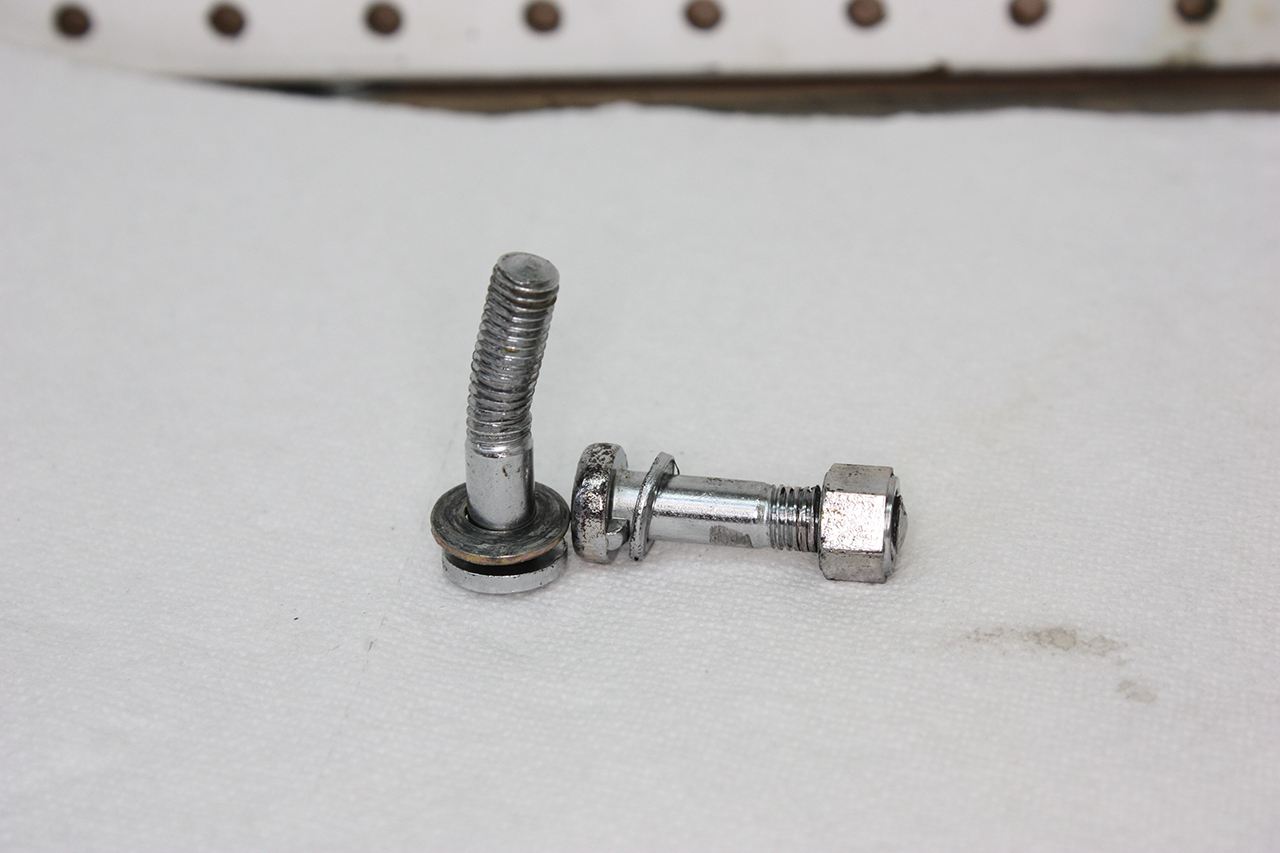
So, whats left to do? There is the chain and peddles to install, and shellac the handlebar grips. Then there is the seat tube and seat. The seat post that was on the bike when it came was to small. To fix this someone wrenched the seat post bolt super tight bending the bolt, the seat post tube and the seat post. I fixed the seat post tube but I am looking for a seat post and seat post bolt that will fit.
Chain has been installed and the peddles have been restored and installed. The freewheel has also been cleaned and lubricated, it spins nicely. The cork grips have had shellac applied.
The last problem has been the seat post and seat post bolt. I had to do a lot of filing to repair the seat post lug. The bolt holes where elongated and pinched closed. After close inspection someone actually cut the seat tube channel wider. I can't figure out why? I thought it was because the seat tube was to small but that is not the case. In the end I have the seat tube lug somewhat straighten out, not perfect though. The original seat tube will need to be used to fit with the shape of the seat lug but a new seat post bolt was needed.
 |
| Miyata Mixtie - Freewheel & Chain Installed |
 |
| Miyata Mixtie - Peddles - Polished & Installed |
 |
| Miyata Mixtie - Cork Grips - Taped |
 |
| Miyata Mixtie - Cork Grips - Wet Shellac |
 |
| Miyata Mixtie - Old Seat Bolt Left - New Right |
The bicycle is finished! I think it is absolutely beautiful!! I love the color, which is new for me liking that type of finish. The bikes rides wonderfully and the cross tires are actually very smooth on pavement. For the final photos I put my leather seat on, I wanted to see what the Miyata Mixtie would look like with a leather saddle, its not the seat that will be on the final bicycle.
|
| Miyata Mixtie - Bicycle Finished |
 |
Miyata Mixtie - Bicycle Finished
Angle View |
 |
| Miyata Mixtie - Bicycle Finished - Handlebar View |
 |
Miyata Mixtie - Bicycle Finished
Head Tube View
Beautiful!!! |
 |
Miyata Mixtie - Bicycle Finished
Cork Grip View |
 |
Miyata Mixtie - Bicycle Finished
Fork View
Again Beautiful!! |
 |
| Miyata Mixtie - Bicycle Finished - Peddle View |
 |
| Miyata Mixtie - Bicycle Finished - Drive Train View |
 |
| Miyata Mixtie - Bicycle Finished - Rear View |