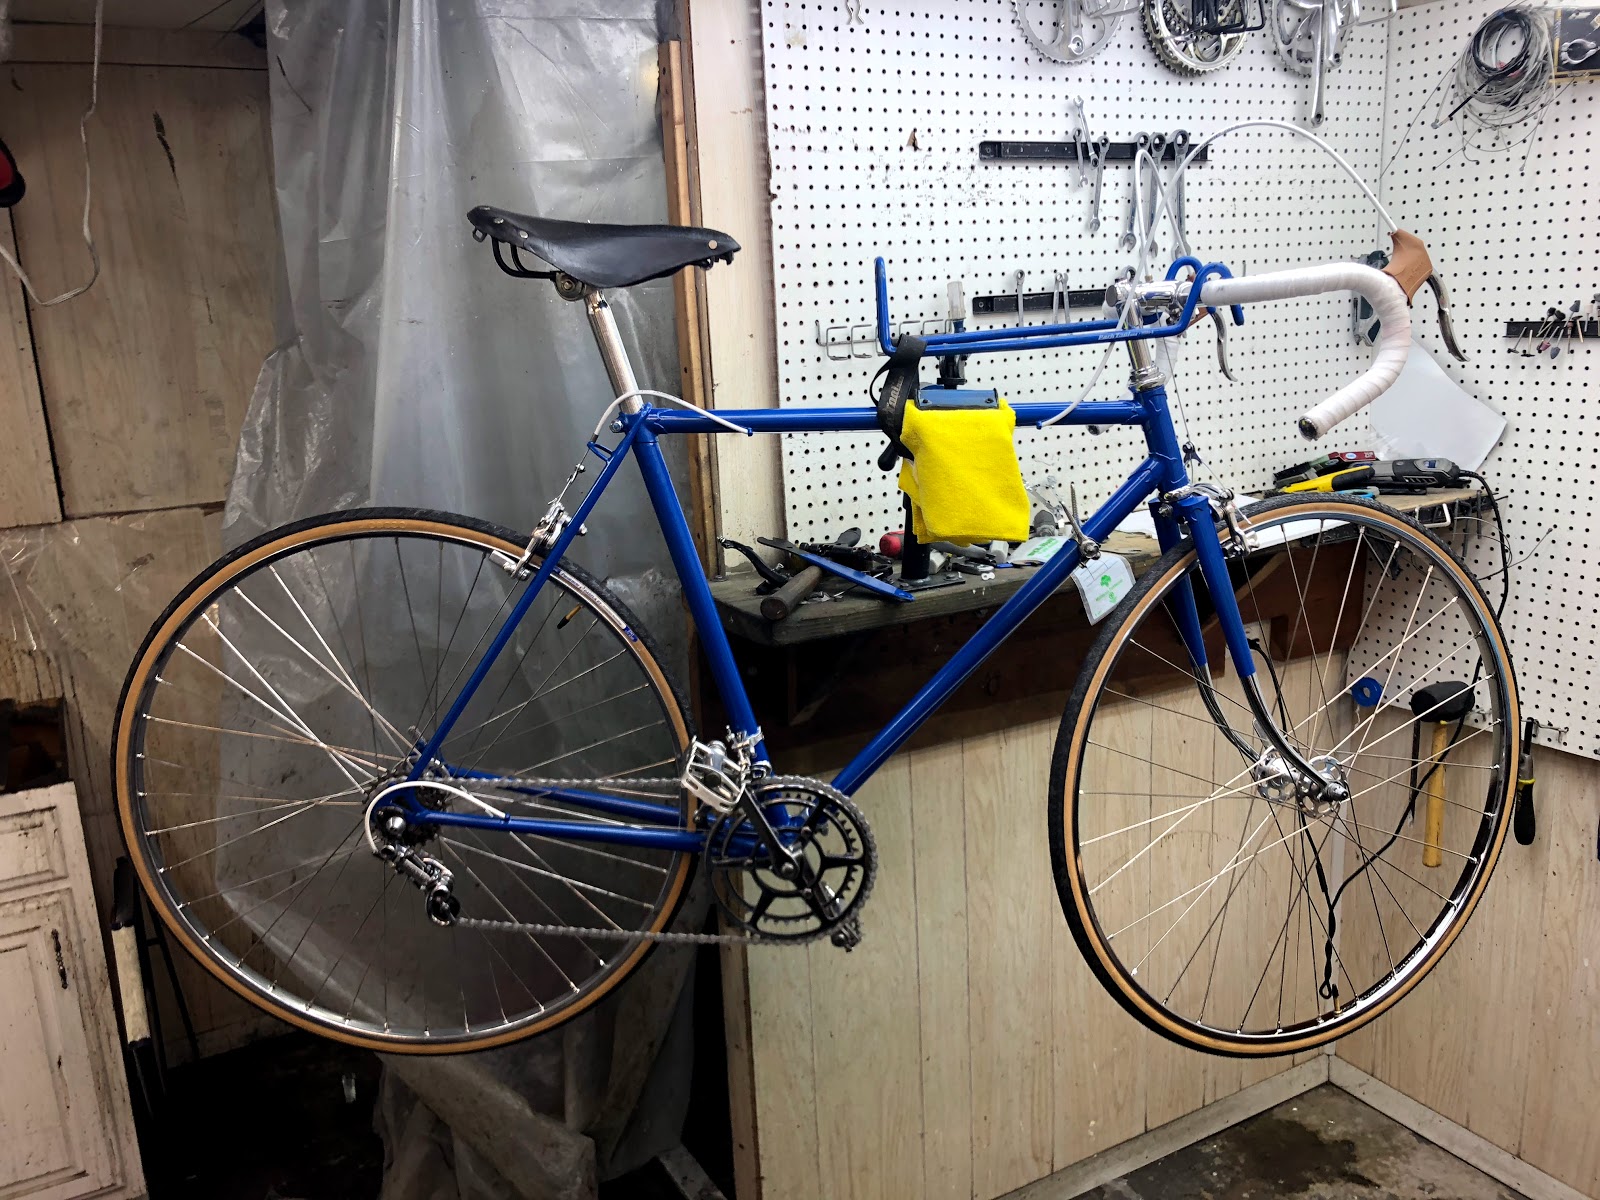
This is Craig's Carlton in for restoration. I love Carlton bicycles and it is so rare I get to work on one. I had a Carlton Flyer a while back that I loved and I sold so I could start doing this full time. I love the feel of Carlton bicycles, they have a feel all their own (A lot of that goes to the Reynolds 531 tubing.). I also love their classic looks. Some of the features of Craig's Carlton is Campagnolo Record derailleurs, although we need to find a front derailleur, Campagnolo shift levers and Campagnolo wheel hubs. So awesome!
The Carlton is a little rough but nothing that can't be worked with.The Carlton will get a complete restoration along with new paint and decals, a replacement front derailleur, new handlebar tape, new bearings, new brake pads, new cables and housings and new tires and tubes. I can't wait to test ride the Carlton and see how it compared to my Flyer!
 |
| Craig's Carlton Restoration - Bicycle Before |
 |
| Craig's Carlton Restoration - Bicycle Before Handlebars |
 |
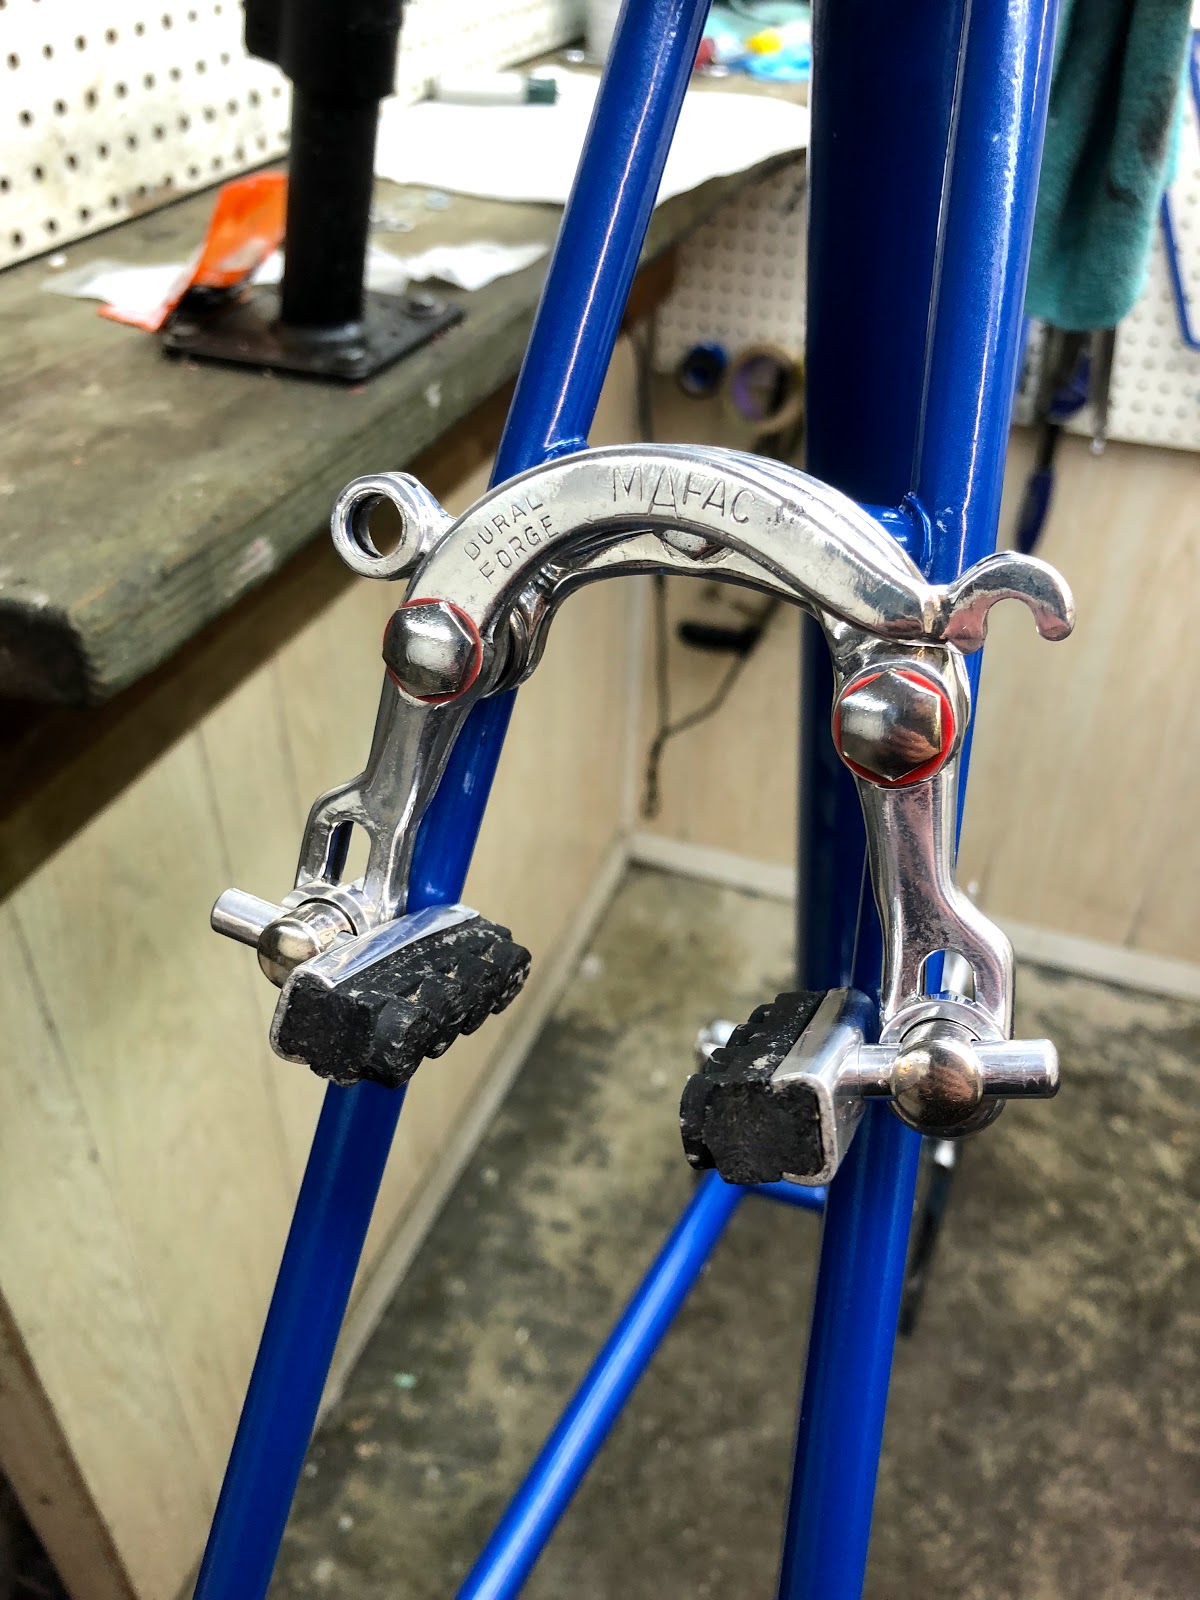
| Craig's Carlton Restoration - Bicycle Before Front Brake |
 |
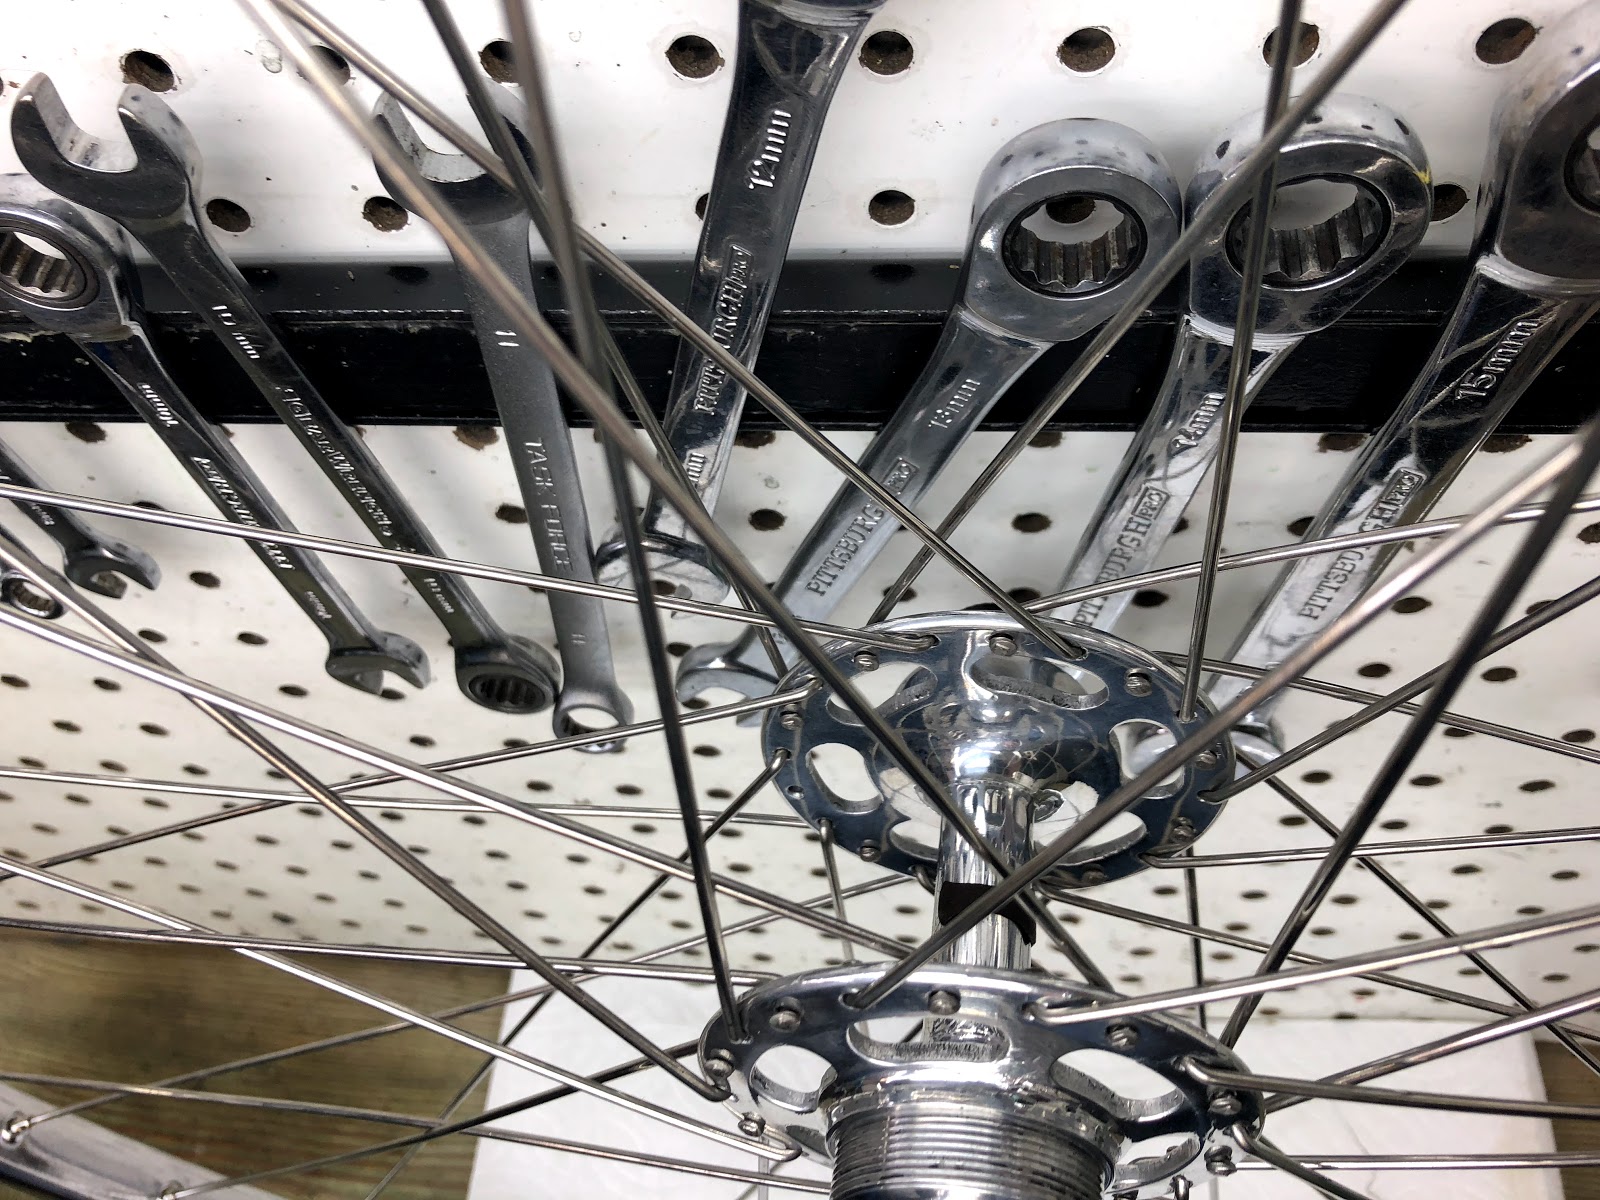
| Craig's Carlton Restoration - Bicycle Before Front Wheel Hub |
 |
| Craig's Carlton Restoration - Bicycle Before Front Wheel Rim |
 |
| Craig's Carlton Restoration - Bicycle Before Stem |
 |
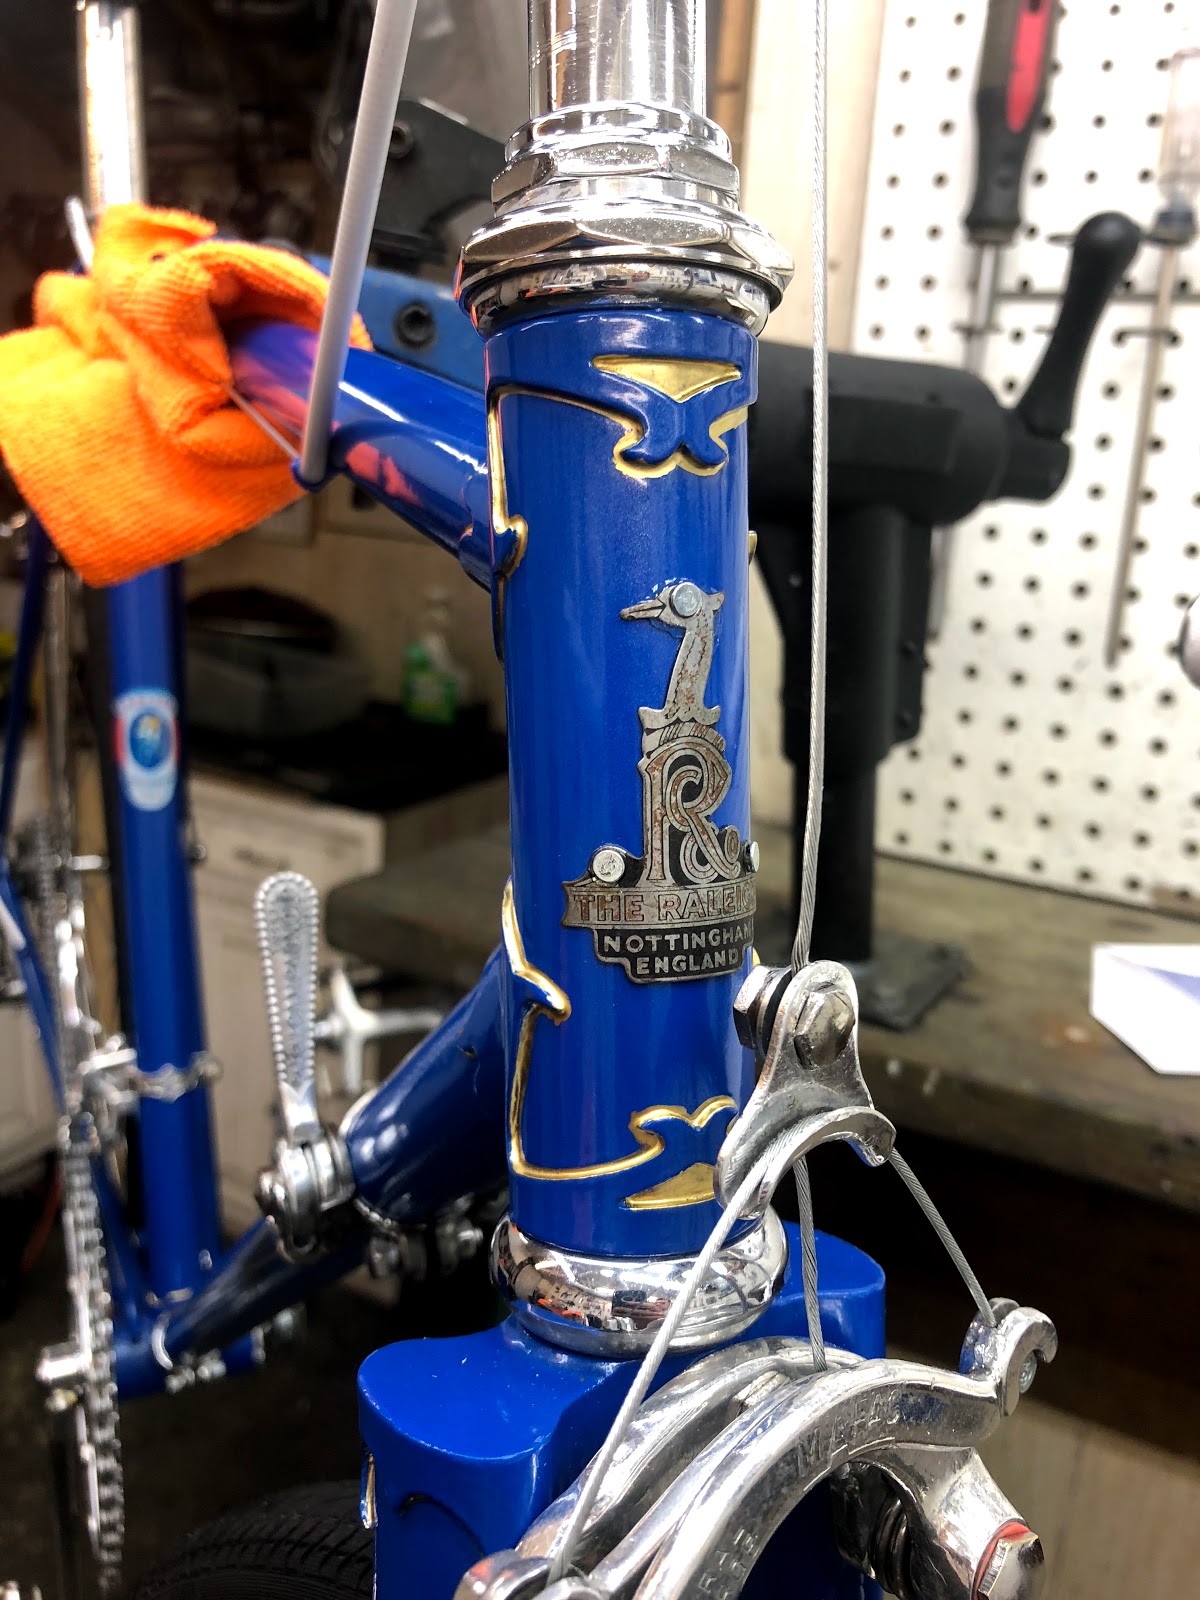
| Craig's Carlton Restoration - Bicycle Before Head Tube |
 |
| Craig's Carlton Restoration - Bicycle Before Fork |
 |
| Craig's Carlton Restoration - Bicycle Before Fork Crown |
 |
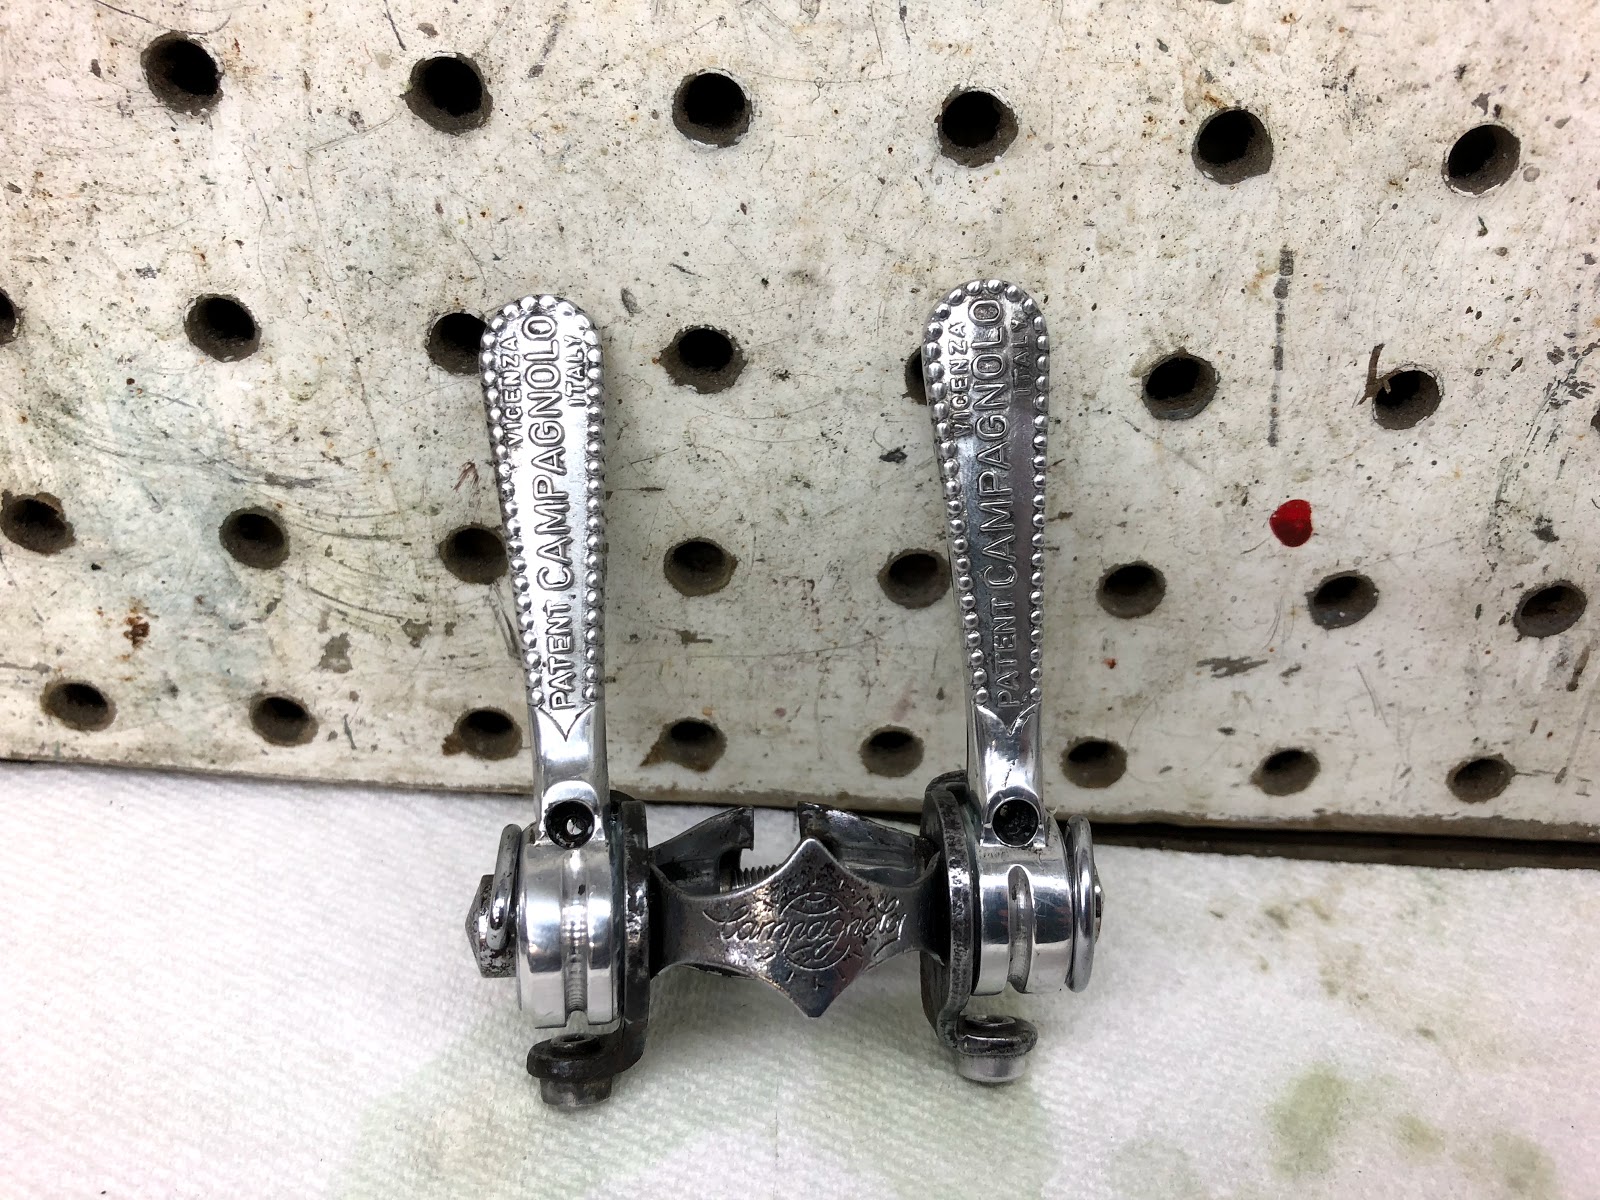
| Craig's Carlton Restoration - Bicycle Before Campagnolo Shift Levers |
 |
| Craig's Carlton Restoration - Bicycle Before Down Tube |
 |
| Craig's Carlton Restoration - Bicycle Before Seat Lug Area |
 |
| Craig's Carlton Restoration - Bicycle Before Reynolds Decal |
 |
| Craig's Carlton Restoration - Bicycle Before Seat Tube |
 |
| Craig's Carlton Restoration - Bicycle Before Seat Tube |
 |
| Craig's Carlton Restoration - Bicycle Before Bottom Bracket |
 |
| Craig's Carlton Restoration - Bicycle Before Crank |
 |
| Craig's Carlton Restoration - Bicycle Before Front Derailleur |
 |
| Craig's Carlton Restoration - Bicycle Before Rear Brake Caliper |
 |
| Craig's Carlton Restoration - Bicycle Before Campagnolo Record Rear Derailleur |
 |
| Craig's Carlton Restoration - Bicycle Before Rear Wheel Hub |
 |
| Craig's Carlton Restoration - Bicycle Before Rear Wheel Rim |
With the frame broken down I find the frame to be in good shape with the paint being replaced. There is little to no rust. I will have to align the fork blades, they are slightly off by eye. I am mad because I can't find the overall photo of the frame broken down.
 |
| Craig's Carlton Restoration - Frame Before Head Tube |
 |
| Craig's Carlton Restoration - Frame Before Head Tube |
 |
| Craig's Carlton Restoration - Frame Before Head Tube |
 |
| Craig's Carlton Restoration - Frame Before Top Tube |
 |
| Craig's Carlton Restoration - Frame Before Down Tube |
 |
| Craig's Carlton Restoration - Frame Before Seat Lug |
 |
| Craig's Carlton Restoration - Frame Before Seat Tube |
 |
| Craig's Carlton Restoration - Frame Before Bottom Bracket |
 |
| Craig's Carlton Restoration - Frame Before Bottom Bracket |
 |
| Craig's Carlton Restoration - Frame Before Bottom Bracket |
 |
| Craig's Carlton Restoration - Frame Before Seat Stays |
 |
| Craig's Carlton Restoration - Frame Before Seat Stays |
 |
| Craig's Carlton Restoration - Frame Before Chain Stays |
 |
| Craig's Carlton Restoration - Frame Before Drop Outs |
 |
| Craig's Carlton Restoration - Frame Before Fork |
 |
| Craig's Carlton Restoration - Frame Before Fork Crown |
 |
| Craig's Carlton Restoration - Frame Before Fork Crown |
 |
| Craig's Carlton Restoration - Frame Before Fork Blade |
 |
| Craig's Carlton Restoration - Frame Before Fork Blade |
 |
| Craig's Carlton Restoration - Frame Before Fork Drop Outs |
The component piece spent a long time in the cleaners and crock pot so I got started on the wheels. I love Campagnolo Record wheel hubs, they don't get better then this and that is coming from a Dura Ace guy. To really get the hubs looking right I had to brake the wheels down so I could polish the hubs on the polishing wheels. I found about half the spokes where rusted into the spoke nipples so the spokes would have needed to be replaced anyways just to true the wheels.
With the wheels broken down I got to work on the polishing wheels. The wheels hubs polished just beautiful and the rims along with the hubs!! This is the stuff that makes me excited for what I do. I love it! I couldn't be happier with the wheel hubs and rims.
 |
| Craig's Carlton Restoration - Rear Wheel Before |
 |
| Craig's Carlton Restoration - Rear Wheel Before - Wheel Hub |
 |
| Craig's Carlton Restoration - Rear Wheel Before - Wheel Hub |
 |
| Craig's Carlton Restoration - Rear Wheel Before - Wheel Hub |
 |
| Craig's Carlton Restoration - Rear Wheel Before - Wheel Rim |
 |
| Craig's Carlton Restoration - Rear Wheel Before - Wheel Hub Old Grease |
 |
| Craig's Carlton Restoration - Front WheelBefore |
 |
| Craig's Carlton Restoration - Front Wheel Before - Wheel Hub |
 |
| Craig's Carlton Restoration - Front Wheel Before Wheel Hub |
 |
| Craig's Carlton Restoration - Front Wheel Before - WHeel Rim |
 |
| Craig's Carlton Restoration - Front Wheel Before - Wheel Hub Old Grease |
 |
| Craig's Carlton Restoration - Wheels Disassembled |
 |
| Craig's Carlton Restoration - Rims Disassembled |
 |
| Craig's Carlton Restoration - Wheel Hubs Disassembled Before Polishing |
 |
| Craig's Carlton Restoration - Front Hub Disassembled Before Polishing |
 |
| Craig's Carlton Restoration - Front Hub Disassembled Before Polishing |
 |
| Craig's Carlton Restoration - Rear Hub Disassembled Before Polishing |
 |
| Craig's Carlton Restoration - Rear Hub Disassembled Before Polishing |
 |
| Craig's Carlton Restoration - Wheel Hubs Polished |
 |
| Craig's Carlton Restoration - Front Wheel Hub Polished |
 |
| Craig's Carlton Restoration - Rear Wheel Hub Polished |
 |
| Craig's Carlton Restoration - Front Wheel Hub Polished |
 |
| Craig's Carlton Restoration - Rear Wheel Hub Polished |
 |
| Craig's Carlton Restoration - Axle Pieces Ready |
 |
| Craig's Carlton Restoration - Wheel Hubs Complete |
 |
| Craig's Carlton Restoration - Wheel Rims Polished |
 |
| Craig's Carlton Restoration - Wheel Rims Polished |
I messed up the paint process on the main frame so I am currently repainting the main frame. The fork painted nicely. The paint color is called Cream Soda, I don't know how blue is cream soda but I feel its a very nice match, it has just about he right metallic amount too.
 |
| Craig's Carlton Restoration - Fork Painted |
 |
| Craig's Carlton Restoration - Fork Painted |
 |
| Craig's Carlton Restoration - Fork Painted |
 |
| Craig's Carlton Restoration - Fork Painted |
 |
| Craig's Carlton Restoration - Fork Painted |
 |
| Craig's Carlton Restoration - Frame Painted |
 |
| Craig's Carlton Restoration - Frame Painted |
 |
| Craig's Carlton Restoration - Frame Painted |
 |
| Craig's Carlton Restoration - Frame Painted |
 |
| Craig's Carlton Restoration - Frame Painted |
 |
| Craig's Carlton Restoration - Frame Painted |
 |
| Craig's Carlton Restoration - Frame Painted |
 |
| Craig's Carlton Restoration - Frame Painted |
I had to upgrade my phone, you know all that Apple slowing down the older phones thing. In that change everything changed how I get photos up to the website. I lost some of the photos in the process, very frustrating.
The headset and bottom bracket where rough but after sometime in the crock pot and work on the polishing wheels they turned out very nice. With new bearings and grease the headset and bottom bracket spin beautifully!
 |
| Craig's Carlton Restoration - Headset & Bottom Bracket Before |
 |
| Craig's Carlton Restoration - Headset & Bottom Bracket Polished |
 |
| Craig's Carlton Restoration - Pressing Headset Cups |
 |
| Craig's Carlton Restoration - Headset Cups Pressed |
 |
| Craig's Carlton Restoration - Headset Bearings Packed |
 |
| Craig's Carlton Restoration - Headset Complete |
 |
| Craig's Carlton Restoration - Headset Complete |
 |
| Craig's Carlton Restoration - Headset Complete |
 |
| Craig's Carlton Restoration - Bottom Bracket Bearings Packed |
 |
| Craig's Carlton Restoration - Bottom Bracket Complete |
 |
| Craig's Carlton Restoration - Bottom Bracket Complete |
 |
| Craig's Carlton Restoration - Headset & Bottom Bracket Complete |
I don't know where the stem and handlebar photos went, very frustrating, so we pick up with the brake levers. The brake levers polished very nice and with new hoods and handlebar tape they will be even better.
 |
| Craig's Carlton Restoration - Brake Levers Polished |
 |
| Craig's Carlton Restoration - Brake Levers Installed |
I like cotter cranks, maybe not the removing old cotter pins but I have always liked the character and design most cotter cranks have. This crank is no exception! I broke the crank down and started the polishing. The crank polished very nice. Assembled and isntalled I could't be happier with the crank.
 |
| Craig's Carlton Restoration - Crank Before |
 |
| Craig's Carlton Restoration - Crank Exploded |
 |
| Craig's Carlton Restoration - Crank Polished |
 |
| Craig's Carlton Restoration - Crank Complete |
 |
| Craig's Carlton Restoration - Crank Installed |
 |
| Craig's Carlton Restoration - Crank Installed |
The brake calipers are rough but that should not be a problem. I will replace bits an pieces from the small parts drawer as I go. The pieces cleaned and polished very nicely. With all the bushings cleaned and lubricated assembled the calipers work wonderfully. Installed the calipers look great!
 |
| Craig's Carlton Restoration - Brake Calipers Before |
 |
| Craig's Carlton Restoration - Brake Calipers Exploded View |
 |
| Craig's Carlton Restoration - Brake Calipers Polished |
 |
| Craig's Carlton Restoration - Brake Calipers Complete |
 |
| Craig's Carlton Restoration - Brake Calipers Installed |
 |
| Craig's Carlton Restoration - Brake Calipers Installed |
The shift levers where a challenge. After a good deal of cleaning, removing some rust and time on the polishing wheels I am pretty happy with the shift levers. Installed with the new paint of the frame the shift levers look great!
 |
| Craig's Carlton Restoration - Shift Levers Before |
 |
| Craig's Carlton Restoration - Shift Levers Before |
 |
| Craig's Carlton Restoration - Shift Levers Before |
 |
| Craig's Carlton Restoration - Shift Levers Exploded |
 |
| Craig's Carlton Restoration - Shift Levers polished |
 |
| Craig's Carlton Restoration - Shift Levers Complete |
 |
| Craig's Carlton Restoration - Shift Levers Installed |
Just a few things left to do. I am waiting on the decals to be printed. I have the rear wheel complete, the front wheel is almost complete, it took me some time finding the spoke length for the front at a descent price. Cables, tires and tubes to install and handlebar tape and brake elver hoods. Not far to go.
The rear derailleur is a little rough but is is a cool Campagnolo Record! One of the better derailleurs ever. I broke down the rear derailleur and started the polishing and lubricating to get it to move better. The rear derailleur isn't perfect but it functions perfect and its cool factor is very high!
I am missing a few photos over the next few section. The problem with a new phone and different cloud and all that stuff I don't know much about.
After a debacle with getting rear spoke the wheels are laced and beautiful! The rear spokes through all the vendors I go to and some I don't like to use except in a pinch I could not find the size for a reasonable price. So I went the Amazon way. Always read the small print, I didn't know the spokes where coming direct from China. I order a 50 spoke bag of spokes. well there where only 23 spokes in the bag. 15 short of what I needed and they where 3 different sizes. Luckily a friend was nice and cut spokes for me to length and rolled the threads for me. Well, he cut and rolled the first one and then I got to use he roller.
The wheels are amazing. The stainless steel spokes look so much better then the old galvanized spokes. The wheel hubs are just plain beautiful and the original rims shine almost perfect. I really love this stuff!!
The seat post had some gouging. I think because at some point it was stuck in the frame and took a little rough handling to remove. I used hand files to clean up the upper portion a little that is visible. I did not file the lower portion that is in the frame because I didn't want to change its size. Overall in looks pretty good!
The rear derailleur is a little rough but is is a cool Campagnolo Record! One of the better derailleurs ever. I broke down the rear derailleur and started the polishing and lubricating to get it to move better. The rear derailleur isn't perfect but it functions perfect and its cool factor is very high!
I am missing a few photos over the next few section. The problem with a new phone and different cloud and all that stuff I don't know much about.
 |
| Craig's Carlton Restoration - Rear Derailleur Before |
 |
| Craig's Carlton Restoration - Rear Derailleur Exploded |
 |
| Craig's Carlton Restoration - Rear derailleur Complete |
 |
| Craig's Carlton Restoration - Rear Derailleur Installed |
The wheels are amazing. The stainless steel spokes look so much better then the old galvanized spokes. The wheel hubs are just plain beautiful and the original rims shine almost perfect. I really love this stuff!!
 |
| Craig's Carlton Restoration - Rear Wheel Laced |
 |
| Craig's Carlton Restoration - Rear Wheel Laced |
 |
| Craig's Carlton Restoration - Rear Wheel Laced |
 |
| Craig's Carlton Restoration - Front Wheel Laced |
 |
| Craig's Carlton Restoration - Front Wheel LAced |
 |
| Craig's Carlton Restoration - Front Wheel Laced |
 |
| Craig's Carlton Restoration - Rear Wheel Laced |
 |
| Craig's Carlton Restoration - Front Wheel Installed |
 |
| Craig's Carlton Restoration - Front Wheel Laced |
 |
| Craig's Carlton Restoration - Front Wheel Installed |
 |
| Craig's Carlton Restoration - Front Wheel Complete |
 |
| Craig's Carlton Restoration - Rear Wheel Installed |
 |
| Craig's Carlton Restoration - Rear Wheel Installed |
 |
| Craig's Carlton Restoration - Rear Derailleur Installed |
 |
| Craig's Carlton Restoration - Rear Wheel Complete |
The seat post had some gouging. I think because at some point it was stuck in the frame and took a little rough handling to remove. I used hand files to clean up the upper portion a little that is visible. I did not file the lower portion that is in the frame because I didn't want to change its size. Overall in looks pretty good!
 |
| Craig's Carlton Restoration - Seat Post Before |
 |
| Craig's Carlton Restoration - Seat Post Polished |
 |
| Craig's Carlton Restoration - Seat Post & Binder Bolt Installed |
 |
| Craig's Carlton Restoration - Wheels & Seat Post Installed |
Now is the time to choose colors of cable housings, choose tires, and choose the color of the brake lever hoods and handlebar tape.
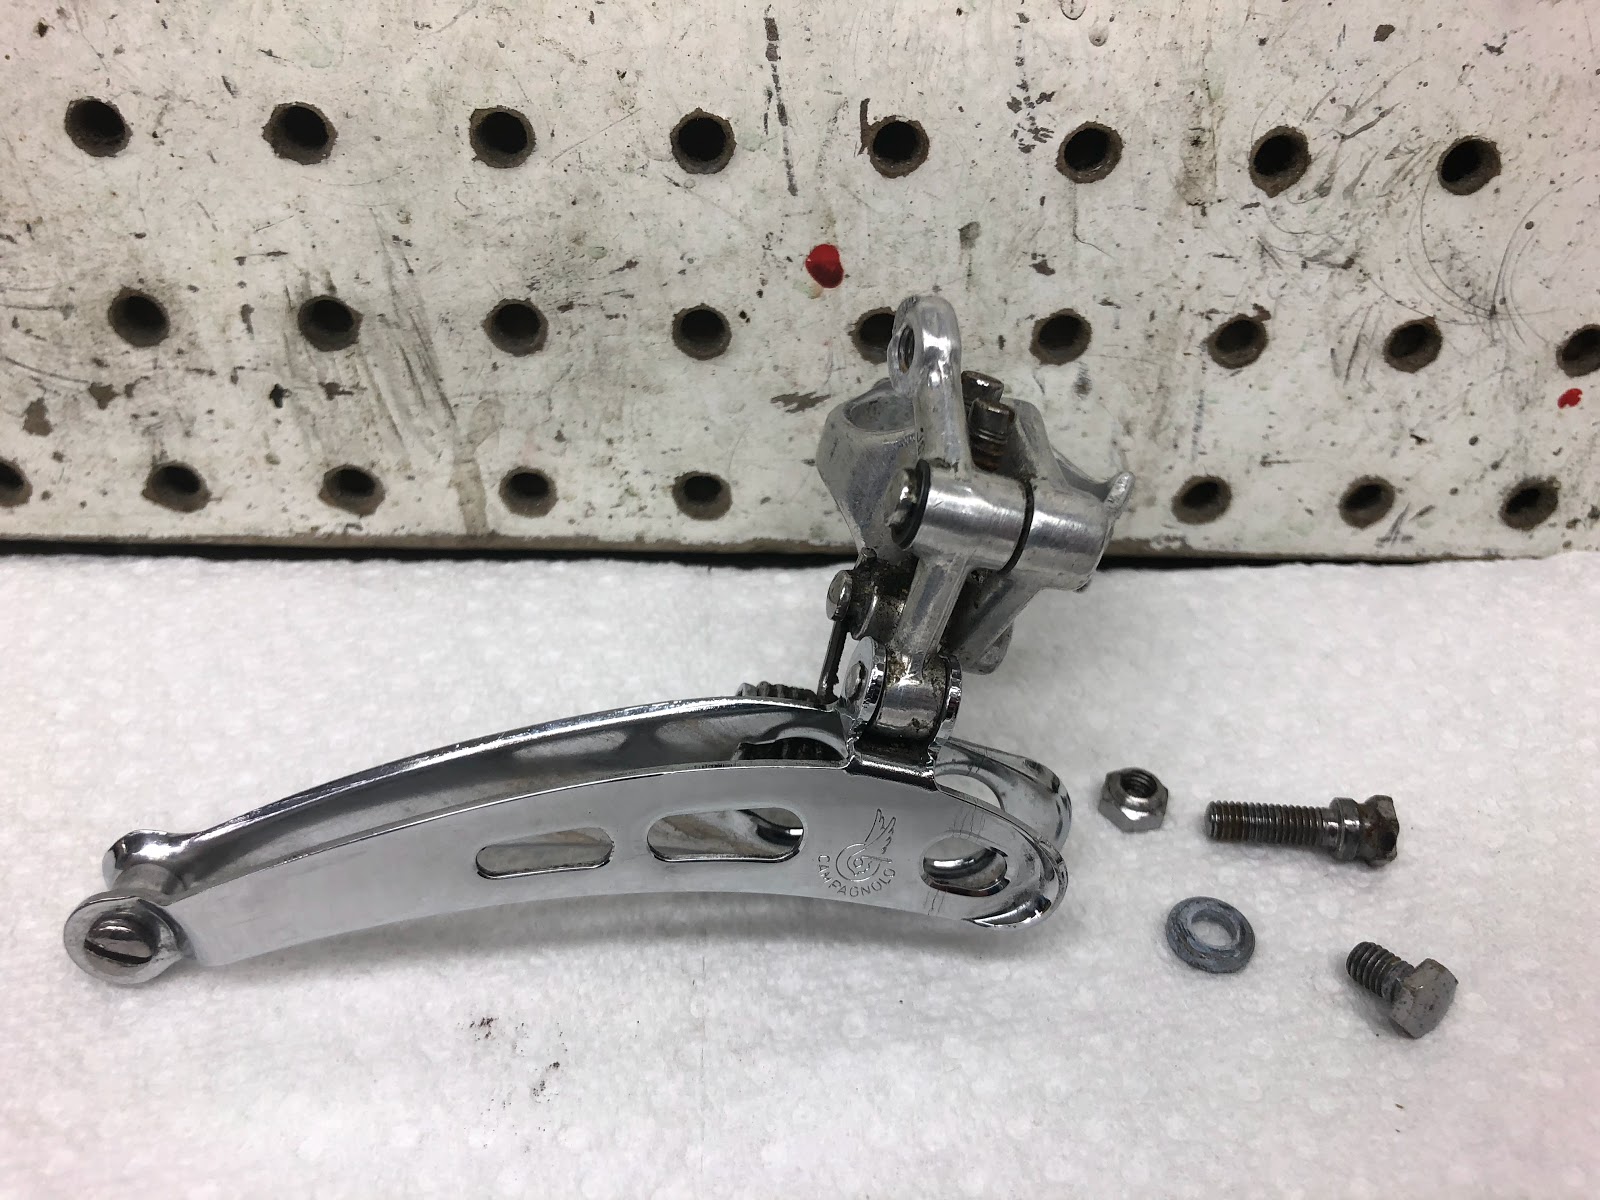
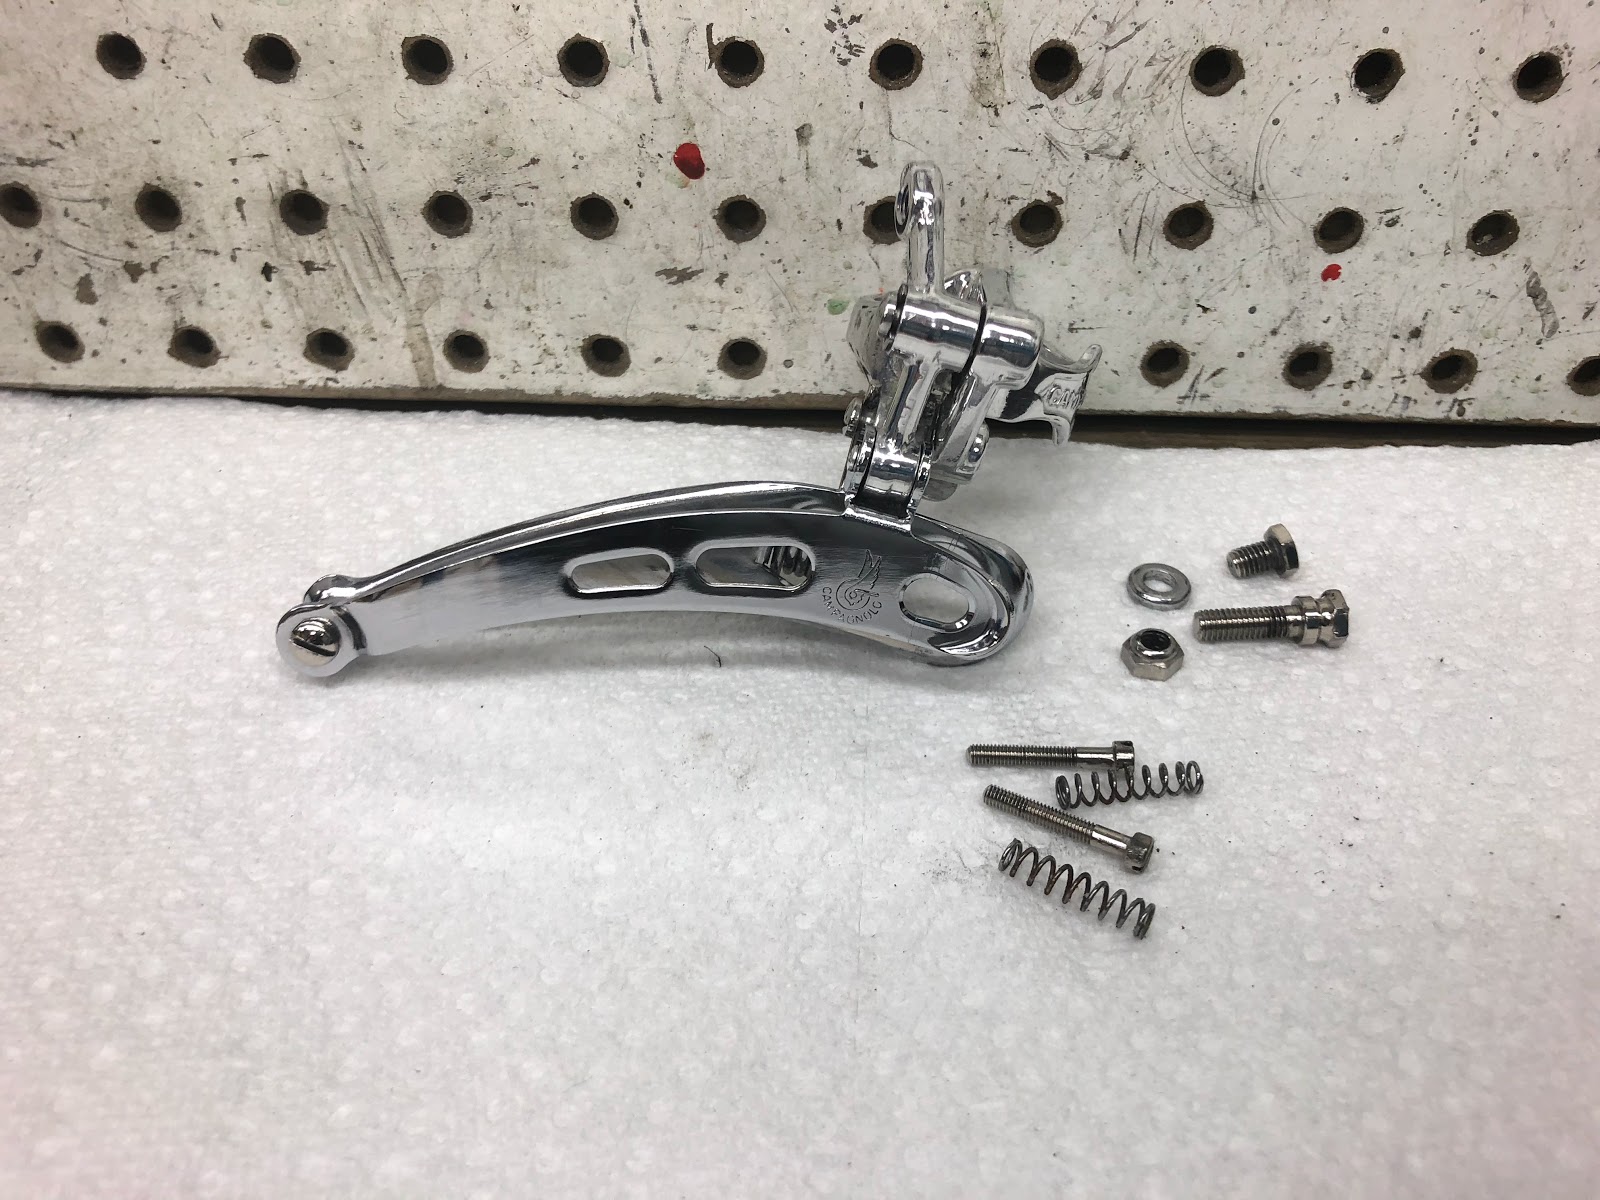
I found a front Campagnolo derailleur to replace the 1980's Shimano replacement derailleur. IT is in pretty nice shape to start. Some time on the polishing wheels and a good flushing and lubricating and it looks and functions great.
 |
| Craig's Carlton Restoration - Replacement Front Campagnolo Derailleur Before |
 |
| Craig's Carlton Restoration - Replacement Front Campagnolo Derailleur Before |
 |
| Craig's Carlton Restoration - Replacement Front Campagnolo Derailleur Before |
 |
| Craig's Carlton Restoration - Replacement Front Campagnolo Derailleur Before |
 |
| Craig's Carlton Restoration - Replacement Front Campagnolo Derailleur Exploded |
 |
| Craig's Carlton Restoration - Replacement Front Campagnolo Derailleur Polished |
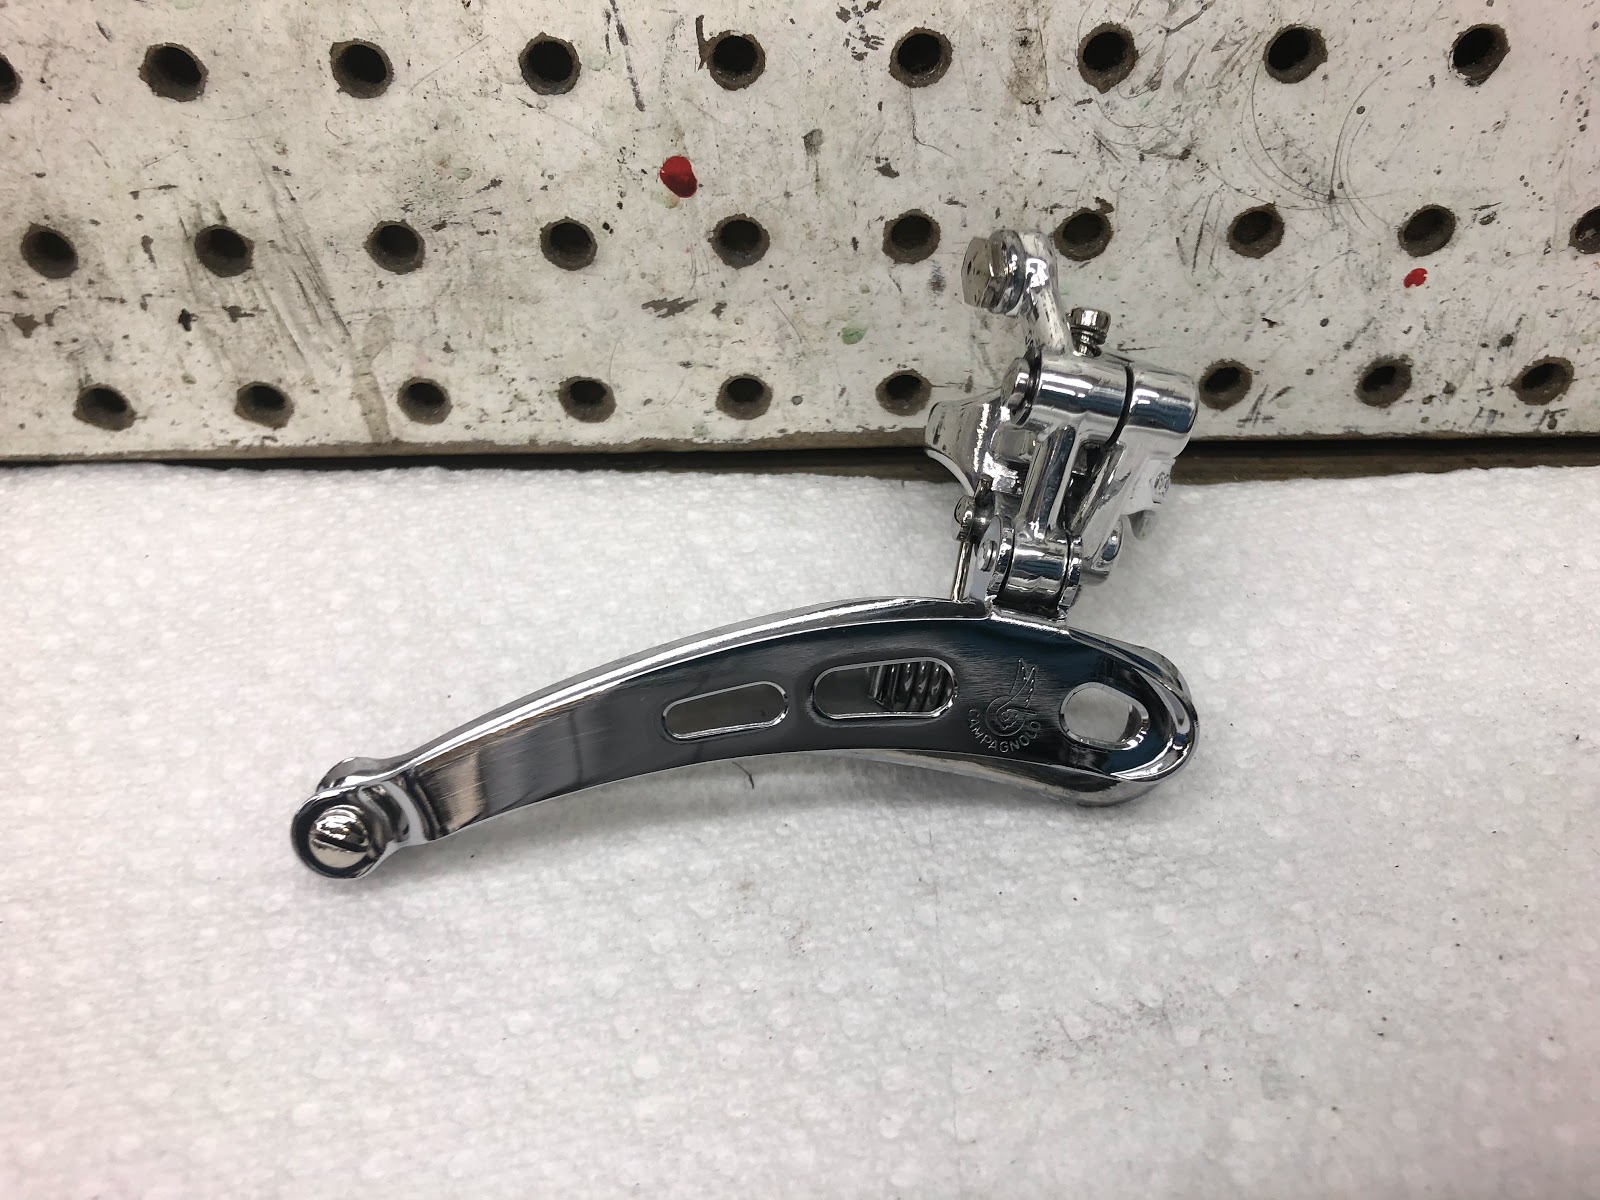 |
| Craig's Carlton Restoration - Replacement Front Campagnolo Derailleur Complete |
 |
| Craig's Carlton Restoration - Replacement Front Campagnolo Derailleur Installed |
 |
| Craig's Carlton Restoration - Replacement Front Campagnolo Derailleur Installed |
With the front derailleur complete I installed the new Panaracer tires. My favorite tire for a vintage look.
 |
| Craig's Carlton Restoration - Front Tire Installed |
 |
| Craig's Carlton Restoration - Front Wheel Complete |
 |
| Craig's Carlton Restoration - Front Wheel Complete |
 |
| Craig's Carlton Restoration - Rear Wheel Complete |
 |
| Craig's Carlton Restoration - Rear Wheel Complete |
 |
| Craig's Carlton Restoration - New Brake Lever Hoods |
 |
| Craig's Carlton Restoration - New Brake Lever Hoods Installed |
 |
| Craig's Carlton Restoration - New Cables & Housings |
 |
| Craig's Carlton Restoration - Cables Installed |
 |
| Craig's Carlton Restoration - Cables Installed |
 |
| Craig's Carlton Restoration - Cables Installed |
It is always hard to use a Campagnolo derailleur where it wasn't normally because Campagnolo does not use cable housings on their front derailleurs. Well there are a few out there that has a cable housing stop built in but very rare to find. When I am at swap meets and see Campagnolo bottom bracket cable stops I always buy them if the price is right. Here is the one for the Carlton. The small guide on the right will be removed and everything polished. This will allow for correct front derailleur cable routing.
 |
| Craig's Carlton Restoration - Campagnolo Cable Guide |
 |
| Craig's Carlton Restoration - Campagnolo Cable Guide Installed |
 |
| Craig's Carlton Restoration - Campagnolo Cable Guide Complete |
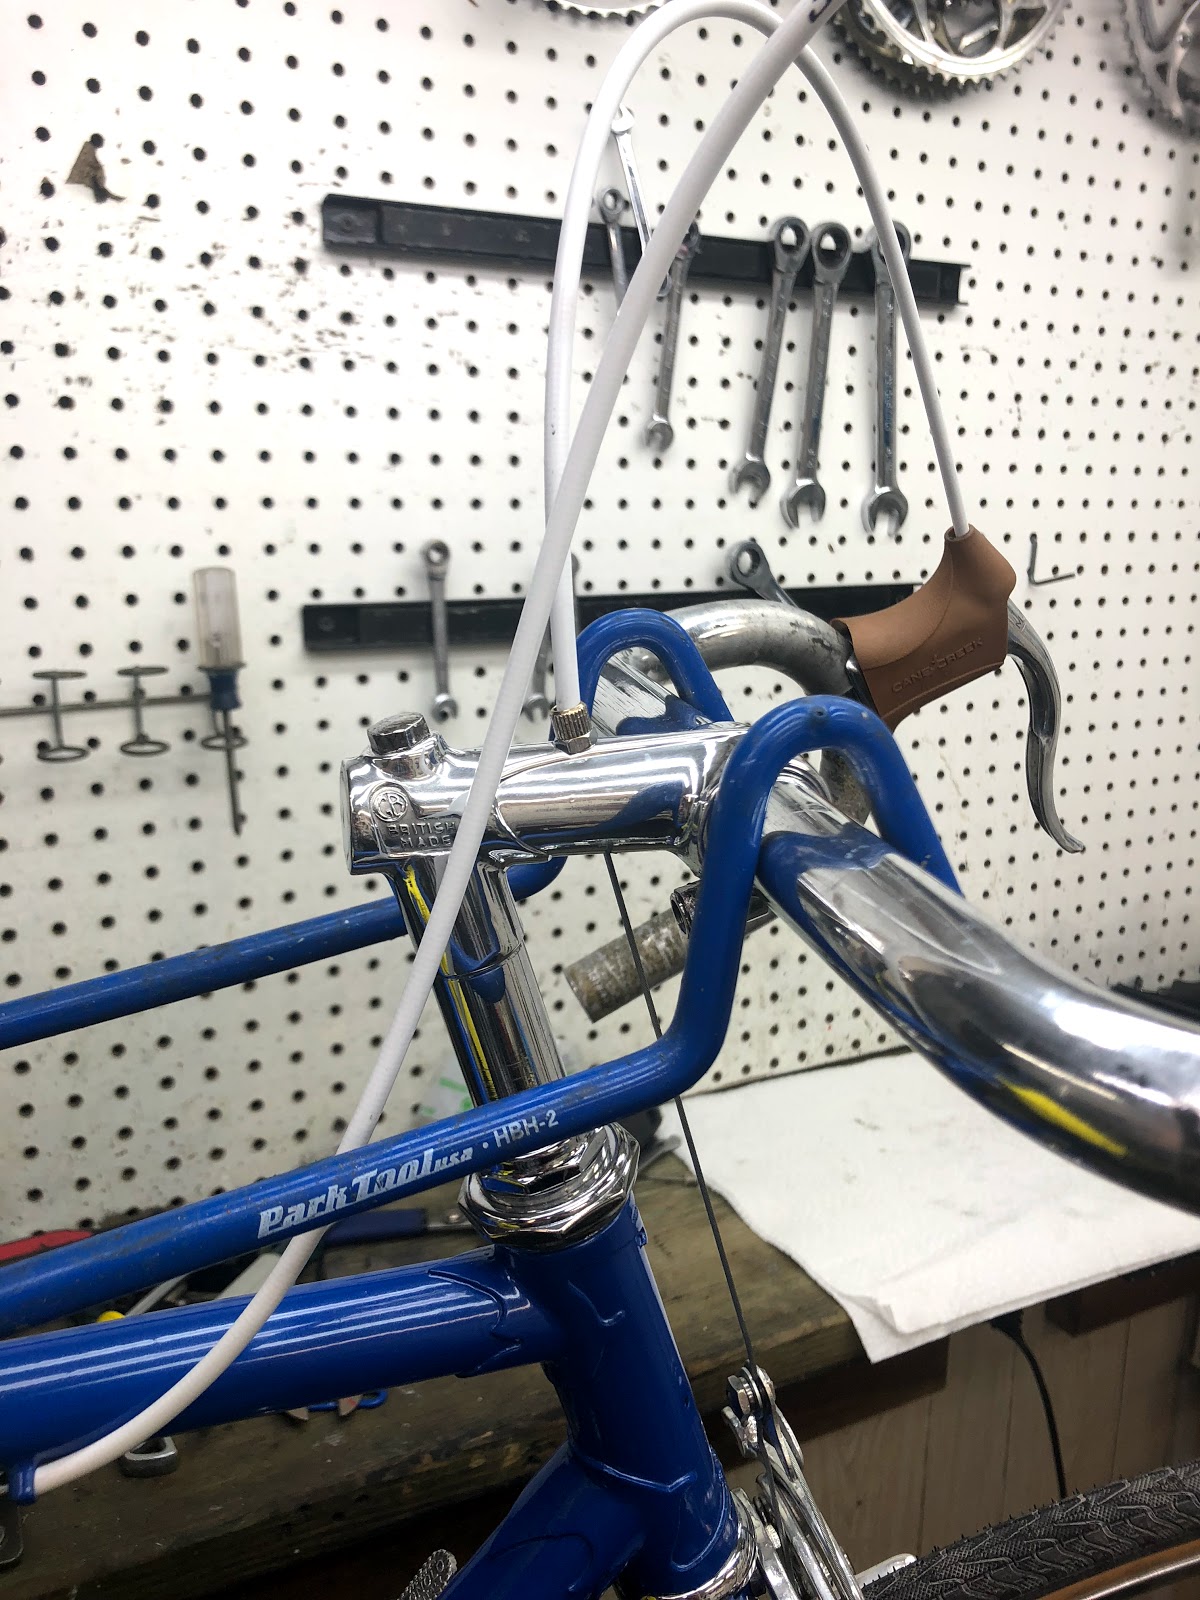
Next is the white cloth handlebar tape. No matter how clean I get the shop and my hands I always end up with a few spots of dirt on the white to clean up. Only 2 this time!
 |
| Craig's Carlton Restoration - New Handlebar Tape |
 |
| Craig's Carlton Restoration - Handlebar Tape Installed |
 |
| Craig's Carlton Restoration - Handlebar Tape Installed |
 |
| Craig's Carlton Restoration - Chrome Metal Caps |
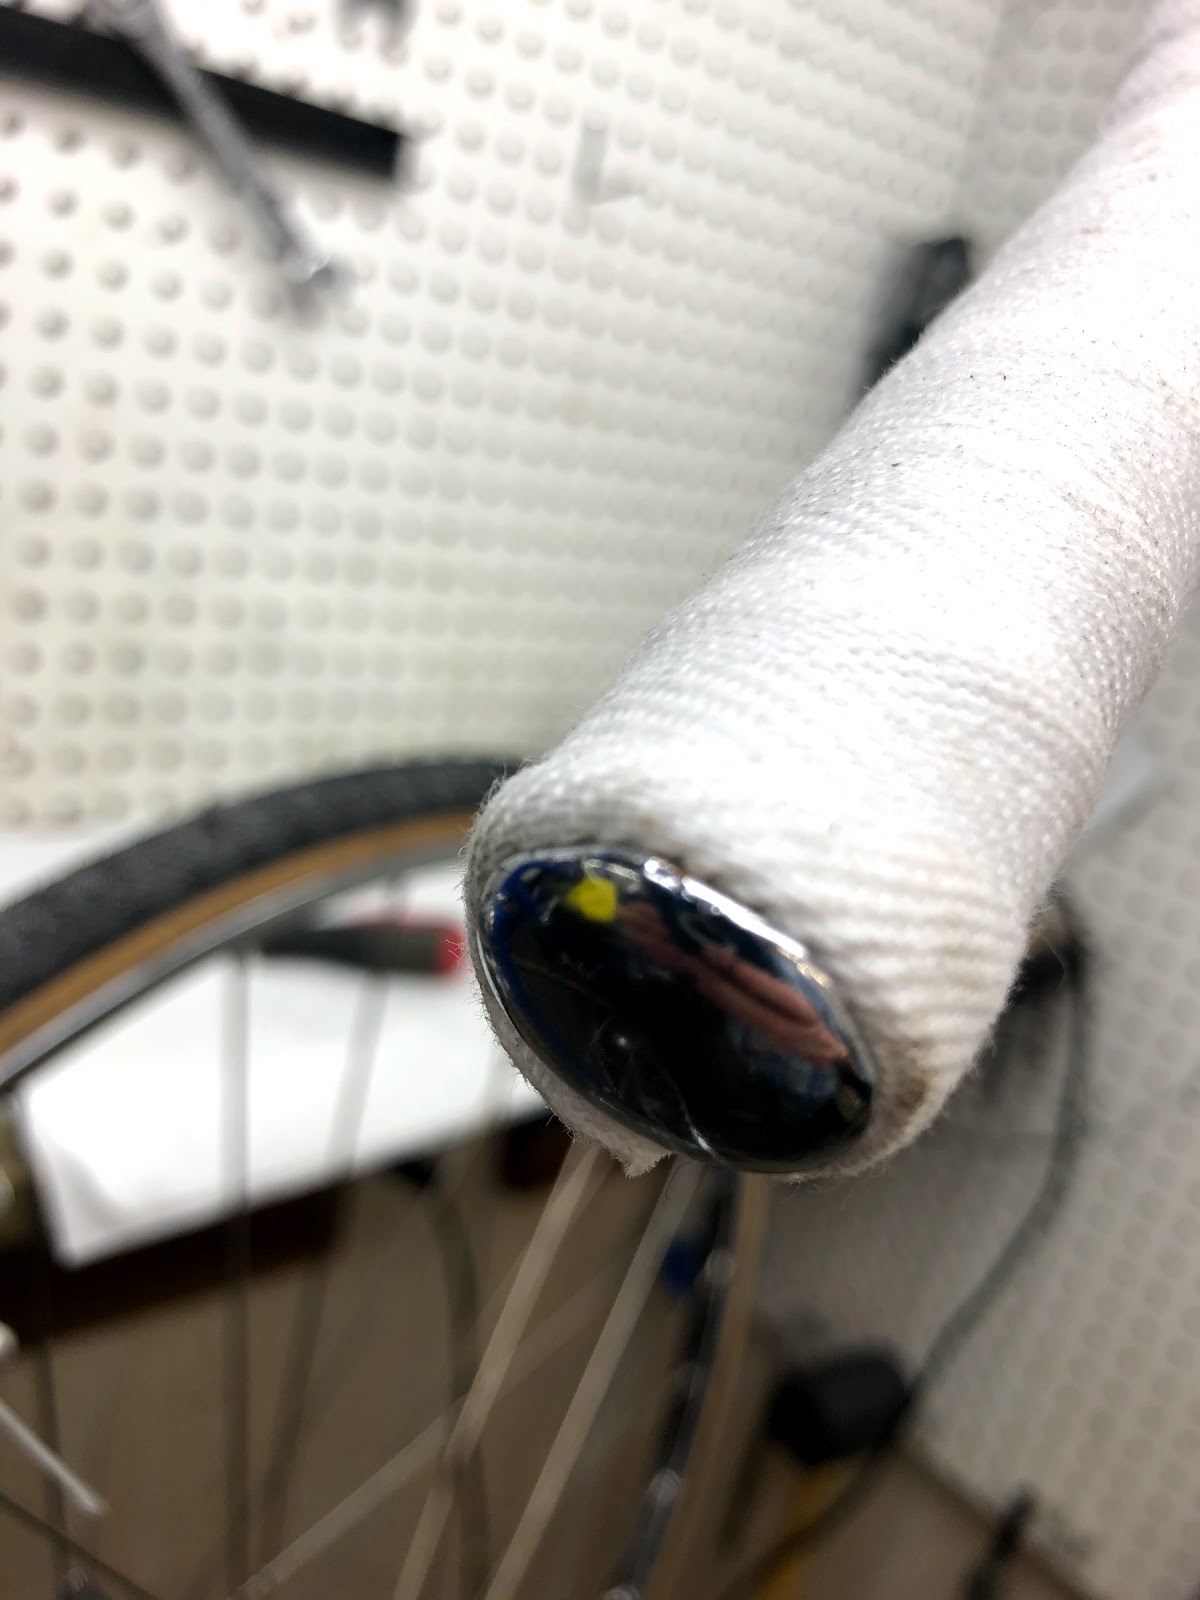 |
| Craig's Carlton Restoration - Chrome Metal Caps Installed |
 |
| Craig's Carlton Restoration - New Chain |
 |
| Craig's Carlton Restoration - Temporary Saddle Installed |
I ruined the first set of decals with my giant ability to be a Klutz. The decals are from Velocals. They are vinyl press decals which are about a million times better then water slide decals. Installed I am very happy with the decals.
 |
| Craig's Carlton Restoration - New Decals |
 |
| Craig's Carlton Restoration - Fork Decal Installed |
 |
| Craig's Carlton Restoration - Down Tube Decal Installed |
 |
| Craig's Carlton Restoration - Decal Process |
 |
| Craig's Carlton Restoration - Seat Tube Decal |
 |
| Craig's Carlton Restoration - Decals Complete |
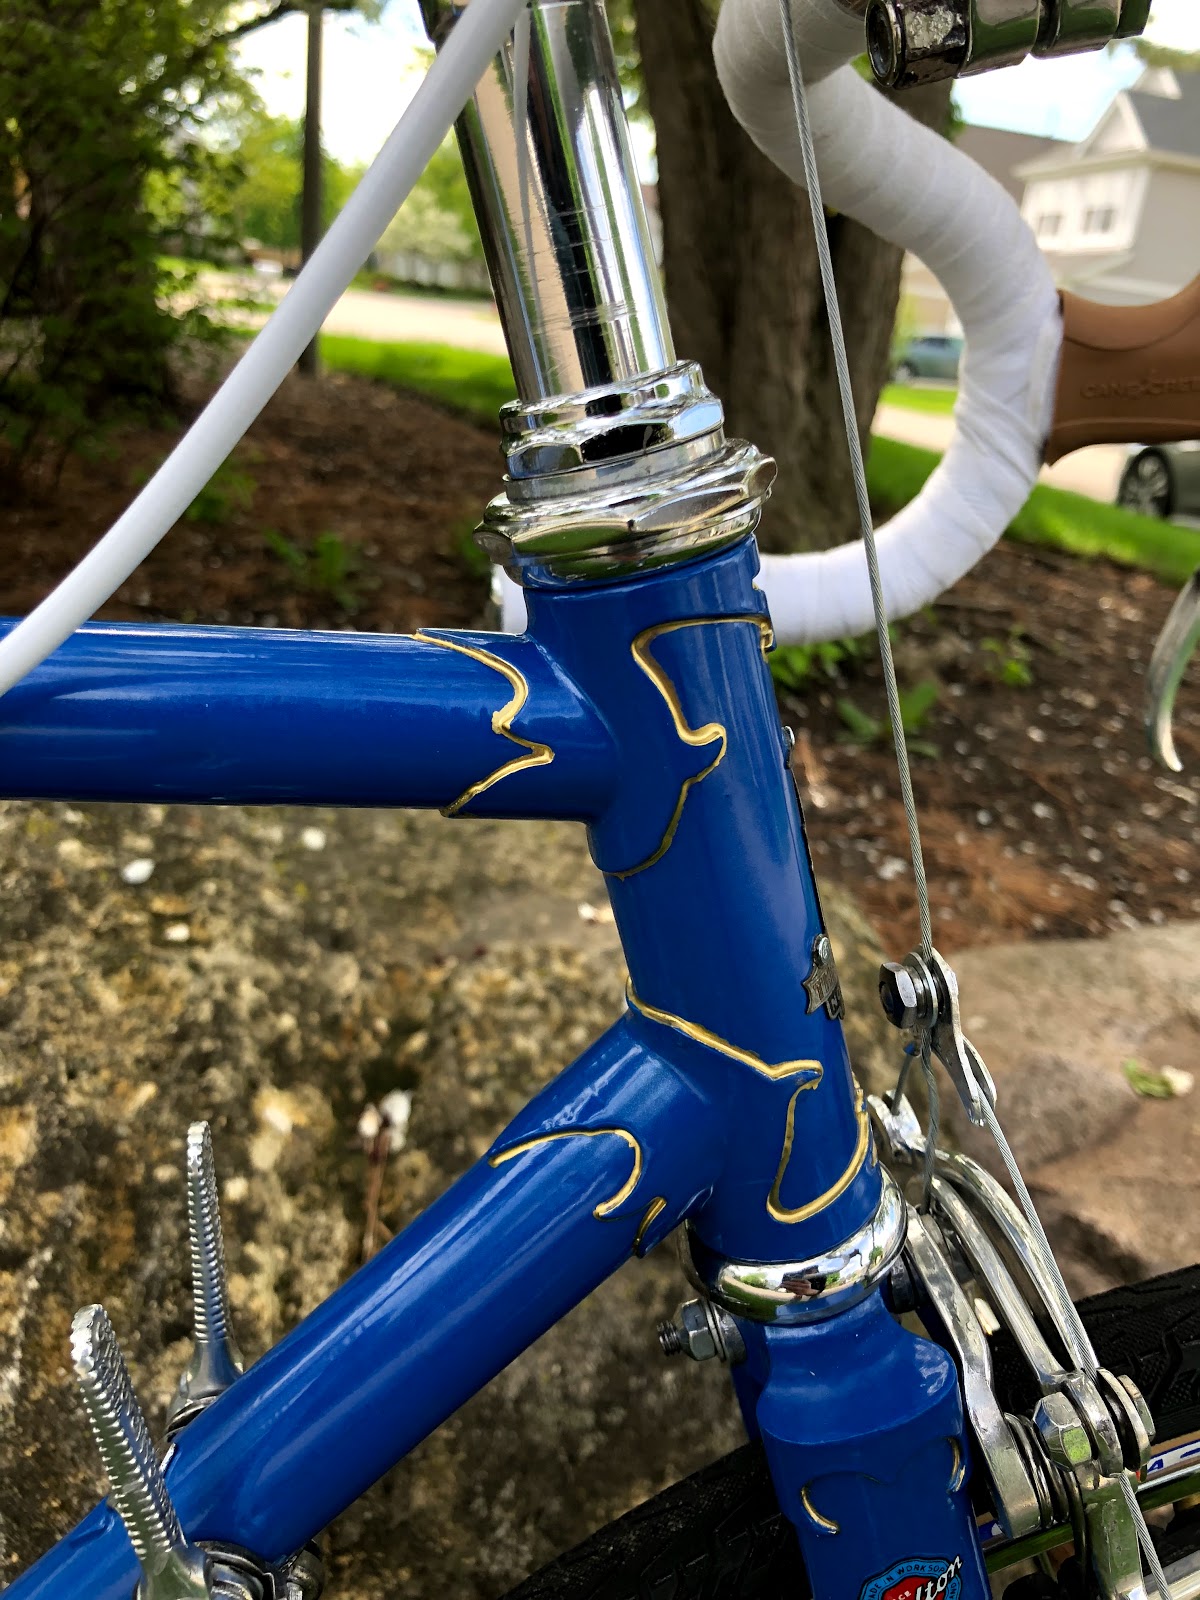
A couple things that happened along the way at the end was the outlining of the lugs in gold and the installation of the head badge. Outlining lugs is one of my favorite things to do, it transforms a bicycle right in front of your eyes.
 |
| Craig's Carlton Restoration - Head Badge Installed |
The Raleigh Carlton took some doing to get it tuned correctly but now it flys! Shifts very nicely and stops pretty nice for steel rims. I couldn't be happier with the ride. The Raleigh looks amazing. The white accents go so well with the new blue paint. The Raleigh has such a classic look I love with the cloth tape, tan wall tires and tan brake lever hoods. I love it!
 |
| Craig's Carlton Restoration - Bicycle Complete |
 |
| Craig's Carlton Restoration - Bicycle Complete |
 |
| Craig's Carlton Restoration - Bicycle Complete - Handlebars |
 |
| Craig's Carlton Restoration - Bicycle Complete - Stem & Handlebars Need to remove that dirt spot from cloth tape. |
 |
| Craig's Carlton Restoration - Bicycle Complete Front Brake |
 |
| Craig's Carlton Restoration - Bicycle Complete Head Tube |
 |
| Craig's Carlton Restoration - Bicycle Complete - Front Wheel Hub |
 |
| Craig's Carlton Restoration - Bicycle Complete - Front Rim |
 |
| Craig's Carlton Restoration - Bicycle Complete Stem |
 |
| Craig's Carlton Restoration - Bicycle Complete Head Tube |
 |
| Craig's Carlton Restoration - Bicycle Complete Fork Crown |
 |
| Craig's Carlton Restoration - Bicycle Complete Shift Levers |
 |
| Craig's Carlton Restoration - Bicycle Complete Down Tube |
 |
| Craig's Carlton Restoration - Bicycle Complete Saddle Area |
 |
| Craig's Carlton Restoration - Bicycle Complete Reynolds Decal |
 |
| Craig's Carlton Restoration - Bicycle Complete Seat Tube |
 |
| Craig's Carlton Restoration - Bicycle Complete Crank |
 |
| Craig's Carlton Restoration - Bicycle Complete Front Derailleur |
 |
| Craig's Carlton Restoration - Bicycle Complete Rear Brake Caliper |
 |
| Craig's Carlton Restoration - Bicycle Complete - Rear Wheel Hub |
 |
| Craig's Carlton Restoration - Bicycle Complete Rear Derailleur |
 |
| Craig's Carlton Restoration - Bicycle Complete - Rear Rim |
 |
| Craig's Carlton Restoration - Bicycle Complete |
John