 |
| Mike's Copper Schwinn Sting Ray Restoration Bicycle After Restoration |
As same for the Black Sting Ray I am going to do rust removal and then we will decide if the components are good or if replacements are wanted. I will put a couple coats of clear over the polished areas that where badly rusted for protection if original part is used. From there all new cables, cable housings, bearings and brake pads will be installed. Tires on the Copper are in better condition then the Black Sting Ray so we will see on those.
Same as the Black Sting Ray I think the Copper Sting Ray has some pretty awesome original paint under the dirt, dull and roughness. I can't wait to see.
I will also post information like year and anything else I find as I research.
 |
| Mike's Copper Schwinn Sting Ray Restoration Bicycle Before |
 |
| Mike's Copper Schwinn Sting Ray Restoration Bicycle Before - Handlebars |
 |
| Mike's Copper Schwinn Sting Ray Restoration Bicycle Before - Brake Levers |
 |
| Mike's Copper Schwinn Sting Ray Restoration Bicycle Before - Speedo |
 |
| Mike's Copper Schwinn Sting Ray Restoration Bicycle Before - Stem |
 |
| Mike's Copper Schwinn Sting Ray Restoration Bicycle Before - Stem |
 |
| Mike's Copper Schwinn Sting Ray Restoration Bicycle Before - Head Tube |
 |
| Mike's Copper Schwinn Sting Ray Restoration Bicycle Before - Front Brake Caliper |
 |
| Mike's Copper Schwinn Sting Ray Restoration Bicycle Before - Front Fender |
 |
| Mike's Copper Schwinn Sting Ray Restoration Bicycle Before - Front Fender |
 |
| Mike's Copper Schwinn Sting Ray Restoration Bicycle Before - Front Wheel Hub |
 |
| Mike's Copper Schwinn Sting Ray Restoration Bicycle Before - Front Wheel Rim |
 |
| Mike's Copper Schwinn Sting Ray Restoration Bicycle Before - Handlebars |
 |
| Mike's Copper Schwinn Sting Ray Restoration Bicycle Before - Head Tube |
 |
| Mike's Copper Schwinn Sting Ray Restoration Bicycle Before - Fork |
 |
| Mike's Copper Schwinn Sting Ray Restoration Bicycle Before - Wheel Hub |
 |
| Mike's Copper Schwinn Sting Ray Restoration Bicycle Before - Shift Lever |
 |
| Mike's Copper Schwinn Sting Ray Restoration Bicycle Before - Down Tube |
 |
| Mike's Copper Schwinn Sting Ray Restoration Bicycle Before - Seat Area |
 |
| Mike's Copper Schwinn Sting Ray Restoration Bicycle Before - Seat Post |
 |
| Mike's Copper Schwinn Sting Ray Restoration Bicycle Before - Seat Tube |
 |
| Mike's Copper Schwinn Sting Ray Restoration Bicycle Before - Drive Train |
 |
| Mike's Copper Schwinn Sting Ray Restoration Bicycle Before - Chain Guard |
 |
| Mike's Copper Schwinn Sting Ray Restoration Bicycle Before - Chain Guard |
 |
| Mike's Copper Schwinn Sting Ray Restoration Bicycle Before - Seat |
 |
| Mike's Copper Schwinn Sting Ray Restoration Bicycle Before - Rear Brake Caliper |
 |
| Mike's Copper Schwinn Sting Ray Restoration Bicycle Before - Rear Fender |
 |
| Mike's Copper Schwinn Sting Ray Restoration Bicycle Before - Rear Derailleur |
 |
| Mike's Copper Schwinn Sting Ray Restoration Bicycle Before - Rear Wheel Hub |
 |
| Mike's Copper Schwinn Sting Ray Restoration Bicycle Before - Rear Wheel Rim |
 |
| Mike's Copper Schwinn Sting Ray Restoration Bicycle Before |
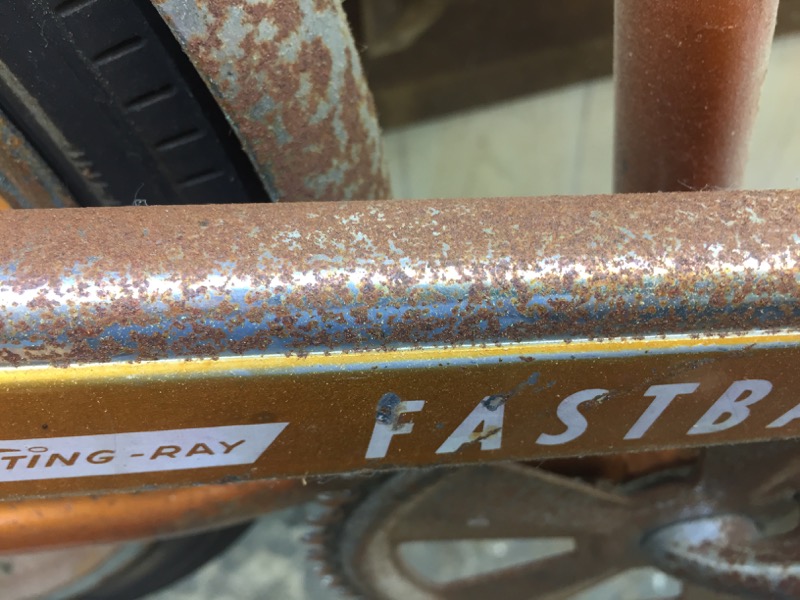
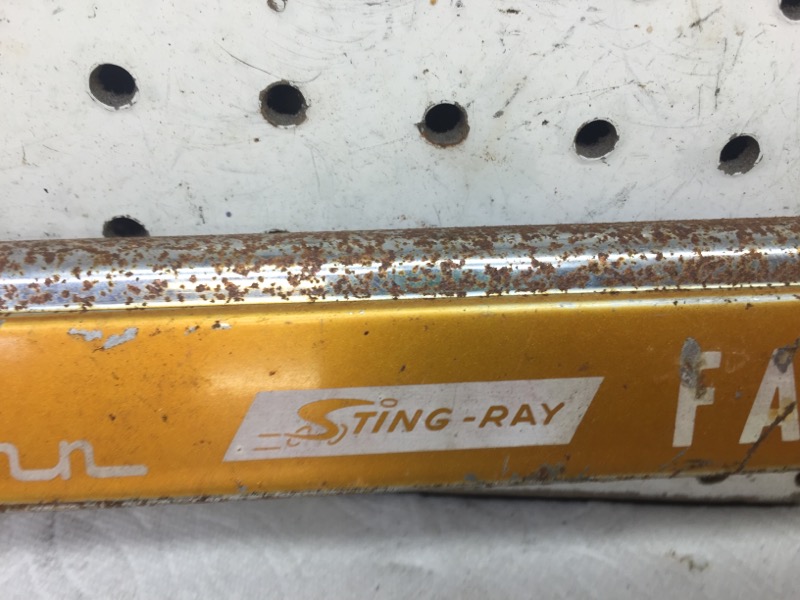
With the Sting Ray broken down I see the frame is in good shape, very few chips and scratches. The frame paint is a little rough though. Very dirty, dull and rough paint surface. I do think there is some really nice original paint in there though!
 |
| Mike's Copper Schwinn Sting Ray Restoration Frame Before |
 |
| Mike's Copper Schwinn Sting Ray Restoration Frame Before - Head Tube |
 |
| Mike's Copper Schwinn Sting Ray Restoration Frame Before - Head Tube |
 |
| Mike's Copper Schwinn Sting Ray Restoration Frame Before - Head Tube |
 |
| Mike's Copper Schwinn Sting Ray Restoration Frame Before - Head Tube |
 |
| Mike's Copper Schwinn Sting Ray Restoration Frame Before - Down Tube |
 |
| Mike's Copper Schwinn Sting Ray Restoration Frame Before - Seat Area |
 |
| Mike's Copper Schwinn Sting Ray Restoration Frame Before - Seat Tube |
 |
| Mike's Copper Schwinn Sting Ray Restoration Frame Before - Seat Tube |
 |
| Mike's Copper Schwinn Sting Ray Restoration Frame Before - Bottom Bracket |
 |
| Mike's Copper Schwinn Sting Ray Restoration Frame Before - Bottom Bracket |
 |
| Mike's Copper Schwinn Sting Ray Restoration Frame Before - Bottom Bracket |
 |
| Mike's Copper Schwinn Sting Ray Restoration Frame Before - Seat Area |
 |
| Mike's Copper Schwinn Sting Ray Restoration Frame Before - Seat Tube |
 |
| Mike's Copper Schwinn Sting Ray Restoration Frame Before - Seat Stays |
 |
| Mike's Copper Schwinn Sting Ray Restoration Frame Before - Chain Stays |
 |
| Mike's Copper Schwinn Sting Ray Restoration Frame Before - Drop Outs |
 |
| Mike's Copper Schwinn Sting Ray Restoration Frame Before - Fork |
 |
| Mike's Copper Schwinn Sting Ray Restoration Frame Before - Fork Crown |
 |
| Mike's Copper Schwinn Sting Ray Restoration Frame Before - Fork Crown |
 |
| Mike's Copper Schwinn Sting Ray Restoration Frame Before - Fork Crown |
 |
| Mike's Copper Schwinn Sting Ray Restoration Frame Before - Fork Drop Outs |
 |
| Mike's Copper Schwinn Sting Ray Restoration Frame Before - Fork Blades |
I gave the Copper frame a deep cleaning, he cleaned well. With the frame cleaned I started working through the polishing grits. The copper paint came back very nice! There are a few rough spots I will continue to work on but over all the paint polished very nice considering. The fork polished very nice! The chrome fork crown cap turned out very nice. I am amazed at how nicely the decals came back to white. I am very happy over all with the results of polishing the paint. I will take a few more photos as I work on a few of the rougher spots.
 |
Mike's Copper Schwinn Sting Ray Restoration
Frame Polished
|
 |
Mike's Copper Schwinn Sting Ray Restoration
Frame Polished - Head Tube
|
 |
Mike's Copper Schwinn Sting Ray Restoration
Frame Polished - Head Tube
|
 |
Mike's Copper Schwinn Sting Ray Restoration
Frame Polished - Head Tube
|
 |
Mike's Copper Schwinn Sting Ray Restoration
Frame Polished - Top Tube
|
 |
Mike's Copper Schwinn Sting Ray Restoration
Frame Polished - Down Tube
|
 |
Mike's Copper Schwinn Sting Ray Restoration
Frame Polished - Seat Area
|
 |
Mike's Copper Schwinn Sting Ray Restoration
Frame Polished - 5 Speed Decal & Rough Spot
|
 |
Mike's Copper Schwinn Sting Ray Restoration
Frame Polished - Chicago Decal
|
 |
Mike's Copper Schwinn Sting Ray Restoration
Frame Polished - Bottom Bracket
|
 |
Mike's Copper Schwinn Sting Ray Restoration
Frame Polished - Bottom Bracket
|

 |
Mike's Copper Schwinn Sting Ray Restoration
Frame Polished - Seat Stays
|
 |
Mike's Copper Schwinn Sting Ray Restoration
Frame Polished - Rear Brake Bridge
|
 |
Mike's Copper Schwinn Sting Ray Restoration
Frame Polished - Chain Stays |
 |
Mike's Copper Schwinn Sting Ray Restoration
Frame Polished - Drop Outs
|
 |
Mike's Copper Schwinn Sting Ray Restoration
Frame Polished - Fork
|
 |
Mike's Copper Schwinn Sting Ray Restoration
Frame Polished - Fork Crown
|
 |
Mike's Copper Schwinn Sting Ray Restoration
Frame Polished - Fork Crown
|
 |
Mike's Copper Schwinn Sting Ray Restoration
Frame Polished - Fork Crown
|
 |
Mike's Copper Schwinn Sting Ray Restoration
Frame Polished - Fork Blades
|
 |
Mike's Copper Schwinn Sting Ray Restoration
Frame Polished - Fork Drop Outs
|
The headset started out kind of rough. I cleaned the pieces through the crock pot and then worked through the polishing wheels. The headset turned out very nice. Installed it looks great! I lost or forgot to take a photo of just the headset complete but down by the handlebar photos you can see the headset complete.
 |
| Mike's Copper Schwinn Sting Ray Restoration Headset Before |
 |
| Mike's Copper Schwinn Sting Ray Restoration Headset Polished |
 |
| Mike's Copper Schwinn Sting Ray Restoration Headset Cups Pressed |
 |
| Mike's Copper Schwinn Sting Ray Restoration Headset Bearings Packed |
 |
| Mike's Copper Schwinn Sting Ray Restoration Handlebars & Stem Before |
 |
| Mike's Copper Schwinn Sting Ray Restoration Stem & Handlebars Before |
 |
| Mike's Copper Schwinn Sting Ray Restoration Stem Before |
 |
| Mike's Copper Schwinn Sting Ray Restoration Brake Levers Before |
 |
| Mike's Copper Schwinn Sting Ray Restoration Handlebars Before |
 |
| Mike's Copper Schwinn Sting Ray Restoration Stem & Handlebars Before |
 |
| Mike's Copper Schwinn Sting Ray Restoration Handlebars Before |
 |
| Mike's Copper Schwinn Sting Ray Restoration Handlebars Before |
 |
| Mike's Copper Schwinn Sting Ray Restoration Handlebars Before |
 |
| Mike's Copper Schwinn Sting Ray Restoration Stem Before |
 |
| Mike's Copper Schwinn Sting Ray Restoration Stem Before |
 |
| Mike's Copper Schwinn Sting Ray Restoration Stem Exploded |
 |
| Mike's Copper Schwinn Sting Ray Restoration Stem Before |
 |
| Mike's Copper Schwinn Sting Ray Restoration Stem just out of rust solution. Not yet polished |
 |
| Mike's Copper Schwinn Sting Ray Restoration Stem just out of rust solution. |
The stem polished nicely. I then applied a few coats of clear to help protect it from rusting again. When a piece has as much rust as some of the Copper Sting Rays parts are you need to help protect the pieces from rust coming back. With out the clear the parts would start to rust fairly quick. The stem looks great installed!
 |
| Mike's Copper Schwinn Sting Ray Restoration Stem Polished & Cleared |
 |
| Mike's Copper Schwinn Sting Ray Restoration Stem Complete |
 |
| Mike's Copper Schwinn Sting Ray Restoration Stem Complete |
 |
| Mike's Copper Schwinn Sting Ray Restoration Stem Installed |
 |
| Mike's Copper Schwinn Sting Ray Restoration Stem Installed |
 |
| Mike's Copper Schwinn Sting Ray Restoration Headset Complete |
The handlebars came out of the rust remover rust free. I polished the handlebars and then applied the couple coats of clear. The handlebars have some pretty rough areas. They look a hundred ties better then they started though. They look pretty good installed too.
 |
| Mike's Copper Schwinn Sting Ray Restoration Handlebars Polished & Clear Applied |
 |
| Mike's Copper Schwinn Sting Ray Restoration Handlebars Rough Spot - Clear Applied |
 |
| Mike's Copper Schwinn Sting Ray Restoration Handlebars Rough Spot - Clear Applied |
 |
| Mike's Copper Schwinn Sting Ray Restoration Handlebars Polished & Clear Applied |
 |
| Mike's Copper Schwinn Sting Ray Restoration Handlebars Polished |
 |
| Mike's Copper Schwinn Sting Ray Restoration Handlebars Installed |
 |
| Mike's Copper Schwinn Sting Ray Restoration Handlebars Installed |
 |
| Mike's Copper Schwinn Sting Ray Restoration Handlebars Installed |
 |
| Mike's Copper Schwinn Sting Ray Restoration Handlebars Installed |
The crank is rough, a lot of surface rust. The bottom bracket looks rough but not to bad really. The bottom bracket should come back beautifully and spin great the crank I am a little worried about.
 |
| Mike's Copper Schwinn Sting Ray Restoration Crank Before |
 |
| Mike's Copper Schwinn Sting Ray Restoration Crank Before |
 |
| Mike's Copper Schwinn Sting Ray Restoration Crank Before |
 |
| Mike's Copper Schwinn Sting Ray Restoration Bottom Bracket Before |
Some of the parts are starting to come out of the rust solution I made up. The first was today, the crank. I am pleased with all the rust being gone. There is some rust pitting but I am hoping to clear coat everything so it should not be a problem. I have not polished the crank yet but below are two photos just after coming out of the rust solution.
 |
| Mike's Copper Schwinn Sting Ray Restoration Crank out of rust solution - Not Polished Yet. |
 |
| Mike's Copper Schwinn Sting Ray Restoration Crank just out of rust solution. - Not polished yet. |
 |
| Mike's Copper Schwinn Sting Ray Restoration Crank & Bottom Bracket Polished |
 |
| Mike's Copper Schwinn Sting Ray Restoration Bottom Bracket Polished |
 |
| Mike's Copper Schwinn Sting Ray Restoration Bottom Bracket Cups Pressed |
 |
| Mike's Copper Schwinn Sting Ray Restoration Bottom Bracket Cups Pressed |
 |
| Mike's Copper Schwinn Sting Ray Restoration Bottom Bracket Bearings Packed |
 |
| Mike's Copper Schwinn Sting Ray Restoration Crank Installed |
 |
| Mike's Copper Schwinn Sting Ray Restoration Crank Installed |
 |
| Mike's Copper Schwinn Sting Ray Restoration Shift Lever Before |
 |
| Mike's Copper Schwinn Sting Ray Restoration Shift Lever Knob |
 |
| Mike's Copper Schwinn Sting Ray Restoration Shift Lever Before |
 |
| Mike's Copper Schwinn Sting Ray Restoration Seat Before |
 |
| Mike's Copper Schwinn Sting Ray Restoration Seat Post Before |
 |
| Mike's Copper Schwinn Sting Ray Restoration Seat Post Before |
 |
| Mike's Copper Schwinn Sting Ray Restoration Seat Piece Before |
 |
| Mike's Copper Schwinn Sting Ray Restoration Seat Piece Before |
 |
| Mike's Copper Schwinn Sting Ray Restoration Seat Struts Before |
 |
| Mike's Copper Schwinn Sting Ray Restoration Seat Exploded |
 |
| Mike's Copper Schwinn Sting Ray Restoration Seat Strut Before |
 |
| Mike's Copper Schwinn Sting Ray Restoration Seat Post Before |
 |
| Mike's Copper Schwinn Sting Ray Restoration Seat Strut Before |
 |
| Mike's Copper Schwinn Sting Ray Restoration Seat Before |
 |
| Mike's Copper Schwinn Sting Ray Restoration Seat Before |
The seat post came out of rust solution next. It should work very well after polishing. Below photo the seat post has not yet been polished.
 |
| Mike's Copper Schwinn Sting Ray Restoration Seat post just out of rust solution. |
 |
| Mike's Copper Schwinn Sting Ray Restoration Seat post just out of rust solution. |
 |
| Mike's Copper Schwinn Sting Ray Restoration Seat Binder & Bolt Before |
 |
| Mike's Copper Schwinn Sting Ray Restoration Seat Post & Binder Polished |
 |
| Mike's Copper Schwinn Sting Ray Restoration Seat Binder Polished |
 |
| Mike's Copper Schwinn Sting Ray Restoration Seat Post Installed |
 |
| Mike's Copper Schwinn Sting Ray Restoration Seat Post Installed |
 |
| Mike's Copper Schwinn Sting Ray Restoration Cable guide Before |
 |
| Mike's Copper Schwinn Sting Ray Restoration Seat Hardware |
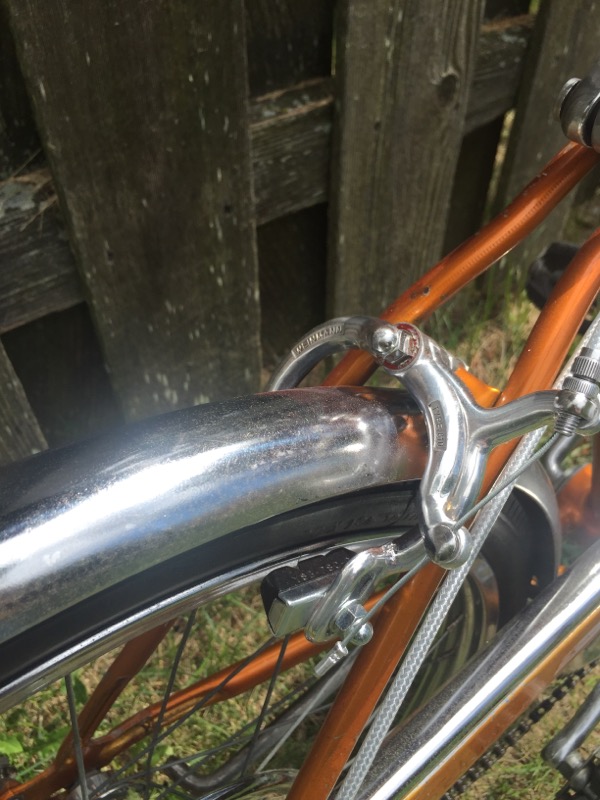
The brake calipers look rough to start but restoring brake calipers are my favorite. There is usually huge difference in the before and after. The pieces of the brakes cleaned nice and polished very nice! There was a little etching in the alloy brake arms but that polished away nicely. New brake pads and the brakes will be stopping much better. The brake calipers look great installed!
 |
| Mike's Copper Schwinn Sting Ray Restoration Brake Calipers Before |
 |
| Mike's Copper Schwinn Sting Ray Restoration Brake Calipers Exploded |
 |
| Mike's Copper Schwinn Sting Ray Restoration Brake Calipers Polished |
 |
| Mike's Copper Schwinn Sting Ray Restoration Brake Calipers Complete |
 |
| Mike's Copper Schwinn Sting Ray Restoration Front Brake Caliper Installed |
 |
| Mike's Copper Schwinn Sting Ray Restoration Rear Brake Caliper Installed |
 |
| Mike's Copper Schwinn Sting Ray Restoration Brake Calipers Installed |
 |
| Mike's Copper Schwinn Sting Ray Restoration Derailleur Before |
 |
| Mike's Copper Schwinn Sting Ray Restoration Derailleur Before |
 |
| Mike's Copper Schwinn Sting Ray Restoration Derailleur Before |
 |
| Mike's Copper Schwinn Sting Ray Restoration Derailleur Exploded |
 |
| Mike's Copper Schwinn Sting Ray Restoration Rear derailleur just out of rust solution. |
 |
| Mike's Copper Schwinn Sting Ray Restoration Rear derailleur just out of rust solution |
 |
| Mike's Copper Schwinn Sting Ray Restoration Pedals Before |
 |
| Mike's Copper Schwinn Sting Ray Restoration Pedals Before |
 |
| Mike's Copper Schwinn Sting Ray Restoration Fenders Before |
 |
| Mike's Copper Schwinn Sting Ray Restoration Front Fender Before |
 |
| Mike's Copper Schwinn Sting Ray Restoration Front Fender Before |
The front fender was the first fender to come out of rust solution. I am very happy with the rust removal. I like the front fender should polish very nice and with a coat of clear it should be great! Below photos the fender has not yet been polished.
 |
| Mike's Copper Schwinn Sting Ray Restoration Front fender just out of rust solution. |
 |
| Mike's Copper Schwinn Sting Ray Restoration Front fender just out of rust solution. |
 |
| Mike's Copper Schwinn Sting Ray Restoration Front fender just out of rust solution. |
 |
| Mike's Copper Schwinn Sting Ray Restoration Rear Fender Before |
 |
| Mike's Copper Schwinn Sting Ray Restoration Rear Fender Before |
 |
| Mike's Copper Schwinn Sting Ray Restoration Rear Fender Before |
 |
| Mike's Copper Schwinn Sting Ray Restoration Rear Fender Before |
 |
| Mike's Copper Schwinn Sting Ray Restoration Rear Fender Before |
 |
| Mike's Copper Schwinn Sting Ray Restoration Fenders Polished & Clear Coated |
 |
| Mike's Copper Schwinn Sting Ray Restoration Rear Fender Polished & Cleared |
 |
| Mike's Copper Schwinn Sting Ray Restoration Front Fender Polished & Cleared |
 |
| Mike's Copper Schwinn Sting Ray Restoration Front Fender Installed |
 |
| Mike's Copper Schwinn Sting Ray Restoration Front Fender Installed |
 |
| Mike's Copper Schwinn Sting Ray Restoration Rear Fender Installed |
 |
| Mike's Copper Schwinn Sting Ray Restoration Rear Fender Installed |
 |
| Mike's Copper Schwinn Sting Ray Restoration New Fender Mount Hardware |
 |
| Mike's Copper Schwinn Sting Ray Restoration Fenders Installed |
 |
| Mike's Copper Schwinn Sting Ray Restoration Chain Guard Before |
 |
| Mike's Copper Schwinn Sting Ray Restoration Chain Guard Before |
 |
| Mike's Copper Schwinn Sting Ray Restoration Chain Guard Before |
 |
| Mike's Copper Schwinn Sting Ray Restoration Chain Guard Before |
 |
| Mike's Copper Schwinn Sting Ray Restoration Chain Guard Before |
 |
| Mike's Copper Schwinn Sting Ray Restoration Chain Guard Before |
 |
| Mike's Copper Schwinn Sting Ray Restoration Chain Guard Before |
 |
| Mike's Copper Schwinn Sting Ray Restoration Chain Guard Before |
The wheels have me very nervous. Well, maybe not nervous but a little concerned because they are starting out very rough. The rust on the rims is very heavy but when I scrap the rust with a plastic tool a scraps of very easy. We will see how they turn out. Right now they have been in rust removal for quite a while and are showing a lot of improvement.
 |
| Mike's Copper Schwinn Sting Ray Restoration Rear Wheel Before |
 |
| Mike's Copper Schwinn Sting Ray Restoration Rear Wheel Hub Before |
 |
| Mike's Copper Schwinn Sting Ray Restoration Rear Wheel Hub Before |
 |
| Mike's Copper Schwinn Sting Ray Restoration Rear Wheel Rim Before |
 |
| Mike's Copper Schwinn Sting Ray Restoration Rear Wheel Hub - Old Grease |
 |
| Mike's Copper Schwinn Sting Ray Restoration Front Wheel Before |
 |
| Mike's Copper Schwinn Sting Ray Restoration Front Wheel Hub Before |
 |
| Mike's Copper Schwinn Sting Ray Restoration Front Wheel Rim Before |
 |
| Mike's Copper Schwinn Sting Ray Restoration Front Wheel Hub Old Grease |
I started polishing the wheels and wheel hubs like I normally do as a unit b hand. After a while I realized it just wasn't going to work that way. I broke the wheels completely down to use the polishing wheels.
The first photo below shows my progress by hand. Not very good.
 |
| Mike's Copper Schwinn Sting Ray Restoration Hand Polishing Results |
 |
| Mike's Copper Schwinn Sting Ray Restoration Rear Wheel Broken Down |
 |
| Mike's Copper Schwinn Sting Ray Restoration Rear Wheel Broken Down |
 |
| Mike's Copper Schwinn Sting Ray Restoration Rear Wheel Hub Before |
 |
| Mike's Copper Schwinn Sting Ray Restoration Front Wheel Broken Down |
 |
| Mike's Copper Schwinn Sting Ray Restoration Front Wheel Hub Before |
 |
| Mike's Copper Schwinn Sting Ray Restoration Front Wheel Hub Before |
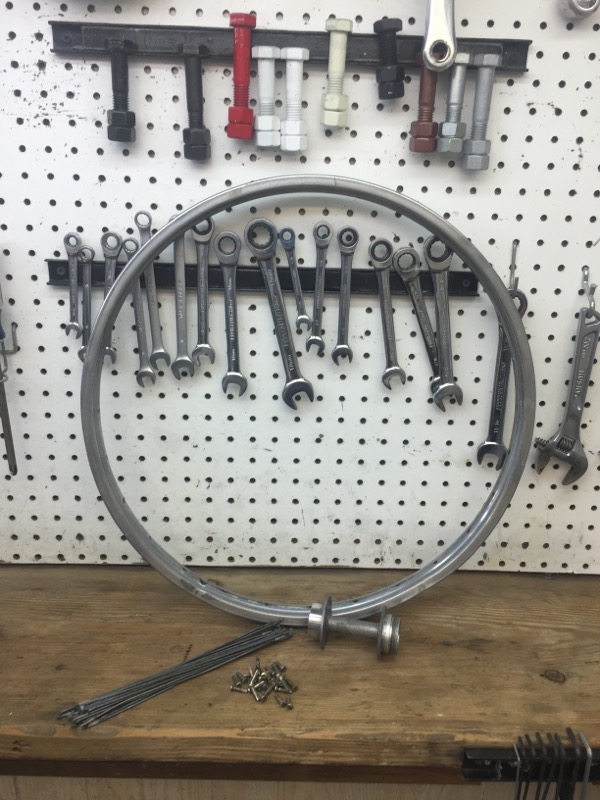
Using the polishing wheels and working through the grits the wheel hubs and rims turned out beautiful. I could't be happier!! I love this stuff!!
 |
| Mike's Copper Schwinn Sting Ray Restoration Wheel Hubs & Rims Polished |
 |
| Mike's Copper Schwinn Sting Ray Restoration Wheel Hubs Polished |
 |
| Mike's Copper Schwinn Sting Ray Restoration Wheel Rims Polished |
 |
| Mike's Copper Schwinn Sting Ray Restoration Rear Wheel Hub Polished |
 |
| Mike's Copper Schwinn Sting Ray Restoration Rear Wheel Hub Polished |
 |
| Mike's Copper Schwinn Sting Ray Restoration Rear Wheel Hub Polished |
 |
| Mike's Copper Schwinn Sting Ray Restoration Rear Wheel Laced |
 |
| Mike's Copper Schwinn Sting Ray Restoration Front Wheel Hub Polshed |
 |
| Mike's Copper Schwinn Sting Ray Restoration Front Wheel Hub Polished |
 |
| Mike's Copper Schwinn Sting Ray Restoration Front Wheel Hub Polished |
 |
| Mike's Copper Schwinn Sting Ray Restoration Front Wheel Laced |
 |
| Mike's Copper Schwinn Sting Ray Restoration Axle Pieces Ready |
 |
| Mike's Copper Schwinn Sting Ray Restoration Rear Wheel Bearings Packed |
 |
| Mike's Copper Schwinn Sting Ray Restoration Front Wheel Bearings Packed |
 |
| Mike's Copper Schwinn Sting Ray Restoration Rear Wheel Complete |
 |
| Mike's Copper Schwinn Sting Ray Restoration Rear Wheel Complete |
 |
| Mike's Copper Schwinn Sting Ray Restoration Rear Wheel Rim Complete |
 |
| Mike's Copper Schwinn Sting Ray Restoration Front Wheel Complete |
 |
| Mike's Copper Schwinn Sting Ray Restoration Front Wheel Complete |
 |
| Mike's Copper Schwinn Sting Ray Restoration Front Wheel Rim Complete |
 |
| Mike's Copper Schwinn Sting Ray Restoration Wheels Complete |
The rear derailleur was very rough. It was hard to break the derailleur down. With it broken down it soaked for a long time to remove the rust. After polishing the derailleur parts turned out pretty good. Assembled the rear derailleur looks much much better. Best of all the derailleur function very smoothly.
 |
| Mike's Copper Schwinn Sting Ray Restoration Rear Derailleur Before |
 |
| Mike's Copper Schwinn Sting Ray Restoration Rear Derailleur Before |
 |
| Mike's Copper Schwinn Sting Ray Restoration Rear Derailleur Before |
 |
| Mike's Copper Schwinn Sting Ray Restoration Rear Derailleur Exploded |
 |
| Mike's Copper Schwinn Sting Ray Restoration Rear Derailleur Polished |
 |
| Mike's Copper Schwinn Sting Ray Restoration Rear Derailleur Complete |
The shift lever took a lot of careful hand work. I couldn't put some of the pieces into the rust remover because of the decals. With time and patience the shift lever cleaned up and polished pretty nice. It has rust pitting but overall I am happy with the results. Installed it looks great!
 |
| Mike's Copper Schwinn Sting Ray Restoration Shift Lever Before |
 |
| Mike's Copper Schwinn Sting Ray Restoration Shift Lever Before |
 |
| Mike's Copper Schwinn Sting Ray Restoration Shift Lever Before |
 |
| Mike's Copper Schwinn Sting Ray Restoration Shift Lever Polished |
 |
| Mike's Copper Schwinn Sting Ray Restoration Shift Lever Complete |
 |
| Mike's Copper Schwinn Sting Ray Restoration Shift Lever Installed |
The seat strut was the most difficult part by far on the copper Stingray. The rust was pretty bad and near the bottom the rust damage was to bad to be saved. I ended up cutting about a 1/2 inch of the bottom of each side. The removing of the half inch should't make much of a difference in the function of the struts. I replaced the hardware nuts and bolts that connect the strut to the frame and the to the seat. The original nuts and bolts where just to far gone with to much rust damage. If I removed the rust and polished the pieces the pitting would still be to deep and the threads would not be the same. The nut would fit to loosely and work its way off. New stainless steel will be much better. Completed I think the seat and the strut look a heck of a lot better then they did. The Stingray is coming together nicely now.
 |
| Mike's Copper Schwinn Sting Ray Restoration Seat Post and Seat Struts Before |
 |
| Mike's Copper Schwinn Sting Ray Restoration Seat Struts Hardware Before |
 |
| Mike's Copper Schwinn Sting Ray Restoration Seat Before |
 |
| Mike's Copper Schwinn Sting Ray Restoration Seat Strut Before |
 |
| Mike's Copper Schwinn Sting Ray Restoration Seat Strut Before |
 |
| Mike's Copper Schwinn Sting Ray Restoration Seat Strut Before |
 |
| Mike's Copper Schwinn Sting Ray Restoration Seat Strut After |
 |
| Mike's Copper Schwinn Sting Ray Restoration Seat Strut After Rough Spot |
 |
| Mike's Copper Schwinn Sting Ray Restoration New Seat Strut Hardware |
 |
| Mike's Copper Schwinn Sting Ray Restoration New & Old Seat Bolts |
The chain guard took a lot of careful work. The decals are very delicate and the rust is very close to the painted area. I worked buy hand to remove the rust and then hand polished everything. I am pretty happy with the results. I love the chrome top of the chain guard, its a great look!
 |
| Mike's Copper Schwinn Sting Ray Restoration Chain Guard Before |
 |
| Mike's Copper Schwinn Sting Ray Restoration Chain Guard Before |
 |
| Mike's Copper Schwinn Sting Ray Restoration Chain Guard Before |
 |
| Mike's Copper Schwinn Sting Ray Restoration Chain Guard Before |
 |
| Mike's Copper Schwinn Sting Ray Restoration Chain Guard Before |
 |
| Mike's Copper Schwinn Sting Ray Restoration Chain Guard Before |
 |
| Mike's Copper Schwinn Sting Ray Restoration Chain Guard Before |
 |
| Mike's Copper Schwinn Sting Ray Restoration Chain Guard Before |
 |
| Mike's Copper Schwinn Sting Ray Restoration Chain Guard After |
 |
| Mike's Copper Schwinn Sting Ray Restoration Brake Levers Before |
 |
| Mike's Copper Schwinn Sting Ray Restoration Brake Levers Polished |
 |
| Mike's Copper Schwinn Sting Ray Restoration Grips Before - Poor Photos |
 |
| Mike's Copper Schwinn Sting Ray Restoration Grips After - Poor Photos |
 |
| Mike's Copper Schwinn Sting Ray Restoration New Cables & Cable Housings |
 |
| Mike's Copper Schwinn Sting Ray Restoration Brakes Wired |
 |
| Mike's Copper Schwinn Sting Ray Restoration Brakes & Grips Installed |
 |
| Mike's Copper Schwinn Sting Ray Restoration Bike Wired |
 |
| Mike's Copper Schwinn Sting Ray Restoration Bicycle Wired |
I ordered 3 new S-7 tires for the front wheel of the Copper Stingray and both tires on the black sting ray. The tires have turned into a problem. Through the rust I did not notice that the rims are the much more rare 20 inch S-5 or S-6 rims. Fairly standard in all other sizes but rare in the 20 inch size. The S-7 tires did not stay on the rims, they would roll off a little. The original slick rear tire on the Copper Stingray was going to be used anyways. For now I treated the original front tire and it looks good for now and should ride for now. After a lot of searching today I have not found new tires in the S-7 size. I will continue the search. I am happy with how the Copper Stingray looks with the tires treated and installed.
 |
| Mike's Copper Schwinn Sting Ray Restoration Original Slick Rear Wheel |
 |
| Mike's Copper Schwinn Sting Ray Restoration Original Slick Tire Installed |
 |
| Mike's Copper Schwinn Sting Ray Restoration Rear Wheel Slick Tire Installed |
 |
| Mike's Copper Schwinn Sting Ray Restoration Original Front Tire Installed |
 |
| Mike's Copper Schwinn Sting Ray Restoration Tires Installed |
I have been using some unmatched pedals for testing. In the morning I will finish the original pedals. They have been fighting a little bit but should be good in the end.
The pedals didn't come back as well as I would have liked. The thin pot metal was just to far gone to get a good polish on. The pedals did come back some and they work very very well and they are kind of rare so definitely worth keeping.
The pedals didn't come back as well as I would have liked. The thin pot metal was just to far gone to get a good polish on. The pedals did come back some and they work very very well and they are kind of rare so definitely worth keeping.
 |
| Mike's Copper Schwinn Sting Ray Restoration Pedals Before |
 |
| Mike's Copper Schwinn Sting Ray Restoration Pedals After |
It took a good deal of tuning and then fine tuning but I am now very happy with how the Copper Stingray rides. It is so fun to ride. It handles on a dime and so easy to do a wheely! Just so much fun.
Condition wise the Copper Stingray is not perfect, there are some pretty rough spots and some rust damage but that is not what we where shooting for on the Stingrays. They where meant to be brought back as far as they could, be rode a lot and to have fun. I do think though the Copper Stingray looks fantastic! I love that copper color!! It is almost a burnt orange and I am a sucker for a an orange bike. My dad has been by a lot to take a look at the Stingrays, he had the same one as a kid but in Campus Green.
Both of these Stingrays are tied for second in the most challenge bikes I have ever worked on and I am very proud of the results.
|
| Mike's Copper Schwinn Sting Ray Restoration Bicycle Complete |
 |
| Mike's Copper Schwinn Sting Ray Restoration Bicycle Complete |
 |
| Mike's Copper Schwinn Sting Ray Restoration Bicycle Complete - Handlebars |
 |
| Mike's Copper Schwinn Sting Ray Restoration Bicycle Complete - Handlebars |
 |
| Mike's Copper Schwinn Sting Ray Restoration Bicycle Complete - Head Tube |
 |
| Mike's Copper Schwinn Sting Ray Restoration Bicycle Complete - Front Brake |
 |
| Mike's Copper Schwinn Sting Ray Restoration Bicycle Complete - Front Wheel Hub |
 |
| Mike's Copper Schwinn Sting Ray Restoration Bicycle Complete - Front Wheel Rim |
 |
| Mike's Copper Schwinn Sting Ray Restoration Bicycle Complete - Stem |
 |
| Mike's Copper Schwinn Sting Ray Restoration Bicycle Complete - Shift Lever |
 |
| Mike's Copper Schwinn Sting Ray Restoration Bicycle Complete - Down Tube - Amazing Color! |
 |
| Mike's Copper Schwinn Sting Ray Restoration Bicycle Complete - Seat |
 |
| Mike's Copper Schwinn Sting Ray Restoration Bicycle Complete - Seat Tube Decals |
 |
| Mike's Copper Schwinn Sting Ray Restoration Bicycle Complete - Bottom Bracket |
 |
| Mike's Copper Schwinn Sting Ray Restoration Bicycle Complete - Drive Train |
 |
| Mike's Copper Schwinn Sting Ray Restoration Bicycle Complete - Rear Brake |
 |
| Mike's Copper Schwinn Sting Ray Restoration Bicycle Complete - Rear Derailleur |
 |
| Mike's Copper Schwinn Sting Ray Restoration Bicycle Complete - Rear Wheel Hub |
 |
| Mike's Copper Schwinn Sting Ray Restoration Bicycle Complete - Rear Wheel Rim |
 |
| Mike's Copper Schwinn Sting Ray Restoration Bicycle Complete |
John Z.
No comments:
Post a Comment