 |
| Mikes Schwinn Sting Ray Restoration Bicycle After Restoration |
The black String Ray fought some in the breaking down process. It took about a week of penetrating oil and strategically placed heat from a blow torch to get everything broken down. The chrome pieces are rough with a lot of surface rust. I will remove the rust and then we will decide to stay with the original part or replace the part. If staying with the original part I will polish the part and then apply a few layers of clear for protection.
I can't wait to see the black Sting Ray completed. I know for now the Sting Ray will be receiving new cables, cable housings, new bearings, new brake pads, new tires and tubes and a few pieces of new hardware like nuts and bolts here and there. I can't wait to see how the black Sting Ray turns out, so sinister with the black paint and all that chrome!
 |
| Mikes Schwinn Sting Ray Restoration - Bicycle Before |
 |
| Mikes Schwinn Sting Ray Restoration - Bicycle Before |
 |
| Mikes Schwinn Sting Ray Restoration - Bicycle Before Brake Levers |
 |
| Mikes Schwinn Sting Ray Restoration - Bicycle Before Handlebars |
 |
| Mikes Schwinn Sting Ray Restoration - Bicycle Before Head Tube |
 |
| Mikes Schwinn Sting Ray Restoration - Bicycle Before Front Wheel Hub |
 |
| Mikes Schwinn Sting Ray Restoration - Bicycle Before Stem |
 |
| Mikes Schwinn Sting Ray Restoration - Bicycle Before Head Tube |
 |
| Mikes Schwinn Sting Ray Restoration - Bicycle Before Fork Crown |
 |
| Mikes Schwinn Sting Ray Restoration - Bicycle Before Wheel Hub |
 |
| Mikes Schwinn Sting Ray Restoration - Bicycle Before Front Fender |
 |
| Mikes Schwinn Sting Ray Restoration - Bicycle Before Front Fender |
 |
| Mikes Schwinn Sting Ray Restoration - Bicycle Before Shift Lever |
 |
| Mikes Schwinn Sting Ray Restoration - Bicycle Before Down Tube |
 |
| Mikes Schwinn Sting Ray Restoration - Bicycle Before Seat Post |
 |
| Mikes Schwinn Sting Ray Restoration - Bicycle Before Seat Tube Decals |
 |
| Mikes Schwinn Sting Ray Restoration - Bicycle Before Chicago Decal |
 |
| Mikes Schwinn Sting Ray Restoration - Bicycle Before Bottom Bracket |
 |
| Mikes Schwinn Sting Ray Restoration - Bicycle Before Drive Train |
 |
| Mikes Schwinn Sting Ray Restoration - Bicycle Before Crank |
 |
| Mikes Schwinn Sting Ray Restoration - Bicycle Before Chain Guard |
 |
| Mikes Schwinn Sting Ray Restoration - Bicycle Before Seat Stays |
 |
| Mikes Schwinn Sting Ray Restoration - Bicycle Before Rear Brake Caliper |
 |
| Mikes Schwinn Sting Ray Restoration - Bicycle Before Rear Fender |
 |
| Mikes Schwinn Sting Ray Restoration - Bicycle Before Rear Derailleur |
 |
| Mikes Schwinn Sting Ray Restoration - Bicycle Before Rear Wheel Hub |
 |
| Mikes Schwinn Sting Ray Restoration - Bicycle Before Rear Wheel Rim |
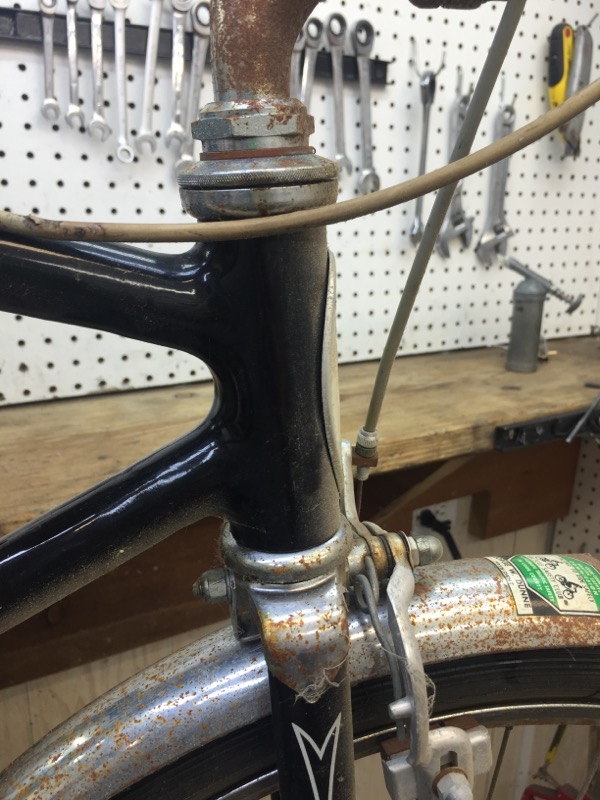
Like I mentioned above it took a little bit of doing to brake the black Sting Ray all the way down. Now that I have the frame bare of components the frame paint is fairly rough but there really isn't a lot of chips or scratches. A few rough spots but not bad overall. The main thing is the paint is very dirty and very dull with a rough surface. I think there is some really nice original paint in there and original paint is so much nicer then new paint if it can be saved.
 |
| Mikes Schwinn Sting Ray Restoration - Frame Before |
 |
| Mikes Schwinn Sting Ray Restoration - Frame Before Head Tube |
 |
| Mikes Schwinn Sting Ray Restoration - Frame Before Head Tube |
 |
| Mikes Schwinn Sting Ray Restoration - Frame Before Head Tube |
 |
| Mikes Schwinn Sting Ray Restoration - Frame Before Top Tube |
 |
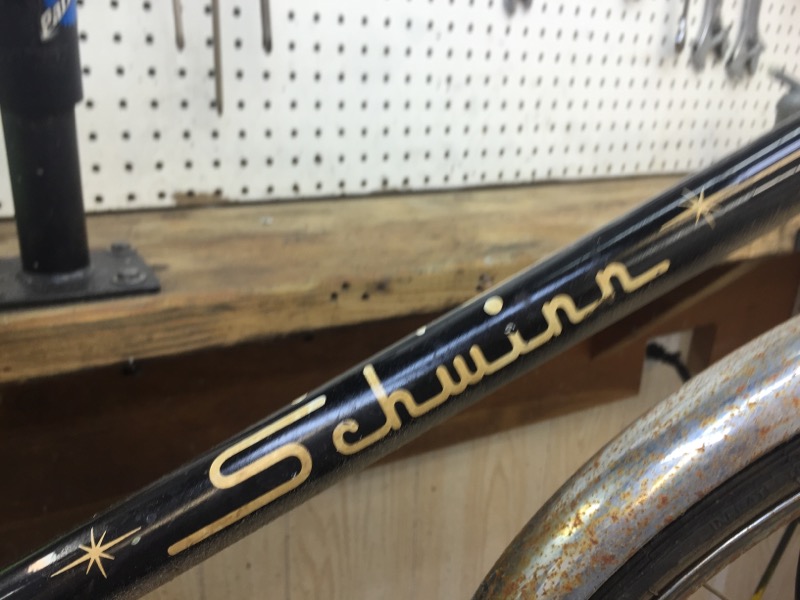
| Mikes Schwinn Sting Ray Restoration - Frame Before Down Tube Decal |
 |
| Mikes Schwinn Sting Ray Restoration - Frame Before Seat Area |
 |
| Mikes Schwinn Sting Ray Restoration - Frame Before Seat Tube Decals |
 |
| Mikes Schwinn Sting Ray Restoration - Frame Before Bottom Bracket |
 |
| Mikes Schwinn Sting Ray Restoration - Frame Before Bottom Bracket |
 |
| Mikes Schwinn Sting Ray Restoration - Frame Before Bottom Bracket |
 |
| Mikes Schwinn Sting Ray Restoration - Frame Before Seat Stays |
 |
| Mikes Schwinn Sting Ray Restoration - Frame Before Chain Stays |
 |
| Mikes Schwinn Sting Ray Restoration - Frame Before Drop Outs |
 |
| Mikes Schwinn Sting Ray Restoration - Frame Before |
 |
| Mikes Schwinn Sting Ray Restoration - Frame Before Fork |
 |
| Mikes Schwinn Sting Ray Restoration - Frame Before Fork Crown |
 |
| Mikes Schwinn Sting Ray Restoration - Frame Before Fork Crown |
 |
| Mikes Schwinn Sting Ray Restoration - Frame Before Fork Crown |
 |
| Mikes Schwinn Sting Ray Restoration - Frame Before Fork Blade |
 |
| Mikes Schwinn Sting Ray Restoration - Frame Before Fork Blades |
I started with a good cleaning of the frame and then a course polishing grit. I am thrilled with the results! The black paint came back a really long ways and looks better then new in some places. The decals are came back amazing! I am thrilled that the original paint turned out so nice! I think I am actually going to work through the medium grit and fine grit polishing grits one more time just to see how much farther it will come! The chrome fork crown turned out fantastic! I love this stuff!!
 |
| Mikes Schwinn Sting Ray Restoration - Frame Polished |
 |
| Mikes Schwinn Sting Ray Restoration - Frame Polished Head Tube |
 |
| Mikes Schwinn Sting Ray Restoration - Frame Polished Head Tube |
 |
| Mikes Schwinn Sting Ray Restoration - Frame Polished Head Tube |
 |
| Mikes Schwinn Sting Ray Restoration - Frame Polished Head Tube |
 |
| Mikes Schwinn Sting Ray Restoration - Frame Polished Down Tube Decal |
 |
| Mikes Schwinn Sting Ray Restoration - Frame Polished Seat Lug |
 |
| Mikes Schwinn Sting Ray Restoration - Frame Polished Seat Tube Decals |
 |
| Mikes Schwinn Sting Ray Restoration - Frame Polished Seat Tube Decal |
 |
| Mikes Schwinn Sting Ray Restoration - Frame Polished Chicago Decal |
 |
| Mikes Schwinn Sting Ray Restoration - Frame Polished Store Decal |
 |
| Mikes Schwinn Sting Ray Restoration - Frame Polished Bottom Bracket |
 |
| Mikes Schwinn Sting Ray Restoration - Frame Polished Bottom Bracket |
 |
| Mikes Schwinn Sting Ray Restoration - Frame Polished Bottom Bracket |
 |
| Mikes Schwinn Sting Ray Restoration - Frame Polished Seat Stays |
 |
| Mikes Schwinn Sting Ray Restoration - Frame Polished Chain Stays |
 |
| Mikes Schwinn Sting Ray Restoration - Frame Polished Drop Outs |
Definitely one more run through the medium and fine grits and a nice coat of sealer wax to top it off. I will post a few photos of the frame after another round!
The rest is going to an interesting route through the build. The rust removal is going to determine the order of the restoration and the time to complete the restoration. For now I am going to post the before photos and fill in the after photos as they come.
The first part to be completed as always is the headset. The headset was rough. I put it through the crock pot and then work on the polishing wheels. The headset turned out very nice. Packed with new bearings it spins great!
The first part to be completed as always is the headset. The headset was rough. I put it through the crock pot and then work on the polishing wheels. The headset turned out very nice. Packed with new bearings it spins great!
 |
| Mikes Schwinn Sting Ray Restoration - Headset Before |
 |
| Mikes Schwinn Sting Ray Restoration - Headset Polished |
 |
| Mikes Schwinn Sting Ray Restoration Pressing Headset Cups |
 |
| Mikes Schwinn Sting Ray Restoration - Headset Bearings Packed |
 |
| Mikes Schwinn Sting Ray Restoration Headset Complete |
 |
| Mikes Schwinn Sting Ray Restoration Headset Complete |
 |
| Mikes Schwinn Sting Ray Restoration - Headset Complete |
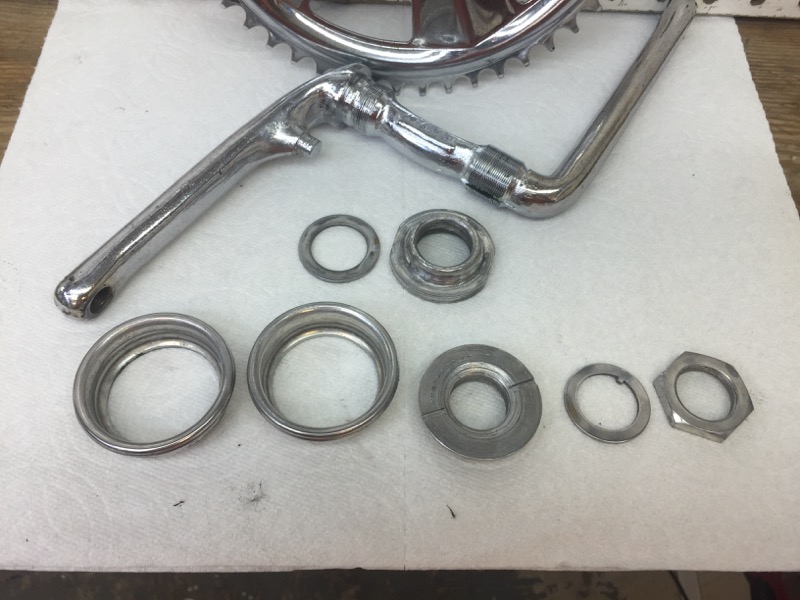
The crank was next. I ended up having to completely break the crank down. The drive side bearing cone was pushed away from where it should be by dried old grease. The crank was stubborn in removing rust but once the rust was gone it polished nicely and looks great installed.
 |
| Mikes Schwinn Sting Ray Restoration - Crank & Bottom Bracket Before |
 |
| Mikes Schwinn Sting Ray Restoration - Crank Before |
 |
| Mikes Schwinn Sting Ray Restoration - Bottom Bracket Before |
 |
| Mikes Schwinn Sting Ray Restoration - Crank & Bottom Bracket Polished |
 |
| Mikes Schwinn Sting Ray Restoration - Chain Ring Polished |
 |
| Mikes Schwinn Sting Ray Restoration - Crank Arm Polished |
 |
| Mikes Schwinn Sting Ray Restoration - Bottom Bracket Polished |
 |
| Mikes Schwinn Sting Ray Restoration - Bottom Bracket Cups Pressed |
 |
| Mikes Schwinn Sting Ray Restoration - Bottom Bracket Cups Pressed |
 |
| Mikes Schwinn Sting Ray Restoration - Crank Complete |
 |
| Mikes Schwinn Sting Ray Restoration - Crank Complete |
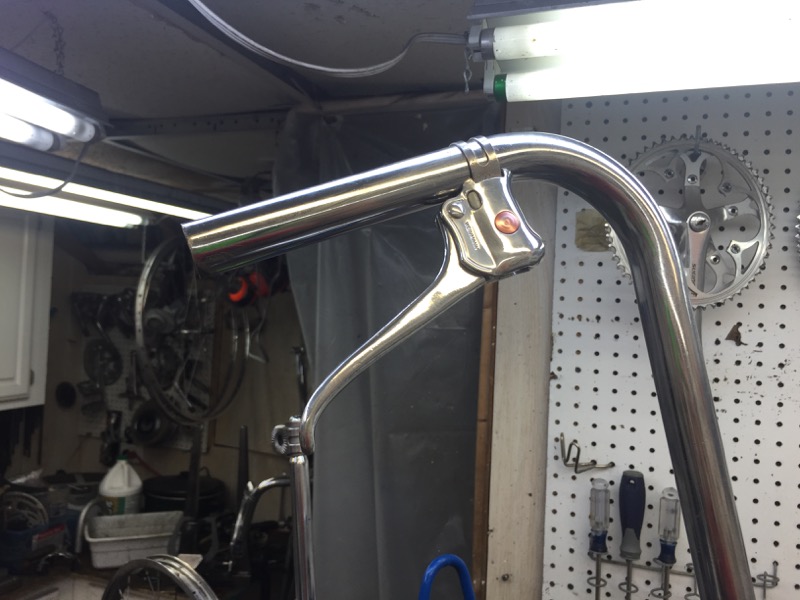
The handlebars are being very very stubborn in rust removal. I am hoping that maybe this Monday they will be out of the solution. If not maybe hey might need to be replaced. For now the stem turned out very nice. The stem looked very rough to start but now turned out great. I love how it looks with the black and chrome!
 |
| Mikes Schwinn Sting Ray Restoration Handlebars & Stem Before |
 |
| Mikes Schwinn Sting Ray Restoration - Handlebars Before |
 |
| Mikes Schwinn Sting Ray Restoration Handlebars Before |
 |
| Mikes Schwinn Sting Ray Restoration Handlebars Before |
 |
| Mikes Schwinn Sting Ray Restoration - Brake Levers Before |
 |
| Mikes Schwinn Sting Ray Restoration - Stem Before |
 |
| Mikes Schwinn Sting Ray Restoration - Stem & Handlebars Before |
 |
| Mikes Schwinn Sting Ray Restoration - Handlebars Before |
 |
| Mikes Schwinn Sting Ray Restoration - Stem Before |
 |
| Mikes Schwinn Sting Ray Restoration - Stem Exploded |
 |
| Mikes Schwinn Sting Ray Restoration - Stem Before |
 |
| Mikes Schwinn Sting Ray Restoration - Stem Polished |
 |
| Mikes Schwinn Sting Ray Restoration - Stem Complete |
 |
| Mikes Schwinn Sting Ray Restoration - Stem Complete |
 |
| Mikes Schwinn Sting Ray Restoration Stem Installed |
 |
| Mikes Schwinn Sting Ray Restoration Stem Installed |
 |
| Mikes Schwinn Sting Ray Restoration - Stem Installed |
I am mad because I missing before photos of the seat post and seat binder. The seat post was in very good shape to start and a little polishing and it looks great! The seat binder took more work but it also turned out great. I love this stuff!
 |
| Mikes Schwinn Sting Ray Restoration - Seat Post & Binder Polished |
 |
| Mikes Schwinn Sting Ray Restoration Seat Post & Binder - Installed |
 |
| Mikes Schwinn Sting Ray Restoration - Seat Post Installed |
 |
| Mikes Schwinn Sting Ray Restoration - Brake Levers Before |
 |
| Mikes Schwinn Sting Ray Restoration - Grips Before |
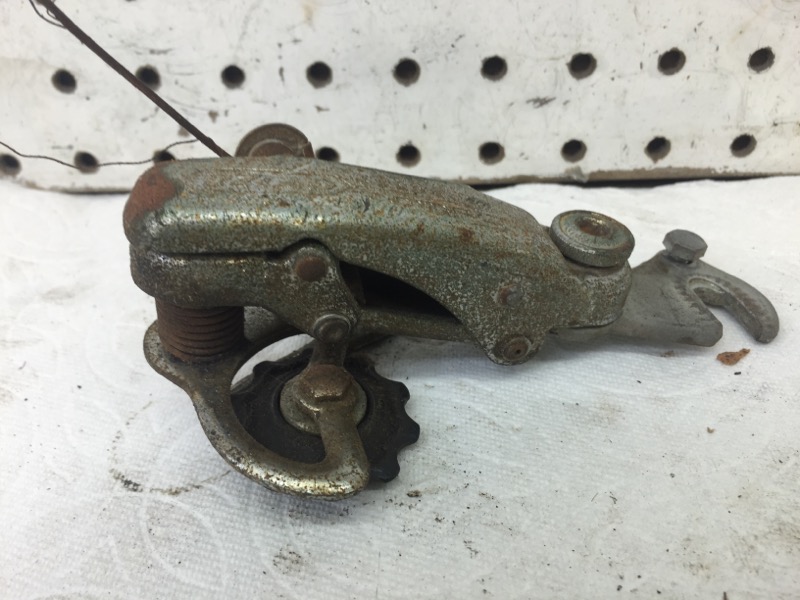
I like these brake calipers, they polish so nice. The calipers did take a good deal of work to break apart. A lot of the nuts and bolts where frozen in place. But that happens when you are dealing with aluminum and steel. The brake caliper pieces polished very nice. Most of the deep etching in the caliper arms polished out nicely. Overall I am very happy with the brake calipers. They look amazing installed!
 |
| Mikes Schwinn Sting Ray Restoration - Brake Calipers Before |
 |
| Mikes Schwinn Sting Ray Restoration - Brake Calipers Exploded |
 |
| Mikes Schwinn Sting Ray Restoration - Brake Calipers Polished |
 |
| Mikes Schwinn Sting Ray Restoration - Brake Calipers Complete |
 |
| Mikes Schwinn Sting Ray Restoration Front Brake Caliper Installed |
 |
| Mikes Schwinn Sting Ray Restoration Rear Brake Caliper Installed |
 |
| Mikes Schwinn Sting Ray Restoration - Brake Calipers Installed |
The shift lever took a good deal of time to work through by hand. I worked by hand to save the decals. The rust remover would remove the decals too. After removing the rust by hand I polished the chrome by hand. The pieces polished very nicely considering where they started. There is a good deal of rust pitting but overall not so bad. I am pleased with the results of the shift lever and love how these shift levers look installed.
 |
| Mikes Schwinn Sting Ray Restoration Shift Lever Before |
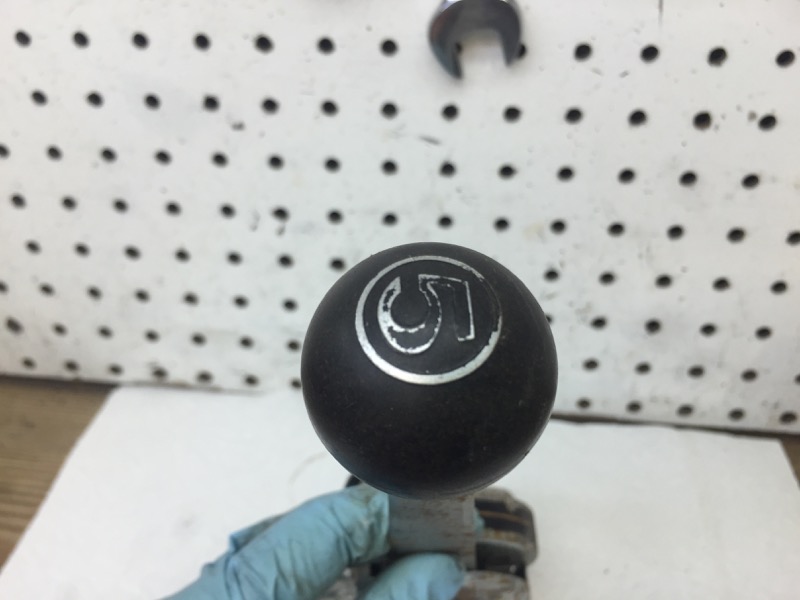 |
| Mikes Schwinn Sting Ray Restoration - Shift Knob Before |
 |
| Mikes Schwinn Sting Ray Restoration - Shift Lever Before |
 |
| Mikes Schwinn Sting Ray Restoration Shift Lever Before |
 |
| Mikes Schwinn Sting Ray Restoration Shift Lever Polished |
 |
| Mikes Schwinn Sting Ray Restoration Shift Lever Complete |
 |
| Mikes Schwinn Sting Ray Restoration Shift Lever Installed |
The rear derailleur started out very rough. The pieces spent a long time in the rust remover solution. When the pieces came out of the rust remover I worked through the polishing wheels. I was very pleased at the results. The rear derailleur looks great considering where it started. Best of all the derailleur functions very smooth which is a little surprising. I love this stuff!
 |
| Mikes Schwinn Sting Ray Restoration - Rear Derailleur Before |
 |
| Mikes Schwinn Sting Ray Restoration - Rear Derailleur Before |
 |
| Mikes Schwinn Sting Ray Restoration - Rear Derailleur Before |
 |
| Mikes Schwinn Sting Ray Restoration - Rear Derailleur Before |
 |
| Mikes Schwinn Sting Ray Restoration - Rear Derailleur Exploded |
 |
| Mikes Schwinn Sting Ray Restoration Rear Derailleur Polished |
 |
| Mikes Schwinn Sting Ray Restoration Rear Derailleur Complete |
 |
| Mikes Schwinn Sting Ray Restoration Rear Derailleur Complete |
 |
| Mikes Schwinn Sting Ray Restoration Rear Derailleur Installed |
 |
| Mikes Schwinn Sting Ray Restoration Rear Derailleur Installed |
The order of the build is a little mixed up but roughly around this time I installed the handlebars. The handlebars where rough and required a lot of time in the rust solution. When rust free they polished pretty nice with a few rough areas. I am happy with the results.
 |
| Mikes Schwinn Sting Ray Restoration Handlebars Polished |
 |
| Mikes Schwinn Sting Ray Restoration Handlebars Installed |
 |
| Mikes Schwinn Sting Ray Restoration Handlebars Installed |
 |
| Mikes Schwinn Sting Ray Restoration Brake Levers Before |
 |
| Mikes Schwinn Sting Ray Restoration Brake Levers Polished |
 |
| Mikes Schwinn Sting Ray Restoration Brake Levers Installed |
 |
| Mikes Schwinn Sting Ray Restoration Brake Levers Installed |
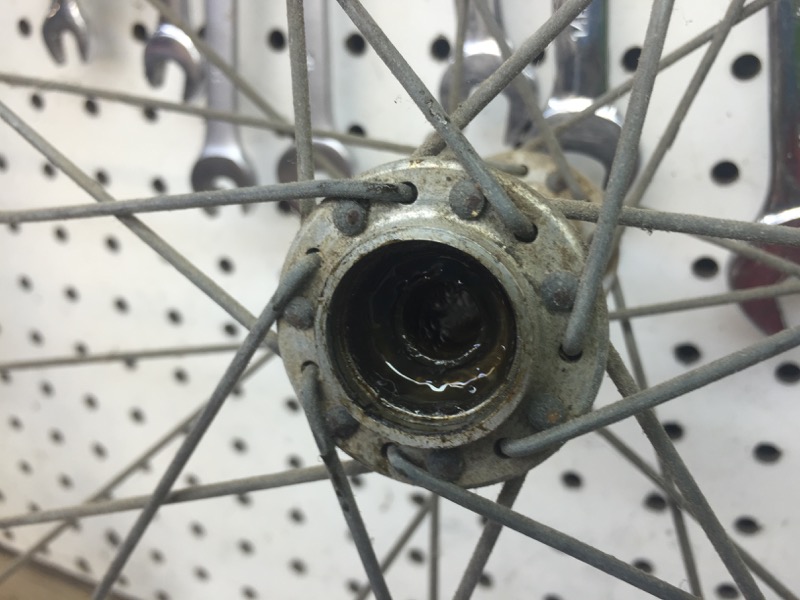
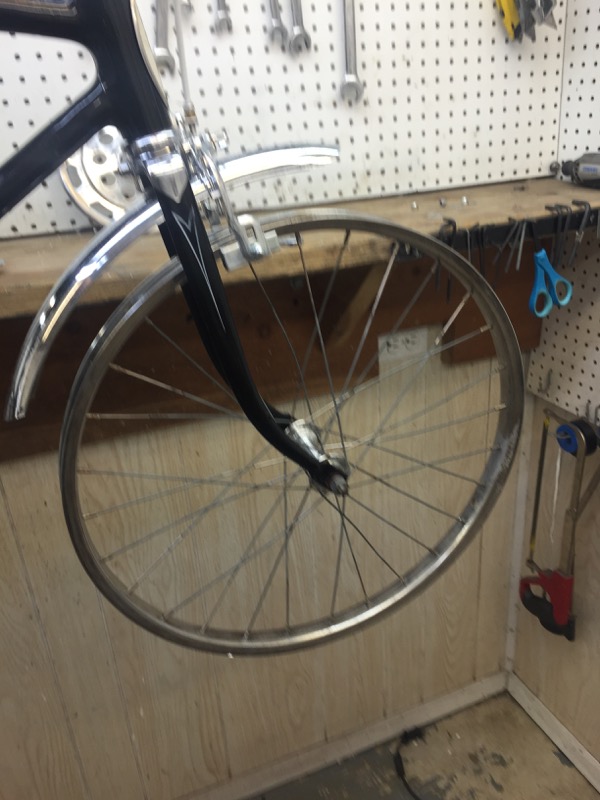
The wheels are already photoed a few times above but they kind of fit here. The wheels are super rough. I started by string to remove the rust but as a wheel together I just couldn't get it right. I broke the wheels down and put all the rusty parts in the rust solution. I then polished the hubs on the polishing wheels. The wheel hubs turned out like new!
When the rims came out of the rust solution I worked them over on the polishing wheels. They are a heck of a lot better then they where but the rims are a little worse then the Copper Stingray rims.
With the polishing done I laced the wheels and gave them the proper dish. The wheels have rough spots but they spin forever and are round and look a hundred times better then they did. I love this stuff!
 |
| Mikes Schwinn Sting Ray Restoration Rear Wheel Before |
 |
| Mikes Schwinn Sting Ray Restoration Rear Wheel Hub Before |
 |
| Mikes Schwinn Sting Ray Restoration Rear Wheel Hub Before |
 |
| Mikes Schwinn Sting Ray Restoration Rear Wheel Rim Before |
 |
| Mikes Schwinn Sting Ray Restoration Rear Wheel Hub Old Grease |
 |
| Mikes Schwinn Sting Ray Restoration Front Wheel Before |
 |
| Mikes Schwinn Sting Ray Restoration Front Wheel Hub Before |
 |
| Mikes Schwinn Sting Ray Restoration Front Wheel Rim Before |
 |
| Mikes Schwinn Sting Ray Restoration Rear Wheel Hub Old Grease |
 |
| Mikes Schwinn Sting Ray Restoration Wheel Hubs Before |
 |
| Mikes Schwinn Sting Ray Restoration Front Wheel Hub Before |
 |
| Mikes Schwinn Sting Ray Restoration Front Wheel Hub Before |
 |
| Mikes Schwinn Sting Ray Restoration Rear Wheel Hub Before |
 |
| Mikes Schwinn Sting Ray Restoration Rear Wheel Hub Before |
 |
| Mikes Schwinn Sting Ray Restoration Rear Wheel Hub Before |
 |
| Mikes Schwinn Sting Ray Restoration Front Wheel Hub BEfore |
 |
| Mikes Schwinn Sting Ray Restoration Rims Before |
 |
| Mikes Schwinn Sting Ray Restoration Wheel Rim Before |
 |
| Mikes Schwinn Sting Ray Restoration Wheels Rust Removed |
 |
| Mikes Schwinn Sting Ray Restoration Rims & Hubs Polished |
 |
| Mikes Schwinn Sting Ray Restoration Wheel Hubs Polished |
 |
| Mikes Schwinn Sting Ray Restoration Rear Wheel Hub Before |
 |
| Mikes Schwinn Sting Ray Restoration Wheel Rims Polsihed |
 |
| Mikes Schwinn Sting Ray Restoration Rear Wheel Bearings Packed |
 |
| Mikes Schwinn Sting Ray Restoration Front Wheel Bearings Packed |
 |
| Mikes Schwinn Sting Ray Restoration Axle Pieces Ready |
 |
| Mikes Schwinn Sting Ray Restoration Front Wheel Laced |
 |
| Mikes Schwinn Sting Ray Restoration Wheel Laced |
 |
| Mikes Schwinn Sting Ray Restoration Wheels Installed |
 |
| Mikes Schwinn Sting Ray Restoration - Brackets Before |
 |
| Mikes Schwinn Sting Ray Restoration - Cable Bracket Before |
 |
| Mikes Schwinn Sting Ray Restoration - Cable Bracket Before |
 |
| Mikes Schwinn Sting Ray Restoration - Pedals Before |
 |
| Mikes Schwinn Sting Ray Restoration - Pedals Before |
 |
| Mikes Schwinn Sting Ray Restoration - Fenders Before |
 |
| Mikes Schwinn Sting Ray Restoration - Front Fender Before |
 |
| Mikes Schwinn Sting Ray Restoration - Front Fender Before |
 |
| Mikes Schwinn Sting Ray Restoration - Front Fender Before |
 |
| Mikes Schwinn Sting Ray Restoration Rear Fender Before |
 |
| Mikes Schwinn Sting Ray Restoration - Rear Fender Before |
 |
| Mikes Schwinn Sting Ray Restoration Rear Fender Before |
 |
| Mikes Schwinn Sting Ray Restoration Rear Fender Before |
 |
| Mikes Schwinn Sting Ray Restoration Rear Fender Before |


The chain guard is rough, a lot of rust but I am hoping it comes back farther then it looks like it will.
 |
| Mikes Schwinn Sting Ray Restoration - Chain Guard |
 |
| Mikes Schwinn Sting Ray Restoration Chain Guard Before |
 |
| Mikes Schwinn Sting Ray Restoration Chain Guard Before |
 |
| Mikes Schwinn Sting Ray Restoration - Chain Guard Before |
 |
| Mikes Schwinn Sting Ray Restoration - Chain Guard Before |
 |
| Mikes Schwinn Sting Ray Restoration - Chain Guard Before |
 |
| Mikes Schwinn Sting Ray Restoration - Chain Guard Before |
I must have been having a bad photo that day because I can't find the photos of the chain guard after. The chain guard turned out nice. There is some rough areas from rust damage but not to bad. Overall I am pleased with the chain guard.
 |
| Mikes Schwinn Sting Ray Restoration Chain Guard Installed |
The rear wheel pie plate had a lot of rust. So much so at the inner circle line that when the rust was removed there was no metal left and the pie plate split apart. Lucky though I save everything I find and organize it. I had a replacement pie plate. Polished and isntalled the pie plate looks great!
 |
| Mikes Schwinn Sting Ray Restoration Replacement Pie Plate |
 |
| Mikes Schwinn Sting Ray Restoration Original Pie Plate Split |
 |
| Mikes Schwinn Sting Ray Restoration Original Pie Plate Split |
|
| Mikes Schwinn Sting Ray Restoration Pie Plate Installed |
The seat strut was not as bad as the Copper Stingray. The rust removed nicely and it polished nicely. I did replace all the hardware with stainless steel. The original was just to far gone and deeply pitted nuts and bolts don't stay tight very well.
 |
| Mikes Schwinn Sting Ray Restoration Seat Strut Polished |
 |
| Mikes Schwinn Sting Ray Restoration New Cables & Cable Housings |
 |
| Mikes Schwinn Sting Ray Restoration Bicycle Wired |
 |
| Mikes Schwinn Sting Ray Restoration Bicycle Wired |
 |
| Mikes Schwinn Sting Ray Restoration Bicycle Wired |
 |
| Mikes Schwinn Sting Ray Restoration Bicycle Wired and Seat Installed |
Also sorry for the kind of mixed up posts of the Stingrays. It kind off just went as parts came out of the rust solution.
Check back soon!
I replaced the pedals on the Black Stingray. The original pedals where just to far gone. i might have been able to make them look better but they still would not spin even ok after overhauling, the internals where just to worn and rusted. I think the standard reproduction look pretty good on the Stingray.
 |
| Mikes Schwinn Sting Ray Restoration Old & New Pedals |
The rear rim had some pretty bad curb damage and flat spots. You could feel this curb damage while riding. I adjusted and massaged the rim a little more round and now the flat spot feeling is gone.
 |
| Mikes Schwinn Sting Ray Restoration Tires Installed |
The Black Stingray looks much much better then it did. I would say the Black Stingray was in a lot worse starting shape then the Copper Stingray. The black paint looks good, the chrome parts came back a very long way and the white cables pull it all together. There are some rough spots and the rims are not as nice as the Copper Stingray but overall I am extremely proud and happy of the Black Stingray results!
|
| Mikes Schwinn Sting Ray Restoration Bicycle Complete |
 |
| Mikes Schwinn Sting Ray Restoration Bicycle Complete |
 |
| Mikes Schwinn Sting Ray Restoration Bicycle Complete - Brake Levers |
 |
| Mikes Schwinn Sting Ray Restoration Bicycle Complete - Stem & Handlebars |
 |
| Mikes Schwinn Sting Ray Restoration Bicycle Complete - Head Tube |
 |
| Mikes Schwinn Sting Ray Restoration Bicycle Complete - Front Brake Caliper |
 |
| Mikes Schwinn Sting Ray Restoration Bicycle Complete - Front Wheel Hub |
 |
| Mikes Schwinn Sting Ray Restoration Bicycle Complete - Front Wheel Rim |
 |
| Mikes Schwinn Sting Ray Restoration Bicycle Complete - Stem |
 |
| Mikes Schwinn Sting Ray Restoration Bicycle Complete - Shift Lever |
 |
| Mikes Schwinn Sting Ray Restoration Bicycle Complete - Down Tube |
 |
| Mikes Schwinn Sting Ray Restoration Bicycle Complete - Drive Train |
 |
| Mikes Schwinn Sting Ray Restoration Bicycle Complete - Rear Brake Caliper |
 |
| Mikes Schwinn Sting Ray Restoration Bicycle Complete - Rear Wheel Hub |
 |
| Mikes Schwinn Sting Ray Restoration Bicycle Complete - Rear Wheel Rim |
John Z.
No comments:
Post a Comment