Hello again,
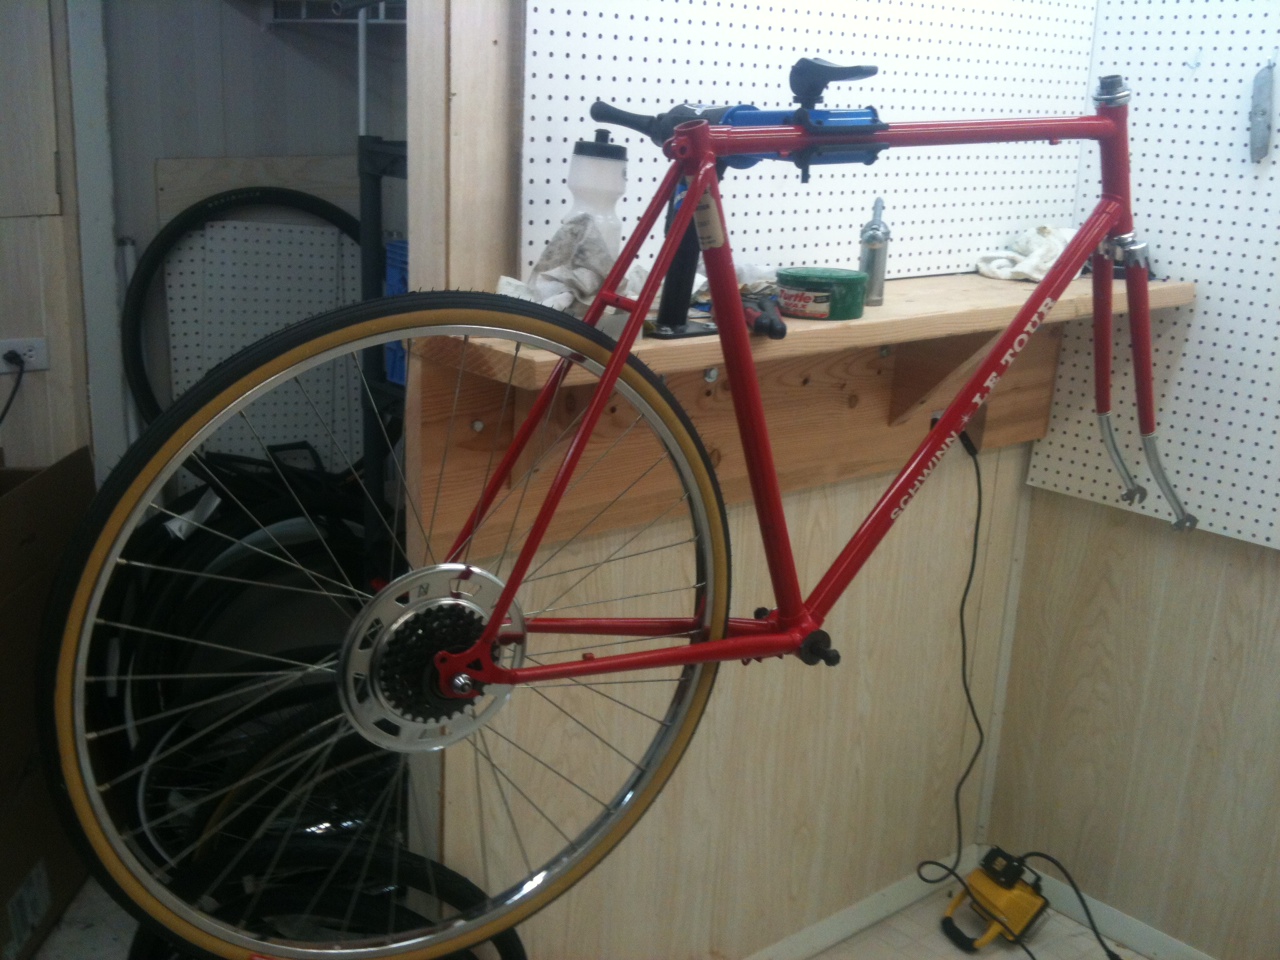
I found this Schwinn Le Tour a while ago and was going to save it as a winter project, but David showed a lot of interest in it and we are going to restore and update it a little. The Schwinn Le Tour was mad in Japan and is Schwinn approved. The bike has a missing front wheel and shows a lot of dirt and grime, but for the age the paint is in fantastic condition.
The bike is going to be completely restored, a new front wheel is on order, the old brake levers will be replaced with modern aero levers, a new seat will be installed, new gel bar tape, all new cables and housings, new tires and tubes and new brake pads. I think that is all but I might be forgetting something.
I am sorry for the darkness of the photos. I still haven't got the lighting right in the new shop.
 |
| 1973/74 Schwinn Le Tour Before - Side View |
 |
| Crank Set Before |
 |
| Fork Chrome Before |
 |
| Fork Crown Before |
 |
| Fork Before |
 |
| Front Derailleur Before |
 |
| Rear Derailleur Before |
 |
| Peddle Before |
I started by stripping the frame off all components. The stem did not out to release easily but after a few tricks all went well. I always save and label all the cable housing, this make cutting new housing very easy. With the frame and fork bare of parts I started cleaning the frame, the frame cleaned nicely I then moved to polishing. I am so pleased with the paint and color after polishing, for almost 40 years old the red just pops and the chrome on the fork shines. What is really nice and a little unusual is the fork is completely chromed top to bottom, no worries about the fork tube corroding. I like the paint so much I had to take the frame outside in the day light to take photos.
 |
| Bike Stripped of Components |
 |
| Some Grime on the Frame |
 |
| Frame & Fork Cleaned & Polished |
 |
| Fork Cleaned & Polished |
Next I started work on the Bottom Bracket. The bracket was dry and I wasn't expecting loose bearings, but i can find almost no ware anywhere. Loose bearing compared to caged bearings is that you can fit more loose bearings with out the cage. It is for better performance. I cleaned and polished the bottom bracket cups and pregreased and packed the bearings, It is easier to pack loose bearing this way before the cups are installed. I then installed the cups and axle. I am very pleased with the results, the bottom bracket functions smoothly. In the photo below with the caliper shows that one side of the axle is longer then the other. The long side is always the drive side.
 |
| Bottom Bracket Before |
 |
| Bottom Bracket Cleaned & Polished |
 |
| BB Cups Prepacked |
 |
| Drive Side Cup Installed |
 |
| Bottom Bracket Complete |
 |
| Checking for Drive Side |
Next came the headset. The headset cups show no wear at all. This bike has hardly been ridden in its 40 years. The headset bearings are also loose bearings. This is a tedious step for there are 52 tiny loose bearings. The best way is to install the bearings in the cups with a heavy coat of grease, this holds the bearings in place. Next, you must very carefully slide the fork into place with out jarring the bearings out of place. While holding the fork in place I then carefully threaded the headset crown into place. The headset is turning smooth, I am happy with the results.
 |
| Headset Loose Bearings |
This is where I am leaving off for the day. Tomorrow I will be polishing the rest of the components to the headset, stem & bars and installing them. I will also start work on the rear wheel. If all goes well I hoped to get a start on the brake calipers also. Thanks for looking.
 |
| Bike to This Point - Love the Shine of the Red & Chrome |
 |
| Fork Chrome & Polished Red |
Today I started work on the rear wheel. It took a while and did not go well, nothing is wrong with the wheel, the bike gods where just not on my side today. It did take quite a while to polish out the chrome, there was just a little rust, but the chrome is very thin compared to a Schwinn Continental, the thin chrome saves weight. After polishing there are a few pit spots in the chrome but not to bad at all.
It took a little bit of force to get the free wheel off, either the threads where not greased when original installed or the grease just dried up. With the free wheel off I removed the bearings and axle, the grease was dry but there was absolutely no wear, either this bike was never ridden or was the most maintained bike ever. I cleaned and polished all the axle components and re installed it. It turns smooth.
Next I removed the old tire, it was dry rotted to the rim. I leave the old tire in place while polishing, it keeps the wheel from sliding around while I am working on it. It took a sharp knife and a stiff wire brush to clean off all the rotted tire.
I then installed the new Kenda Gum wall tire. It looks great against the chrome. With the tire on the only things left to do was to polish the pie plate and clean the free wheel. The free wheel cleaned easily and still functions very smooth. The pie plate also polished up very nice. A high polish on a pie plate always makes the rear wheel look so much nicer.
That is where I left off today, the rear wheel just took to much time to get to anything else. Tomorrow I will be on to the stem and handle bars.
 |
| Rear Wheel Before |
 |
| Rear Wheel Before |
 |
| Rear Wheel Disassembled |
 |
| Rear Wheel Axle Removed |
 |
| Rear Wheel Polished & New Tire |
 |
| Rear Wheel Complete |
 |
| Rear Wheel On Bike |
 |
| Rear Wheel Installed Free Wheel View |
 |
| Rear Wheel Rim Polished |
Today I started work on polishing the handle bars, stem and the rest of the headset components. The components are in good shape except for the cable hanger, it had lite rust on it. For some reason all the cable hangers from the 70's rust easily. The hanger did polish up nice, just a few pit spots. Everything else polished out nicely. I then started work on the shift levers, the levers will take a while, I have restored 100's of shift levers, but I have never seen levers put together like this. I have to do one lever at a time and label everything. Restoring one lever at a time leaves one lever assembled as a guide if things do not go back together correctly. I will post photos of the levers when I am finished with them.
The Stem and bars look great polished, my shop lighting does not do justice to the shine in the photos. I can't wait to see the new brake levers and new white cork gel tape against the shine and the red.
 |
| Handle Bars Before |
 |
| Handle Bars Broken Down |
 |
| Headset & Handle Bars Polished & Installed |
 |
| Stem & Handle Bars Polished & Installled |
I finished work on the derailleurs. They looked in rough shape, but looks are not everything. A good amount of degreasing and cleaning and then a lot of polish on the buffer and they look great. I love the look of the LeTour rear derailleur. I have restored many of them and I think they are one of the best looking derailleurs made. Something that surprised me about the front derailleur is that the chain cage is brushed chrome. Usually they have a high sheen, but I kind of like the brushed look. I hope to get the crank set polished and installed tomorrow.
 |
| Front & Rear Derailleur Before |
 |
| Front Derailleur Before |
 |
| Rear Derailleur Disassembled |
 |
| Rear Derailleur Before |
 |
| Rear Derailleur Polished |
 |
| Rear Derailleur Installed |
 |
| Front Derailleur Installed |
I started work on the crank set today. The crank was pretty dirty, dirty enough that I could not tell the finish of the metal. I disassembled the crank, all 38 pieces and cleaned all the grease off. The finish is a brushed nickle look, it is a nice look but means that you can only do very lite polishing. After polishing the crank looks great. There are a few spots that I wish i could have polished harder, but that would leave a shinny spot against the brushed look. With the crank looking good I installed it on the bike. I really like the cleaned polished metal against the red.
I am still waiting on the new front wheel, the seat and brake levers. I won't say where I order them from, but they always have very slow processing and shipping times. The prices are good, but i guess you make up for that in time. I wish the wheel and levers where here, it would allow me to start running new cable housing and see the fresh new white of the housing against the red. I think I will start polishing the miscellaneous parts like the seat post components and cable hanger, the bracketts that run the cables down the down tube and BB, and a few bolts here and there. i will also start the brakes soon.
 |
| Crank Before |
 |
| Crank Before |
 |
| Crank Disassembled |
 |
| Crank Cleaned & Polished |
 |
| Crank Installed |
Today I cleaned and polished the many miscellaneous parts on a bike that you don't think of but take a good amount of time to restore and are very noticeable if you do not restore them. This include the seat post, seat post bolt, seat post cable hanger, bottom bracket cable hanger, down tube cable hanger, left crank arm and front reflector. Everything cleaned and polished nicely. Most people prefer the cable hanger be part of the frame, but I have always like the chrome strapping type hangers. They have character and shine. Waiting on parts to arrive has really slowed me down, I am getting to the frustration point that I might mention there name on the blog. Next is to clean and polish the brakes and put on new brake pads. Then it is just waiting on parts.
 |
| Misc. Parts Before |
 |
| Seat Post Hanger Bolt & Tube Polished |
 |
| Bottom Bracket Cable Hanger Polished |
 |
| Down Tube Cable Hanger Polished |
 |
| Front Reflector Polished |
 |
| Crank Arm Polished |
Work on the front brake went very well. A polished brake caliper makes all the difference in the world, it really starts to bring the restoration together. It takes some patience to overhaul these old center pull brakes, there are 36 pieces per brake. These brakes where just slightly different than many of the brakes this type I have restored. I will be starting the Rear brake in a little while, I always need a brake after each caliper. It is 1:30 and still no UPS with parts.
 |
| Brake Calipers Before |
 |
| Front Brake Caliper Before |
 |
| Front Brake Caliper Exploded View |
 |
| Front Brake Polished Rear Brake Before |
 |
| Front Brake Caliper Installed |
 |
| Front Brake Caliper Installed |
I started work on the rear brake, but then got a knock at the door, it was UPS with half the parts, seat and brake levers. I couldn't wait to see the seat and levers on the bike so I put the rear brake on hold. I first had to polish the seat coupler, i have seen this area ignored before on restored bikes because it is mostly hidden by the seat, but I notice it right away, and it would not be a complete restoration if it wasn't overhauled. I am not even sure if it is called a coupler, but that is what i call it. With the coupler polished I installed the seat. It looks great, but I will be removing it after photos are taken to keep it clean during the rest of the restoration. With that complete I installed the modern brake levers. The bike is really starting to come together, just need that new front wheel to show up. I will post rear brake photos when it is complete. I need to rearrange my new shop better so I can get better overall views of the bike.
 |
| Rear Brake Exploded view |
 |
| Seat Coupler Before polishing |
 |
| Seat Coupler Polished |
 |
| Seat Installed - Looks Great |
Still no front wheel today, the company assured me that it is on its way. I started polishing the rear brake and noticed that one of the caliper arms had a broken area where the cable yoke attaches. Just the tiniest little fingers broken off, but enough that the cable does not seat properly. Maybe this is why the bikes seems to have so little use, it probably didn't stop well with the cable not seated properly. I tired to find a replacement arm in my collection of replacement parts but did not have one because the original caliper is actually of lesser quality then most. So my solution is to use a replacement caliper from my collection. This is a Weinmann 750 center pull brake amde in Switzerland, a very nice brake, better then the original. After polishing and installing the brake looks great. There is a photo where you can see the tiniest finger broken off, hard to see, but makes all the difference in the world. Tomorrow I hope finish off the shift levers and start running housing and cables. I just noticed in the photos that I have to polish and install the rear reflector.
 |
| Broken Caliper Arm |
 |
| Caliper From My Collection |
 |
| Caliper Exploded View |
 |
| Caliper Polished & Installed w/ New Brake Pads |
You may notice from the photos that the front wheel actually showed up today. I did not get as far as I would have liked today, life just did not allow it today. But I still have this evening if things go right. I Finished off the shift levers. I am not completely happy happy with the chrome. It shines fine, but it is thin and has some pits. I looked through my collection of parts and do not have a replacement one, I have a ton of Sun Tour Shift levers, but not a Schwinn. I do have pretty high standards. I ran the cable housing and cables, I am going to rerun the rear brake cable, I think the housing can be a little shorter. I always seem to have a first draft when I run housing.
The front wheel showed up, it is actually an alloy rim, I went back and looked and they say steel replacement rim in the description so I gave a call and they said that it is a misprint, It is actually alloy. I can not believe that the alloy rim and wheel cost so little, I run the same wheel on my Schwinn World Fixed gear, but nutted instead of quick release and it is a great wheel. I am a little worried about the rear wheel now, it looks great, but it is much heavier then the new front wheel. I hope to be finished soon, its in the home stretch, but now its all details, details take time but make the bike in the end.
 |
| Shift Levers Polished & Installed |
 |
| Cable, Cable Housing & Front Wheel Installed |
 |
| Cable & Cable Housing Installed |
 |
| Rear Derailleur Cable & Housing Installed |
I finished the bike today except for the test ride, tuning and a wipe down. I will post the photos of the final details later, but I wanted to get these up to be seen.
 |
| Schwinn Le Tour - Side View |
 |
| Schwinn Le Tour - Favorite Angle |
 |
| Schwinn Le Tour Front View |
 |
| Schwinn Le Tour - Rear View |
 |
| Schwinn Le Tour - Drive Train |
 |
| Schwinn Le Tour - Handle Bar View |
The bike is finished and David has picked it up. We had one small problem with a loose headset, the lock ring cam loose. David and I where discussing there might not be a better looking or better condition 38 year Le Tour out there. I absolutely love the red and white theme, I am a little jealous of it and am stepping up my search for a red Schwinn Superior for myself and to go with the red and white theme.
Thanks for looking, if you learned anything or found the post enjoying please do you Amazon shopping in the link at the top right corner of the blog. It helps support the blog and does not raise your Amazon prices. Thanks, John Z..


Love your work John, a good read, keep up the interesting articles. James from PerthVintageCycles.
ReplyDeleteThanks James,
ReplyDeleteI really enjoy your work also. I have been reading your blog for a while and love your work. I really love your Raleigh International all Brooksed out. I wish I could find one around here to restore.
Thanks,
John
Beautiful work! I have this same bike, given to me by my dad. It's been through several versions but now I've got mostly new components on it and use it to commute to work every day (37 miles round trip). It's a solid and comfortable bike.
ReplyDeleteThanks Ryan,
ReplyDeleteCool story about your Le Tour. Dave is currently, and like all of us continually tinkering with his. He is moving it in the direction of a Rivendell style bike.
Thanks for the interest.
John Z.
Great writeup and particularly useful to me as I just started to restore my own '74 Le Tour.
ReplyDeleteHoping you can help me with a small problem involving the headset.
I forgot to take pictures or notes during disassembly and can't recall the sequence
/location for a 2mm thk.spacer. From the photos it appears I have the same arrangement as your bike, including front brake and shifter brackets. Interesting to note my headset bearing and not loose but caged.
Thanks for any help. This is my first effort at bike work.
The 2 mm spacer goes on top of the top bearing race followed by the shift lever bracket and then the lock nut. Thanks for the interest.
DeleteJohn Z.
Thanks for the guidance. Can I just confirm the sequence again:
Delete- top bearing race cover
- 2mm spacer
- lock ring (didn't see this in your photo set)
- brake bracket
- shift lever bracket
- lock nut
Gary
Good work nice bicycle. I have a 1973 Schwinn Le Tour I found myself and plan to get it going. It will be my going to work and riding around town bicycle.
ReplyDeleteWhat a great finished product that red is lovely after all your work. I converted a Ladies version Le Tour to a city bike for my sister-in-law but have never worked on a Men's version - sharp bike.
ReplyDeleteBeautiful job...and I love all the documentation! One thing, though...you put the seat post on backwards. After all the great work you did, you didn't notice this when you took the photo with the saddle on.
ReplyDeleteCool
ReplyDelete