|
| Raleigh Olympic Mixtie - Starting Point |
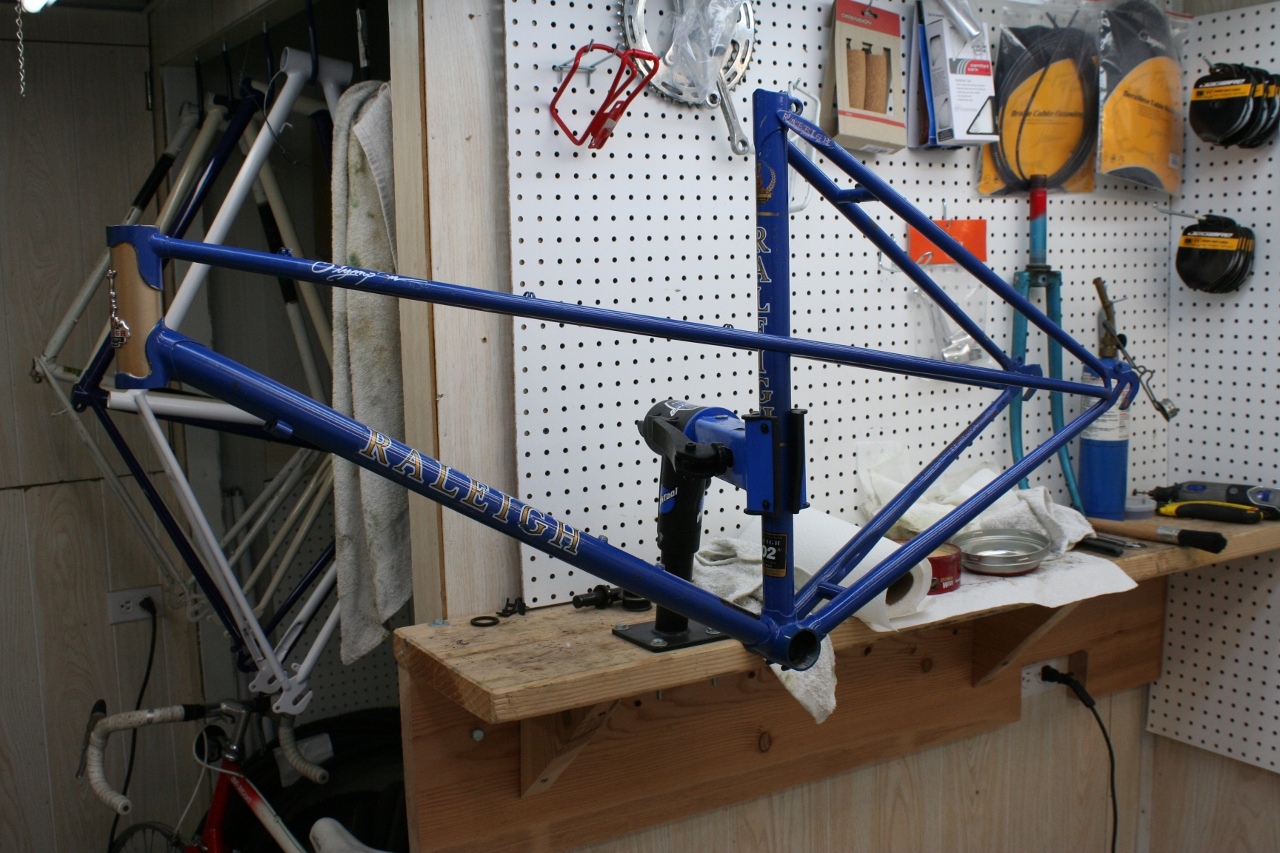
Hello, I have been working on Emmett's Raleigh Olympic mixtie for his wife. We stated with a Peugeot downer bike and a Gitane frame, but the french variances where just to much to get it to work out. So today we started with a Raleigh Olympic frame. The frame came with a bottom bracket, crank, stem, fork, brakes, derailleurs and shift levers. The plane for the bike is to turn it into a city style bicycle for comfort and again in my opinion looks so much better then a mixtie frame with drop bars.
The frame stripped down pretty easy of its parts. The bottom bracket lock ring was cross threaded just on the end of the bearing cup, the whole cup and lock ring came off as one, it took some creative use of a vise and bottom bracket tools to get the lock ring off.
The frame is in descent shape. There are a few scratches and rust spots that I will try to fill. The fork is not original and has an odd mismatched blue. I will be stripping the fork and polishing the metal to a shine with a clear coat cover, not exactly a chrome fork, but the effect will be close to it and will work better then trying to match the blue of the frame.
 |
| Raleigh Olympic Mixtie - Stripped of Parts - Dirty |
 |
| Raleigh Olympic Mixtie - Frame BB Dirty |
 |
| Raleigh Olympic Mixtie - Frame BB Polished |
 |
| Raleigh Olympic Mixtie - Frame Cleaned & Polished |
 |
Raleigh Olympic Mixtie - I Like Raleigh's
Head Badge |
I have the bottom bracket components and the headset components in the crock pot with the soapy water cleaning, tomorrow they will be ready for polishing and installation, although the headset won't be installed until the fork is stripped and polished.
I continued work on the Raleigh Olympic Mixtie. The bottom bracket cleaned up nicely in the crock pot and polished to a nice shine. I am glad the lock ring came off the bearing cup with not to much problems. The bottom bracket turns smoothly, a lot better then how it started.
 |
| Raleigh Olympic Mixtie - Bottom Bracket Polished |
 |
| Raleigh Olympic Mixtie - Bottom Bracket Bearings Packed |
 |
| Raleigh Olympic Mixtie - Bottom Bracket Complete |
While I worked on the bottom bracket and frame I had the fork sprayed with a foam paint stripper. I do not like to use chemicals, but at this time it is the easiest. I try to contain all the chemicals in a lined wash bin and then dispose of them at house hold chemical recycling days. I am not sure what is safer, mechanically removing paint wearing a respirator or chemicals with a respirator, soon i hope to have the media blaster set up in my new very small shop.
the first coat removed the top coat of rattle can blue someone put on it in the past leaving the red layer underneath. The red layer is a much stronger layer, it will take two to three coats of stripper. I started the stripper coat for the red layer but that is when it started raining hard the other day and the stripper foam would just wash away. With chemicals I only spray them out side, so I have to wait for a slight warmer day then today.
 |
| Raleigh Olympic Mixtie - Fork Before |
 |
Raleigh Olympic Mixtie -
Foam Stripper Applied |
 |
| Raleigh Olympic Mixtie - Paint Peeling |
 |
Raleigh Olympic Mixtie -
Red Layer Underneath |
With the bad weather for working outside I worked on the wheels. The rear wheel cleaned and polished up nicely. Besides thirty year old grease there was not much where on the hub. There was a little corrosion on the chromed axle pieces, on the buffing wheel the corrosion cleaned up but left some stains.
 |
| Raleigh Olympic Mixtie - Rear Wheel - Before |
 |
| Raleigh Olympic Mixtie - Rear Wheel Hub Before |
 |
| Raleigh Olympic Mixtie - Rear Wheel Complete & Installed |
 |
Raleigh Olympic Mixtie - Rear
Wheel Rim Polished |
Next is work on the front wheel and then the drive train. Hoping for a day a little above freezing to finish the fork, but that does not look like it will be anytime soon.
I can not find the photos for the front wheel, so I will have to take new after photos and load them up. The front wheel turned out nice, the alloy hub polished nicely and the chrome rim looks good, there is some wear in the hub, but not to bad, the wheel turns smooth.
I have been working on the fork, the fork is finally clean of paint, the layer of primer was very stubborn. With the fork cleaned I polished it of the buffing wheel and some hand polishing in the hard to reach areas. I have not clear coated the fork yet, I am using it now for mock up. There are a few spots on the fork that did not polish away, but overall not to bad.
 |
Raleigh Olympic Mixtie - Fork Stripped
Not Polished |
With the fork polished I started work on the stem and handlebars. The stem polished just okay, after a closer look there is some staining in the aluminum, after a good amount of patients and some hand polishing it does not look to bad, but not perfect. The handle bars are steel chromed. There is some pitting on the bends and there was some rust near the collar for lack of a better word. The rust has been removed from around the collar, but the chrome is damaged in that area. Again the handle bars are not perfect, but they are a lot better then when started.
 |
| Raleigh Olympic Mixtie - Stem and Handle Bars - Before |
I need to find what happen to some of the photos, they have to be in the cloud somewhere or I will retake some of them.
I also installed the new tires today, below are photos of the fork polished and installed and the stem and bars polished and installed and the bike overall to this point. Things will start to go fast now, drive train next.
 |
Raleigh Olympic Mixtie - Fork Polished and Installed
One More Polishing Needed |
 |
Raleigh Olympic Mixtie - Stem Polished
& Installed |
 |
| Raleigh Olympic Mixtie - Handle Bars Polished & Installed |
 |
| Raleigh Olympic Mixtie - Bicycle to this Point |
That is the bike to this point. If Emmett's wife likes the bike and it becomes a favorite I think a Repaint in a classic white or a lite blue with white cable housings would look really nice. Until later Have a good day.
Got a lot done on the Raleigh Olympic Mixtie lately. The derailleurs, crank and brake calipers are all done. Some where in rough shape and only so much could be done.
 |
| Raleigh Olympic Mixtie - Drive Train and Brake Calipers |
In the photo above you can see the front brake caliper on the left. There are some badly rusted parts along with the front derailleur on the right that is in rough shape. In the photo below you can see the brake calipers cleaned and polished. The front caliper is on the right. There was a lot of rust damage to the small parts. After a good deal of or they came out ok. The small parts have a kind of anodized look to them.
 |
| Raleigh Olympic Mixtie - Brake Calipers Polished |
The front derailleur was in rough shape. It took a lot of polishing and hand work and the derailleur did not function smoothly. After all said and done it looks pretty good and now functions perfectly.
 |
| Raleigh Olympic Mixtie - Front Derailleur Before |
 |
| Raleigh Olympic Mixtie - Front Derailleur Finished & installed |
The rear derailleur was also in somewhat of rough shape. There are some bad gouges in the alloy that are just to big to fix. The rear derailleur has been completely overhauled and polished. It now functions perfectly and looks descent. In the after photo below you can also see the pie plate polished and installled.
 |
| Raleigh Olympic Mixtie - Rear Derailleur Before |
 |
| Raleigh Olympic Mixtie - Rear Derailleur Overhauled & Installed |
The crank is a riveted and stamped crank. It can not be taken apart so it has been difficult to clean and polish. I polished it the best I could, it looks ok, not anywhere near perfect, but ok.
 |
| Raleigh Olympic Mixtie - Crank Polished & Installed |
Below are photos of the bicycle so far. Velo-Orange city brake levers have been installed. Emmett has ordered some bar grips and thumb shift levers. They should be here soon.
 |
| Raleigh Olympic Mixtie - Bicycle up to Now |
 |
| Raleigh Olympic Mixtie - Front Brake Installed |
 |
| Raleigh Olympic Mixtie - Rear Brake Installed |
 |
| Raleigh Olympic Mixtie - Brake Levers Installed |
It has been slow going for a while on the Raleigh Olympic. Clear coating the fork took some time, had a few problems that would require start overs. The fork clear coat did turn out pretty nice when it was all said and done, a couple more days of letting the clear harden and it can be polished out.
With the fork cleared everything started to go together pretty fast, the index shifting levers where installed, the cable housing and cables run and the leather handle bar grips installed. When it came to tuning the bike things got a little rough, with the chain installed it could be seen that the rear derailleur had about three bends in it. I tried to straighten it out, but could not get the bends out enough to shift smoothly. Emmett has a few other derailleurs that we are going to try.
 |
| Raleigh Olympic Mixtie - Cables Run |
The freewheel and peddles where installed. The freewheel was in rough shape but after an overhaul really spins nice, I am pleased with the results. Emmett had a set of very nice peddles but one of them did nut spin smoothly. After trying to overhaul the peddle it is just to far gone. I had some nice peddles in my stash of parts and they cleaned up very nice and spin great. In the photo below you can see the freewheel and peddles.
 |
| Raleigh Olympic Mixtie - Freewheel & Peddles Installed |
 |
| Raleigh Olympic Mixtie - Front View |
 |
| Raleigh Olympic Mixtie - Bike 99% Complete |
In the photos you can also see that the saddle has been installed. The bike is about 99% complete. Need to pick out a new derailleur, clip the cables and tune and test ride. I here its suppose to be in the 50's this weekend, maybe it will melt some of this snow for a descent test ride. It will also help in taking some descent after photos.
Well, after a lot of derailleur tries and a few different freewheels and finally got a combination that works nice. I also installed the rear rack and a few odds and ends. The test ride was nice, it road very nice, shifting I would say is about 95% of perfect, for the way it needed to be set up and using some late 80's mountain bike components to get index shifting 95% is pretty good.
 |
| Raleigh Olympic Mixtie - Finished Bicycle - Side |
 |
| Raleigh Olympic Mixtie - Finished Bicycle - Angle View |
 |
| Raleigh Olympic Mixtie - Finished Bicycle - Handlebar View |
 |
| Raleigh Olympic Mixtie - Finished Bicycle - Drive Train |
 |
| Raleigh Olympic Mixtie - Finished Bicycle - Rear View |