 |
| Bill's 1963 Schwinn Racer De Luxe Restoration Bicycle After Restoration |
This is Bill's 1963 Schwinn Racer. He brought it to me from Green Bay a week or two ago for a total restoration. The Schwinn Racer has the best story of all, it was bought for him by his parents when he was a kid and he still has it after all this time!
For the Schwinn 3 speeds this is my favorite color scheme. The black with the white decals and the red white and blue stripes is awesome!! Besides the color I just plain love 3 speed bicycles. There is nothing quite like a well tuned steel three speed and going out riding all day. A 3 speed bicycles is also a work horse and can do all kinds of errands around town.
The Schwinn Racer is in pretty descent starting shape. Bill has done some cleaning and a little polishing already. The Schwinn Racer De Luxe will receive a total restoration with new powder coat paint, new decals, new tires, new tire tubes and new cables and housings. There is some rough chrome here and there but that should come back pretty good.
 |
| Bill's 1963 Schwinn Racer De Luxe Restoration - Bicycle Before |
 |
| Bill's 1963 Schwinn Racer De Luxe Restoration - Bicycle Before |
 |
| Bill's 1963 Schwinn Racer De Luxe Restoration - Bicycle Before Handlebars |
 |
| Bill's 1963 Schwinn Racer De Luxe Restoration - Bicycle Before Stem |
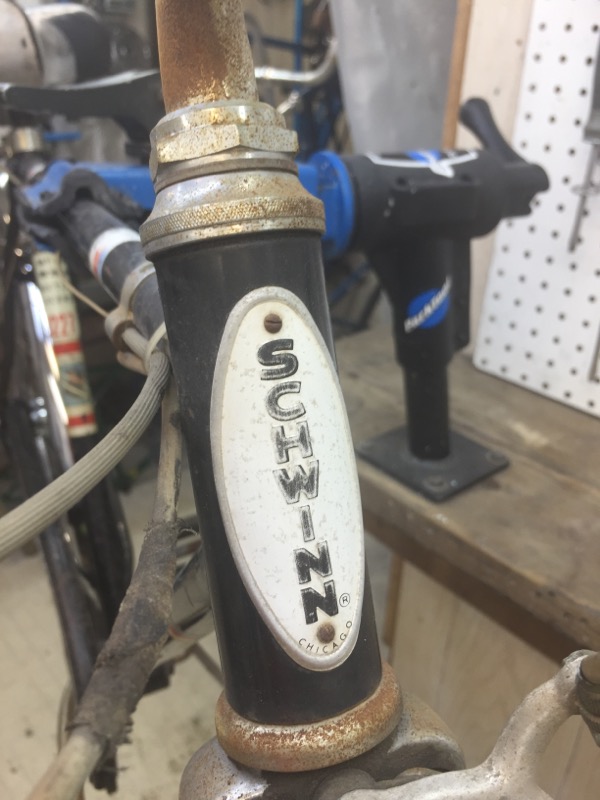 |
| Bill's 1963 Schwinn Racer De Luxe Restoration - Bicycle Before Head Tube |
 |
| Bill's 1963 Schwinn Racer De Luxe Restoration - Bicycle Before Front Brake |
 |
| Bill's 1963 Schwinn Racer De Luxe Restoration - Bicycle Before Front Wheel Hub - Cool Schwinn Script |
 |
| Bill's 1963 Schwinn Racer De Luxe Restoration - Bicycle Before Front Wheel Rim |
 |
| Bill's 1963 Schwinn Racer De Luxe Restoration - Bicycle Before Brake Lever & Shift Lever |
 |
| Bill's 1963 Schwinn Racer De Luxe Restoration - Bicycle Before Head Tube |
 |
| Bill's 1963 Schwinn Racer De Luxe Restoration - Bicycle Before Fork Crown |
 |
| Bill's 1963 Schwinn Racer De Luxe Restoration - Bicycle Before Front Fender |
 |
| Bill's 1963 Schwinn Racer De Luxe Restoration - Bicycle Before Head Tube |
 |
| Bill's 1963 Schwinn Racer De Luxe Restoration - Bicycle Before Top Tube Brackets |
 |
| Bill's 1963 Schwinn Racer De Luxe Restoration - Bicycle Before Down Tube Decals |
 |
| Bill's 1963 Schwinn Racer De Luxe Restoration - Bicycle Before Top Tube Decal |
 |
| Bill's 1963 Schwinn Racer De Luxe Restoration - Bicycle Before Three Speed Bracket |
 |
| Bill's 1963 Schwinn Racer De Luxe Restoration - Bicycle Before Saddle |
 |
| Bill's 1963 Schwinn Racer De Luxe Restoration - Bicycle Before Seat Tube Decals |
 |
| Bill's 1963 Schwinn Racer De Luxe Restoration - Bicycle Before Bottom Bracket |
 |
| Bill's 1963 Schwinn Racer De Luxe Restoration - Bicycle Before Drive Train |
 |
| Bill's 1963 Schwinn Racer De Luxe Restoration - Bicycle Before Crank |
 |
| Bill's 1963 Schwinn Racer De Luxe Restoration - Bicycle Before Pedal |
 |
| Bill's 1963 Schwinn Racer De Luxe Restoration - Bicycle Before Rear Brake |
 |
| Bill's 1963 Schwinn Racer De Luxe Restoration - Bicycle Before Rear Fender Struts |
 |
| Bill's 1963 Schwinn Racer De Luxe Restoration - Bicycle Before Rear Fender Strut |
 |
| Bill's 1963 Schwinn Racer De Luxe Restoration - Bicycle Before Rear Wheel Hub |
 |
| Bill's 1963 Schwinn Racer De Luxe Restoration - Bicycle Before Rear Wheel Hub |
 |
| Bill's 1963 Schwinn Racer De Luxe Restoration - Bicycle Before Rear Wheel Rim |
 |
| Bill's 1963 Schwinn Racer De Luxe Restoration - Bicycle Before Rear Fender |
I stripped the components from the frame. It really is a coll frame with all that black and decals! The paint is rough which is why the new powder coat paint.
 |
| Bill's 1963 Schwinn Racer De Luxe Restoration - Frame Before |
 |
| Bill's 1963 Schwinn Racer De Luxe Restoration - Frame Before Head Tube |
 |
| Bill's 1963 Schwinn Racer De Luxe Restoration - Frame Before Head Tube |
 |
| Bill's 1963 Schwinn Racer De Luxe Restoration - Frame Before Head Tube |
 |
| Bill's 1963 Schwinn Racer De Luxe Restoration - Frame Before Down Tube Deca |
 |
| Bill's 1963 Schwinn Racer De Luxe Restoration - Frame Before Down Tube |
 |
| Bill's 1963 Schwinn Racer De Luxe Restoration - Frame Before Top Tube |
 |
| Bill's 1963 Schwinn Racer De Luxe Restoration - Frame Before Seat Tube |
 |
| Bill's 1963 Schwinn Racer De Luxe Restoration - Frame Before Seat Tube |
 |
| Bill's 1963 Schwinn Racer De Luxe Restoration - Frame Before Bottom Bracket |
 |
| Bill's 1963 Schwinn Racer De Luxe Restoration - Frame Before Bottom Bracket |
 |
| Bill's 1963 Schwinn Racer De Luxe Restoration - Frame Before Bottom Bracket |
 |
| Bill's 1963 Schwinn Racer De Luxe Restoration - Frame Before Seat Stays |
 |
| Bill's 1963 Schwinn Racer De Luxe Restoration - Frame Before Chain Stays |
 |
| Bill's 1963 Schwinn Racer De Luxe Restoration - Frame Before Drop Tubes |
 |
| Bill's 1963 Schwinn Racer De Luxe Restoration - Frame Before Fork |
 |
| Bill's 1963 Schwinn Racer De Luxe Restoration - Frame Before Fork Crown |
 |
| Bill's 1963 Schwinn Racer De Luxe Restoration - Frame Before Fork Crown |
 |
| Bill's 1963 Schwinn Racer De Luxe Restoration - Frame Before Fork Crown |
 |
| Bill's 1963 Schwinn Racer De Luxe Restoration - Frame Before Fork Blades |
 |
| Bill's 1963 Schwinn Racer De Luxe Restoration - Frame Before Fork Drop Outs |
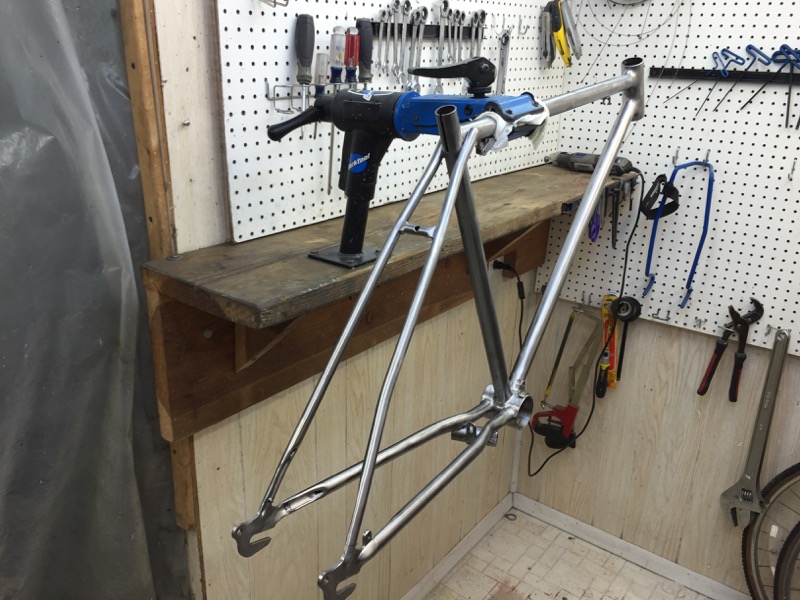
The paint was stubborn. It must be all those now illegals chemicals that where in the paint back then. But I am happy those chemicals are gone. I also wear a lot of skin and breathing protection when stripping the paint. The paint eventually removed and then I prepared the frame for powder coat. The photos below are of the frame prepared. It is a cool looking frame with no paint too!
 |
| Bill's 1963 Schwinn Racer De Luxe Restoration - Frame Prepared |
 |
| Bill's 1963 Schwinn Racer De Luxe Restoration - Frame Prepared Head Tube |
 |
| Bill's 1963 Schwinn Racer De Luxe Restoration - Frame Prepared Head Tube |
 |
| Bill's 1963 Schwinn Racer De Luxe Restoration - Frame Prepared Head Tube |
 |
| Bill's 1963 Schwinn Racer De Luxe Restoration - Frame Prepared Top Tube |
 |
| Bill's 1963 Schwinn Racer De Luxe Restoration - Frame Prepared Seat Lug Area |
 |
| Bill's 1963 Schwinn Racer De Luxe Restoration - Frame Prepared Bottom Bracket |
 |
| Bill's 1963 Schwinn Racer De Luxe Restoration - Frame Prepared Bottom Bracket |
 |
| Bill's 1963 Schwinn Racer De Luxe Restoration - Frame Prepared Bottom Bracket |
 |
| Bill's 1963 Schwinn Racer De Luxe Restoration - Frame Prepared Seat Stays |
 |
| Bill's 1963 Schwinn Racer De Luxe Restoration - Frame Prepared Drop Outs |
 |
| Bill's 1963 Schwinn Racer De Luxe Restoration - Frame Prepared |
 |
| Bill's 1963 Schwinn Racer De Luxe Restoration - Frame Prepared Fork |
 |
| Bill's 1963 Schwinn Racer De Luxe Restoration - Frame Prepared Fork Crown |
 |
| Bill's 1963 Schwinn Racer De Luxe Restoration - Frame Prepared Fork Crown |
 |
| Bill's 1963 Schwinn Racer De Luxe Restoration - Frame Prepared Fork Blades |
 |
| Bill's 1963 Schwinn Racer De Luxe Restoration - Frame Prepared Fork Drop Outs |
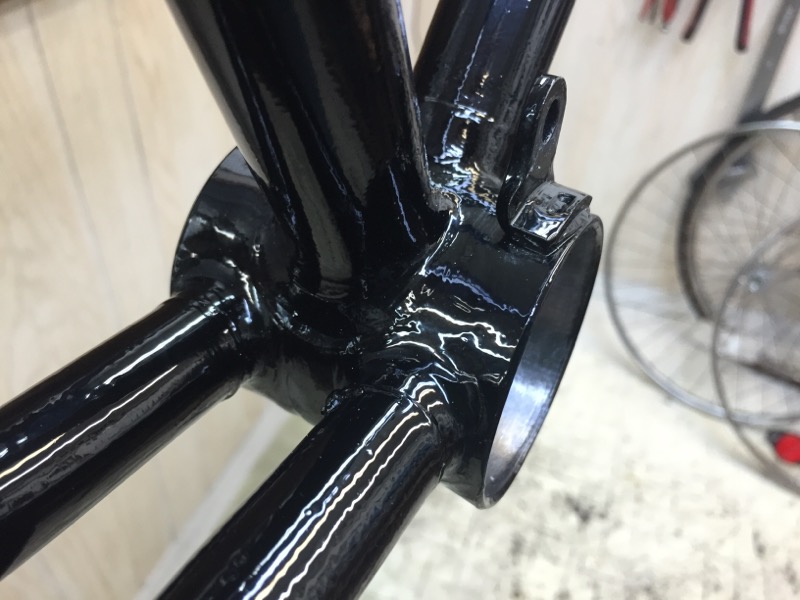
I completed the black powder coat paint on the frame and fork. I actually painted the fork and frame twice. The first time through things turned out fine but just not quite where I like the paint to be so I sprayed paint stripper and removed the powder coat.
Like I mentioned the first time through was a fine powder coat paint job but there was just something that was not striking me well. I think it was the way the powder are laying on the somewhat rough Schwinn frame tubing that was bugging me. The second time through the paint turned better then fine. it turned out fantastic!! The black is a deep dark black with a high luster and it lays on the frame tubing so much better. I love it!! I am so happy with the results!!
With the fork powder paint done I polished the fork crown cap. There was a few small bad areas but after polishing the fork crown cap looks great and even better installed with the new black paint.
Now started the very exciting time for me. When a frame has been repainted and the color is bright and new and I get to start installing the restored polished components. It is very exciting!! For me anyways...
Like I mentioned the first time through was a fine powder coat paint job but there was just something that was not striking me well. I think it was the way the powder are laying on the somewhat rough Schwinn frame tubing that was bugging me. The second time through the paint turned better then fine. it turned out fantastic!! The black is a deep dark black with a high luster and it lays on the frame tubing so much better. I love it!! I am so happy with the results!!
 |
| Bill's 1963 Schwinn Racer De Luxe Restoration - Frame Paint Complete |
 |
| Bill's 1963 Schwinn Racer De Luxe Restoration - Frame Paint Complete - Head Tube |
 |
| Bill's 1963 Schwinn Racer De Luxe Restoration - Frame Paint Complete - Head Tube |
 |
| Bill's 1963 Schwinn Racer De Luxe Restoration - Frame Paint Complete - Seat Lug |
 |
| Bill's 1963 Schwinn Racer De Luxe Restoration - Frame Paint Complete - Bottom Bracket |
 |
| Bill's 1963 Schwinn Racer De Luxe Restoration - Frame Paint Complete - Bottom Bracket |
 |
| Bill's 1963 Schwinn Racer De Luxe Restoration - Frame Paint Complete - Bottom Bracket |
 |
| Bill's 1963 Schwinn Racer De Luxe Restoration - Frame Paint Complete - Seat Lug |
 |
| Bill's 1963 Schwinn Racer De Luxe Restoration - Frame Paint Complete - Chain Stays |
 |
| Bill's 1963 Schwinn Racer De Luxe Restoration - Frame Paint Complete - Drop Outs |
 |
| Bill's 1963 Schwinn Racer De Luxe Restoration - Frame Paint Complete - Fork |
 |
| Bill's 1963 Schwinn Racer De Luxe Restoration - Frame Paint Complete - Fork Crown |
 |
| Bill's 1963 Schwinn Racer De Luxe Restoration - Frame Paint Complete - Fork Blades |
 |
| Bill's 1963 Schwinn Racer De Luxe Restoration - Frame Paint Complete - Fork Crown |
 |
| Bill's 1963 Schwinn Racer De Luxe Restoration - Frame Paint Complete - Drop Outs |
With the fork powder paint done I polished the fork crown cap. There was a few small bad areas but after polishing the fork crown cap looks great and even better installed with the new black paint.
 |
| Bill's 1963 Schwinn Racer De Luxe Restoration - Fork Crown Polished |
 |
| Bill's 1963 Schwinn Racer De Luxe Restoration Fork Crown - Polished |
 |
| Bill's 1963 Schwinn Racer De Luxe Restoration - Fork Crown Cap Installed |
 |
| Bill's 1963 Schwinn Racer De Luxe Restoration Fork Crown Cap - Installed |
Now started the very exciting time for me. When a frame has been repainted and the color is bright and new and I get to start installing the restored polished components. It is very exciting!! For me anyways...
I started with the head badge. The head badge is a little rough. I cleaned it the best it would. The after photo isn't great but the head badge does look a little better. Installed the head badge looks great against the new black paint. The head badge could be replaced but I like the rough head badge in a way. The rough head badge is the original head badge and it still shows all the miles the Breeze has seen. It kind of connects the past with the the restoration.
 |
| Bill's 1963 Schwinn Racer De Luxe Restoration - Head Badge Before |
 |
| Bill's 1963 Schwinn Racer De Luxe Restoration - Head Badge Cleaned |
 |
| Bill's 1963 Schwinn Racer De Luxe Restoration Head Badge - Installed |
 |
| Bill's 1963 Schwinn Racer De Luxe Restoration Head Badge - Installed |
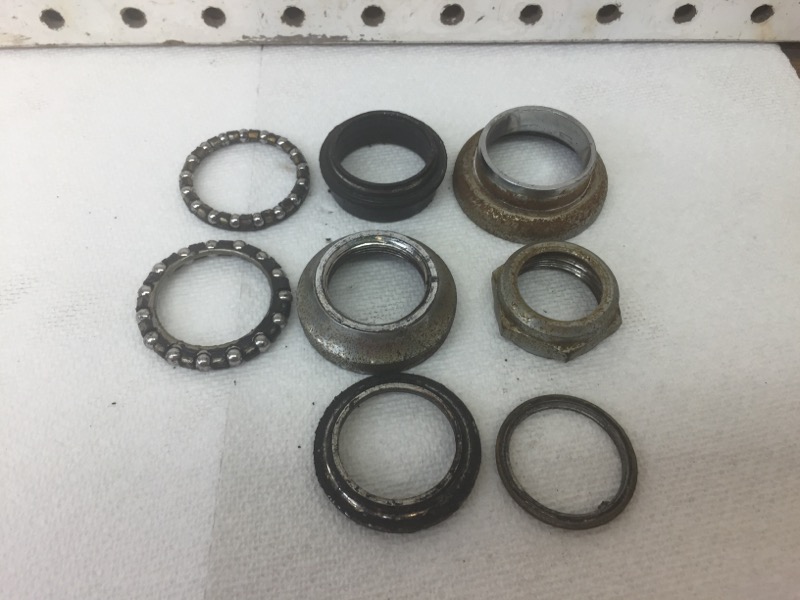
Now it is time for the headset. Things will really start to come together and all the new will shine. The headset is my favorite Schwinn headset ever made. It functions great with the heavy duty bearings but it is the shape I really like. The curved bearing race is my favorite. Usually this headset is covered up by the Schwinn Big Stick shift levers but being a three speed the headset is exposed. The headset polished beautifully!! Especially considering the rough start it was in. The new bearings packed in new grease has the headset functioning extremely smooth! I love the chrome and black of everything coming together!
 |
| Bill's 1963 Schwinn Racer De Luxe Restoration - Headset Before |
 |
| Bill's 1963 Schwinn Racer De Luxe Restoration - Headset Polished |
 |
| Bill's 1963 Schwinn Racer De Luxe Restoration Pressing Headset Cups |
 |
| Bill's 1963 Schwinn Racer De Luxe Restoration Headset Cups - Pressed |
 |
| Bill's 1963 Schwinn Racer De Luxe Restoration - Headset Bearings Packed |
 |
| Bill's 1963 Schwinn Racer De Luxe Restoration Head Set - Complete |
 |
| Bill's 1963 Schwinn Racer De Luxe Restoration Headset - Complete |
 |
| Bill's 1963 Schwinn Racer De Luxe Restoration - Headset Complete |
 |
| Bill's 1963 Schwinn Racer De Luxe Restoration - Stem & Handlebars Before |
 |
| Bill's 1963 Schwinn Racer De Luxe Restoration Stem & Handlebars - Before |
 |
| Bill's 1963 Schwinn Racer De Luxe Restoration - Stem & Handlebars Before |
 |
| Bill's 1963 Schwinn Racer De Luxe Restoration - Stem & Handlebars Before |
 |
| Bill's 1963 Schwinn Racer De Luxe Restoration - Handlebars Before |
 |
| Bill's 1963 Schwinn Racer De Luxe Restoration - Handlebars Before |
 |
| Bill's 1963 Schwinn Racer De Luxe Restoration - Stem Before |
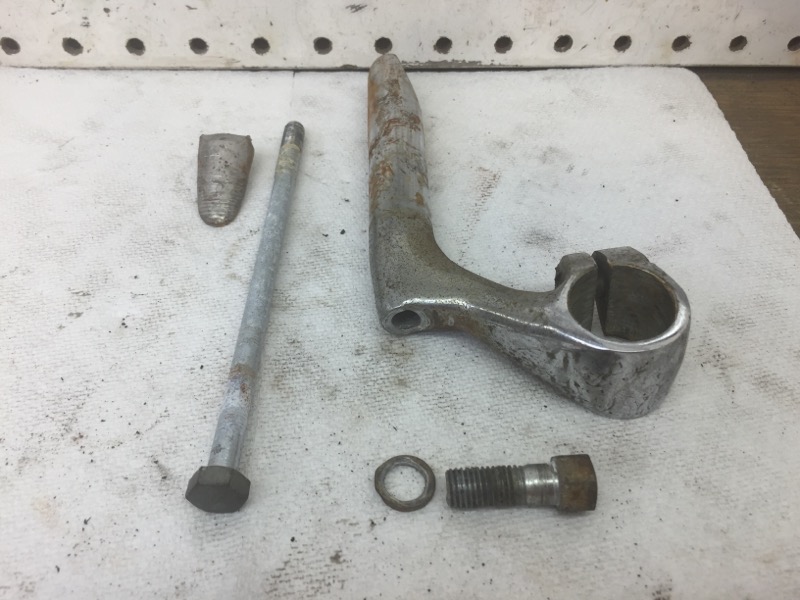 |
| Bill's 1963 Schwinn Racer De Luxe Restoration - Stem Exploded |
 |
| Bill's 1963 Schwinn Racer De Luxe Restoration - Stem Before |
 |
| Bill's 1963 Schwinn Racer De Luxe Restoration - Stem & Handlebars Polished |
 |
| Bill's 1963 Schwinn Racer De Luxe Restoration - Handlebars Polished |
 |
| Bill's 1963 Schwinn Racer De Luxe Restoration - Stem Polished |
 |
| Bill's 1963 Schwinn Racer De Luxe Restoration - Stem Polished |
 |
| Bill's 1963 Schwinn Racer De Luxe Restoration Stem & Handlebars - Compelte |
 |
| Bill's 1963 Schwinn Racer De Luxe Restoration - Stem & Handlebars Complete |
 |
| Bill's 1963 Schwinn Racer De Luxe Restoration Stem & Handlebars - Complete |
 |
| Bill's 1963 Schwinn Racer De Luxe Restoration - Stem & Handlebars Complete |
The saddle and stem are actually in fairly good shape for their age. The seat collar is going to need to be replaced. In the second photo below you can see all the notches that allow the seat to be adjusted in the tilt direction are all worn away. I will have to go into parts storage and see if I have one that will work. The seat post polished beautifully and the seat post collar polished beautifully as well. There is nothing like polished chrome and alloy against bright black paint.
 |
| Bill's 1963 Schwinn Racer De Luxe Restoration - Seat Post & Saddle Before |
 |
| Bill's 1963 Schwinn Racer De Luxe Restoration - Seat Post Before Worn Out Seat Collar |
 |
| Bill's 1963 Schwinn Racer De Luxe Restoration - Seat Binder Collar Before |
 |
| Bill's 1963 Schwinn Racer De Luxe Restoration - Seat Binder Collar Before |
 |
| Bill's 1963 Schwinn Racer De Luxe Restoration - Seat Post & Seat Binder Collar - Polished |
 |
| Bill's 1963 Schwinn Racer De Luxe Restoration Seat Post - Complete |
Next I worked on the brake levers and the Sturmey Archer 3 speed shifter. The brake levers polished beautifully! These brake levers always polish beautifully. The Sturmey Archer shift lever polished very nice. The original shift levers like these are so much nicer then today's replacements. Everything is coming together wonderfully!
 |
| Bill's 1963 Schwinn Racer De Luxe Restoration - Brake Levers Before |
 |
| Bill's 1963 Schwinn Racer De Luxe Restoration - Shift Lever Before |
 |
| Bill's 1963 Schwinn Racer De Luxe Restoration - Brake & Shift Levers Polished |
 |
| Bill's 1963 Schwinn Racer De Luxe Restoration - Shift Lever Complete |
 |
| Bill's 1963 Schwinn Racer De Luxe Restoration - Brake & Shift Lever Complete |
 |
| Bill's 1963 Schwinn Racer De Luxe Restoration - 3 Speed Shift Lever - Complete |
 |
| Bill's 1963 Schwinn Racer De Luxe Restoration - Brake & Shift Levers Complete |
The brake calipers are rough to start with. A few of the washer shims are either missing or broken. I disassembled the brake calipers and polished all of the pieces. I replaced the broken and missing washer shims and installed new brake pads. The brake calipers turned out fantastic and look amazing installed. I am very proud of the results of the brake calipers.
 |
| Bill's 1963 Schwinn Racer De Luxe Restoration - Brake Calipers Before |
 |
| Bill's 1963 Schwinn Racer De Luxe Restoration - Brake Calipers Exploded |
 |
| Bill's 1963 Schwinn Racer De Luxe Restoration - Brake Calipers Polished |
 |
| Bill's 1963 Schwinn Racer De Luxe Restoration - Brake Calipers Complete |
 |
| Bill's 1963 Schwinn Racer De Luxe Restoration Front Brake Caliper - Installed |
 |
| Bill's 1963 Schwinn Racer De Luxe Restoration Rear Brake Caliper - Installed |
 |
| Bill's 1963 Schwinn Racer De Luxe Restoration - Bottom Bracket Before |
 |
| Bill's 1963 Schwinn Racer De Luxe Restoration - Crank Before |
 |
| Bill's 1963 Schwinn Racer De Luxe Restoration - Crank - Before |
 |
| Bill's 1963 Schwinn Racer De Luxe Restoration - Crank & Bottom Bracket Polished |
 |
| Bill's 1963 Schwinn Racer De Luxe Restoration - Pressing Bottom Bracket Cups |
 |
| Bill's 1963 Schwinn Racer De Luxe Restoration - Bottom Bracket Cup Installed |
 |
| Bill's 1963 Schwinn Racer De Luxe Restoration - Crank Complete |
 |
| Bill's 1963 Schwinn Racer De Luxe Restoration - Crank Complete |
 |
| Bill's 1963 Schwinn Racer De Luxe Restoration - Crank Complete |
 |
| Bill's 1963 Schwinn Racer De Luxe Restoration - Shift Cable Bracket Before |
 |
| Bill's 1963 Schwinn Racer De Luxe Restoration - Shift Cable Bracket Exploded |
 |
| Bill's 1963 Schwinn Racer De Luxe Restoration - Shift Cable Bracket Polished - New & Old Plastic Stop |
 |
| Bill's 1963 Schwinn Racer De Luxe Restoration - Cable Bracket Installed |
Last thing for now is the handlebar grips. The handlebar grips are worn down in spots but will clean very nice and will have a little luster after treatment. The grips look great installed!
 |
| Bill's 1963 Schwinn Racer De Luxe Restoration - Handlebars Grips Before |
 |
| Bill's 1963 Schwinn Racer De Luxe Restoration - Handlebars Grips Ready |
 |
| Bill's 1963 Schwinn Racer De Luxe Restoration - Handlebars Grips Installed |
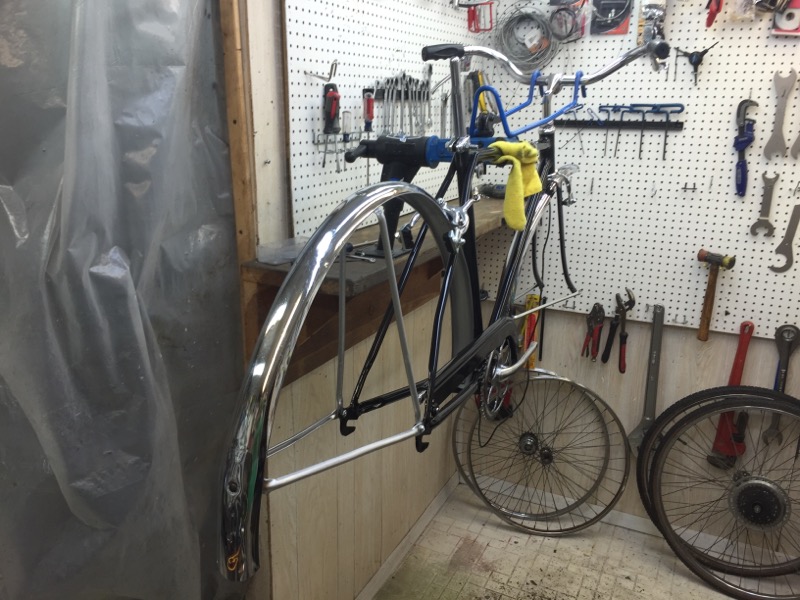
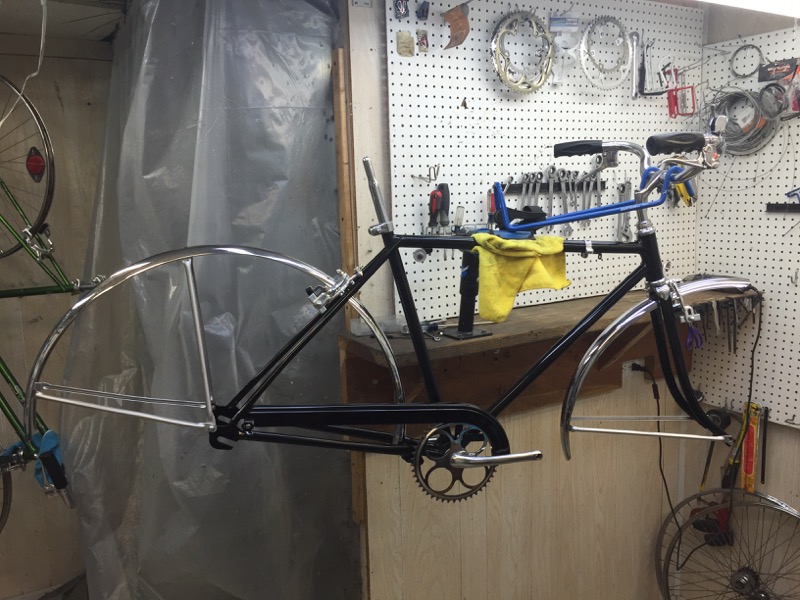
That is all for now. I have the chain guard soaking in paint stripper and then I will hit the underside of the chain guard with the sand blaster cabinet just to clean it up. A lot of rust can form on the underside and its best to make sure its all gone before powder coating. I am also soaking the front wheel rim in a rust removal solution. Below is a a photo of the bicycle so far and then a photo of the head tube area just because I really like it.
 |
| Bill's 1963 Schwinn Racer De Luxe Restoration - Bicycle So Far |
 |
| Bill's 1963 Schwinn Racer De Luxe Restoration A Photo just because I really like it and all the chrome and black! |
I installed the three speed bracket wheel. The main screw is a little rough even after polishing but it looks better then it did. This is a hard screw to replace because it is a specialized screw. Looks so much better cleaned and the new paint.
 |
| Bill's 1963 Schwinn Racer De Luxe Restoration Three Speed Bracket Wheel - Installed |
I started work on the chain guard a few days ago. The red primer under the black proved to b e stubborn. With the paint removed I prepped the surface. The chain guard turned out very nice. Chain guards take a beating from use and from rust on the inside but the rust did not do much damage after sand blasting and the chain guard is still pretty straight. Black shows all the dents and crooked bends in metal so I am very happy with the final results!!
 |
| Bill's 1963 Schwinn Racer De Luxe Restoration Chain Guard Before |
 |
| Bill's 1963 Schwinn Racer De Luxe Restoration Chain Guard Painted |
 |
| Bill's 1963 Schwinn Racer De Luxe Restoration Chain Guard Installed |
I really like the looks of this bike. I am a 3 speed guy to start but all that black and chrome is so nice!
 |
| Bill's 1963 Schwinn Racer De Luxe Restoration Chain Guard Complete - Beautiful!! |
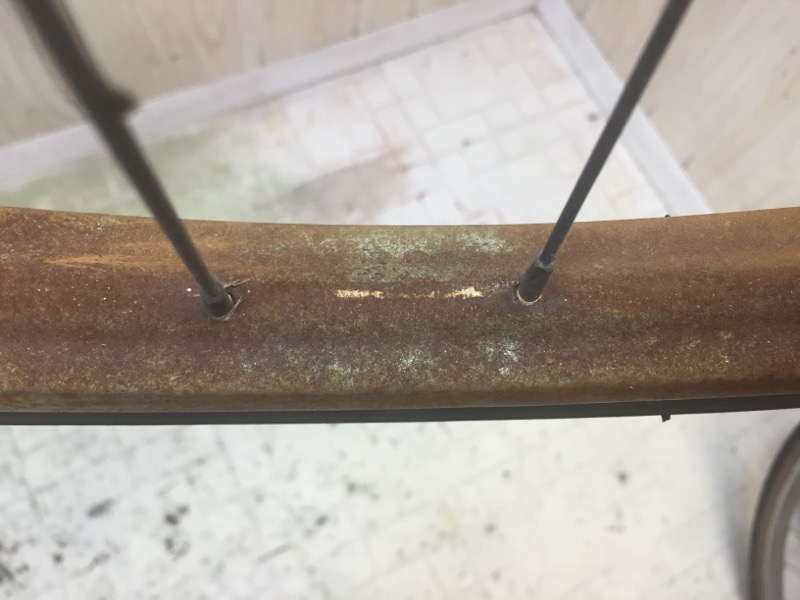
The front wheel rim is rough, there is no way around it. The rust is very thick in places and the there is not much left of the top chrome layer. I have started the rust removal process and see how the rim turns out. The wheel hub is in descent starting shape although dull and a lot of dried hard grease. I love the script they used in stamping "Schwinn" in the wheel hub.
The rear wheel is in very good shape. It is amazing the difference in the two wheels being stored together for all the time. So far I have done just a little cleaning on the rear wheel. I will overhaul the hub a little later and polish out everything.
 |
| Bill's 1963 Schwinn Racer De Luxe Restoration Front Wheel Before |
 |
| Bill's 1963 Schwinn Racer De Luxe Restoration Front Wheel Hub - Before |
 |
| Bill's 1963 Schwinn Racer De Luxe Restoration Front Wheel Hub - Before |
 |
| Bill's 1963 Schwinn Racer De Luxe Restoration Front Wheel Rim - Before |
 |
| Bill's 1963 Schwinn Racer De Luxe Restoration Front Wheel Rim - Before - Curb Dent |
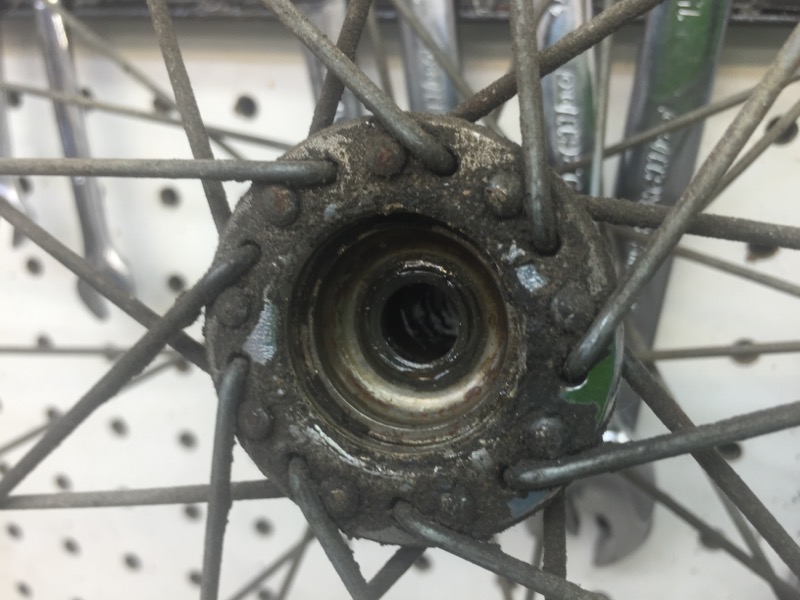 |
| Bill's 1963 Schwinn Racer De Luxe Restoration Front Wheel Hub - Old Grease |
 |
| Bill's 1963 Schwinn Racer De Luxe Restoration Rear Wheel - Before |
 |
| Bill's 1963 Schwinn Racer De Luxe Restoration Rear Wheel Hub - Before |
 |
| Bill's 1963 Schwinn Racer De Luxe Restoration Rear Wheel Hub - Before |
 |
| Bill's 1963 Schwinn Racer De Luxe Restoration Rear Wheel Rim - Before |
 |
| Bill's 1963 Schwinn Racer De Luxe Restoration Rear Wheel Hub - Before |
 |
| Bill's 1963 Schwinn Racer De Luxe Restoration Rear Wheel Hub - Before |
The wheels have been a slow process, soaking the front wheel to remove rust. While I am working on the wheels I started work on the fenders. The outer section of the fenders are in really good shape, the inner side is not so good. The side of the fender that is close to the wheels takes a beating over time. I cleaned the inside of the fenders and removed the rust. There was some damage to the chrome on the underside, actually a lot of chrome damage.
My solution to the damage on the underside is to paint just the underside with a rust preventative primer and a silver paint. This will keep the damaged areas from forming rust again. I masked off the fenders and then applied the primer and silver paint. I think the fenders turned out fantastic doing this. Along with the fender struts being painted the fenders are almost like new again.
The rear fender reflector is in fantastic shape considering most of these reflectors where easily broken off. I polished the edges of the reflector and clean the plastic. The reflector looks great installed.
Overall I am thrilled with the fenders, they look fantastic with the new black paint. It doesn't get much better then this! Oh, I also pounded out a few dents and straightened the fender struts.
 |
| Bill's 1963 Schwinn Racer De Luxe Restoration Rear Fender - Before |
 |
| Bill's 1963 Schwinn Racer De Luxe Restoration Rear Fender Struts - Before |
 |
| Bill's 1963 Schwinn Racer De Luxe Restoration Rear Fender Struts - Before |
 |
| Bill's 1963 Schwinn Racer De Luxe Restoration Rear Fender Strut - Before |
 |
| Bill's 1963 Schwinn Racer De Luxe Restoration Rear Fender Underside - Before |
 |
| Bill's 1963 Schwinn Racer De Luxe Restoration Dent In Rear Fender |
 |
| Bill's 1963 Schwinn Racer De Luxe Restoration Dent In Rear Fender |
 |
| Bill's 1963 Schwinn Racer De Luxe Restoration Fenders Masked for Paint |
 |
| Bill's 1963 Schwinn Racer De Luxe Restoration Rear Fender - Complete |
 |
| Bill's 1963 Schwinn Racer De Luxe Restoration Rear Fender Struts - Painted |
 |
| Bill's 1963 Schwinn Racer De Luxe Restoration Under Side Of Rear Fender - Painted |
 |
| Bill's 1963 Schwinn Racer De Luxe Restoration Rear Fender - Polished |
 |
| Bill's 1963 Schwinn Racer De Luxe Restoration Rear Fender - Polished |
 |
| Bill's 1963 Schwinn Racer De Luxe Restoration Rear Fender - Complete |
 |
| Bill's 1963 Schwinn Racer De Luxe Restoration Rear Fender - Complete |
 |
| Bill's 1963 Schwinn Racer De Luxe Restoration Front Fender - Before |
 |
| Bill's 1963 Schwinn Racer De Luxe Restoration Front Fender Strut - Before |
 |
| Bill's 1963 Schwinn Racer De Luxe Restoration Front Fender - Before |
 |
| Bill's 1963 Schwinn Racer De Luxe Restoration Front Fender Strut - Painted - Masking not removed. |
 |
| Bill's 1963 Schwinn Racer De Luxe Restoration Front Fender Strut - Paintes |
 |
| Bill's 1963 Schwinn Racer De Luxe Restoration Front Fender - Underside Painted |
 |
| Bill's 1963 Schwinn Racer De Luxe Restoration Front Fender - Polished |
 |
| Bill's 1963 Schwinn Racer De Luxe Restoration Front Fender - Polished |
 |
| Bill's 1963 Schwinn Racer De Luxe Restoration Front Fender - Complete |
 |
| Bill's 1963 Schwinn Racer De Luxe Restoration Rear Reflector - Polished |
 |
| Bill's 1963 Schwinn Racer De Luxe Restoration Rear Reflector - Installed |
 |
| Bill's 1963 Schwinn Racer De Luxe Restoration Fenders - Complete |
 |
| Bill's 1963 Schwinn Racer De Luxe Restoration Fenders - Complete |
 |
| Bill's 1963 Schwinn Racer De Luxe Restoration New Brake Cables & Cable Housings |
 |
| Bill's 1963 Schwinn Racer De Luxe Restoration Brake Cables - Installed |
 |
| Bill's 1963 Schwinn Racer De Luxe Restoration Rear Brake Cable - Installed |
 |
| Bill's 1963 Schwinn Racer De Luxe Restoration Brake Cables - Complete |
Continued from above I rebuilt the rear three speed hub and polished the rim and installed the new tire and tube. The 3 speed hub was in good shape on the inside, I just did a little cleaning inside and packed the bearings in grease and replaced the axle bearings. The rear wheel polished very nicely and with the new black wall tire installed it looks even better. The black wall tire I think looks fantastic with all the chrome and black paint. It has a mean look!
The front wheel just turned out to be to far gone to use. I went to the parts collection and was lucky enough to have a matching replacement wheel in pretty good condition. It was even labeled #1 in the parts notebook so it was the first going in. I disassembled the wheel and started the polishing. The hub and rim polished beautifully, I am very happy with the results. The tire that was on the wheel was not a Schwinn size but the English size and was a nightmare to remove. With the hub polished I prepared the axle pieces and replaced the bearings. Back in new grease the bearings and wheel spin wonderfully. I installed the new tube and tire and installed it all to the Racer. It looks fantastic installed and the Racer looks more complete now.
|
| Bill's 1963 Schwinn Racer De Luxe Restoration Rear Wheel - Before |
|
| Bill's 1963 Schwinn Racer De Luxe Restoration Rear Wheel Hub - Before |
|
| Bill's 1963 Schwinn Racer De Luxe Restoration Rear Wheel Rim - Before |
|
| Bill's 1963 Schwinn Racer De Luxe Restoration Rear Wheel Hub - Before |
|
| Bill's 1963 Schwinn Racer De Luxe Restoration Rear Wheel Hub - Before |
 |
| Bill's 1963 Schwinn Racer De Luxe Restoration Rear Wheel Hub - Polished |
 |
| Bill's 1963 Schwinn Racer De Luxe Restoration Rear Wheel Hub - Internal Bearings Packed |
 |
| Bill's 1963 Schwinn Racer De Luxe Restoration Axle Pieces Ready |
 |
| Bill's 1963 Schwinn Racer De Luxe Restoration Axle Bearings - Packed |
 |
| Bill's 1963 Schwinn Racer De Luxe Restoration Rear Wheel Hub - Complete |
 |
| Bill's 1963 Schwinn Racer De Luxe Restoration Rear Wheel Hub - Complete |
 |
| Bill's 1963 Schwinn Racer De Luxe Restoration Rear Wheel Rim - Polished |
 |
| Bill's 1963 Schwinn Racer De Luxe Restoration New Kenda S-6 Tires |
 |
| Bill's 1963 Schwinn Racer De Luxe Restoration Rear Wheel - Complete |
 |
| Bill's 1963 Schwinn Racer De Luxe Restoration Rear Wheel - Complete |
 |
| Bill's 1963 Schwinn Racer De Luxe Restoration Rear Wheel - Complete |
 |
| Bill's 1963 Schwinn Racer De Luxe Restoration Rear Wheel - Complete - Awesome!! |
The front wheel just turned out to be to far gone to use. I went to the parts collection and was lucky enough to have a matching replacement wheel in pretty good condition. It was even labeled #1 in the parts notebook so it was the first going in. I disassembled the wheel and started the polishing. The hub and rim polished beautifully, I am very happy with the results. The tire that was on the wheel was not a Schwinn size but the English size and was a nightmare to remove. With the hub polished I prepared the axle pieces and replaced the bearings. Back in new grease the bearings and wheel spin wonderfully. I installed the new tube and tire and installed it all to the Racer. It looks fantastic installed and the Racer looks more complete now.
 |
| Bill's 1963 Schwinn Racer De Luxe Restoration Replacement Wheel - Before |
 |
| Bill's 1963 Schwinn Racer De Luxe Restoration Replacement Front Wheel - Before |

 |
| Bill's 1963 Schwinn Racer De Luxe Restoration Replacement Front Wheel Hub - Old Grease |
 |
| Bill's 1963 Schwinn Racer De Luxe Restoration Replacement Wheel Hub - Polished |
 |
| Bill's 1963 Schwinn Racer De Luxe Restoration Replacement Wheel Rim - Polished |
 |
| Bill's 1963 Schwinn Racer De Luxe Restoration Axle Pieces Ready |
 |
| Bill's 1963 Schwinn Racer De Luxe Restoration Front Wheel Bearings - Packed |
 |
| Bill's 1963 Schwinn Racer De Luxe Restoration Replacement Front Wheel - Complete |
 |
| Bill's 1963 Schwinn Racer De Luxe Restoration Replacement Front Wheel - Complete |
 |
| Bill's 1963 Schwinn Racer De Luxe Restoration Front Wheel Complete |
The saddle is in ok shape, actually better then most this old. The white is faded but not all the way. I cleaned the saddle the best it would and then brightened up the metal rails and springs. I had to find a new seat collar since the old one was worn down to nothing. The one I found in the collection should work pretty well but won't know until i can ride it and test it.
 |
| Bill's 1963 Schwinn Racer De Luxe Restoration Saddle- Before |
 |
| Bill's 1963 Schwinn Racer De Luxe Restoration Saddle - Before |
 |
| Bill's 1963 Schwinn Racer De Luxe Restoration Saddle - Before |
 |
| Bill's 1963 Schwinn Racer De Luxe Restoration Saddle - Cleaned |
 |
| Bill's 1963 Schwinn Racer De Luxe Restoration Saddle - Installed |
I cleaned and polished the kickstand. The kickstand polished very nice and looks great installed.
 |
| Bill's 1963 Schwinn Racer De Luxe Restoration Kick Stand - Polished |
 |
| Bill's 1963 Schwinn Racer De Luxe Restoration Kickstand - Installed |
With just about everything almost done it was time to install the new three speed shift cable. I replaced the black cable housing that it comes with with the matching housing to the brake cables. The Racer looks fantastic with all the new cable housings and cables. I love this stuff!
 |
| Bill's 1963 Schwinn Racer De Luxe Restoration New Three Speed Shift Cable |
 |
| Bill's 1963 Schwinn Racer De Luxe Restoration Shift Cable - Installed |
Last thing before test riding was to clean and install the chain.
 |
| Bill's 1963 Schwinn Racer De Luxe Restoration Chain - Installed |
I tried to get a test ride in before dark. The photo below does not show how dark it actually was. Ran into a major problem and never got more then a few feet into the test ride. The chain is very very worn and after a half revolution of the pedals the chain comes off. Even with the chain tension much tighter then in the photo the chain just slips and falls of the crank. I will have to install a new chain tomorrow and try for test ride attempt number two.
 |
| Bill's 1963 Schwinn Racer De Luxe Restoration Beautiful Racer!! - Failed Test Ride |
 |
| Bill's 1963 Schwinn Racer De Luxe Restoration New Chain Installed & Tuned |
With the Racer tuned I installed the new pedals, the new pedals look better then the old mainly because the old pedals where rough. It also rides a lot nicer with the new pedals.
 |
| Bill's 1963 Schwinn Racer De Luxe Restoration New Pedas |
 |
| Bill's 1963 Schwinn Racer De Luxe Restoration New Pedals - Installed |
The new decals brought the whole restoration together. The decals make the whole bike pop!! The new Red White and Blue banding is amazing! It really is a stunning bicycle with all that fresh black, chrome and now decals! I love it!!
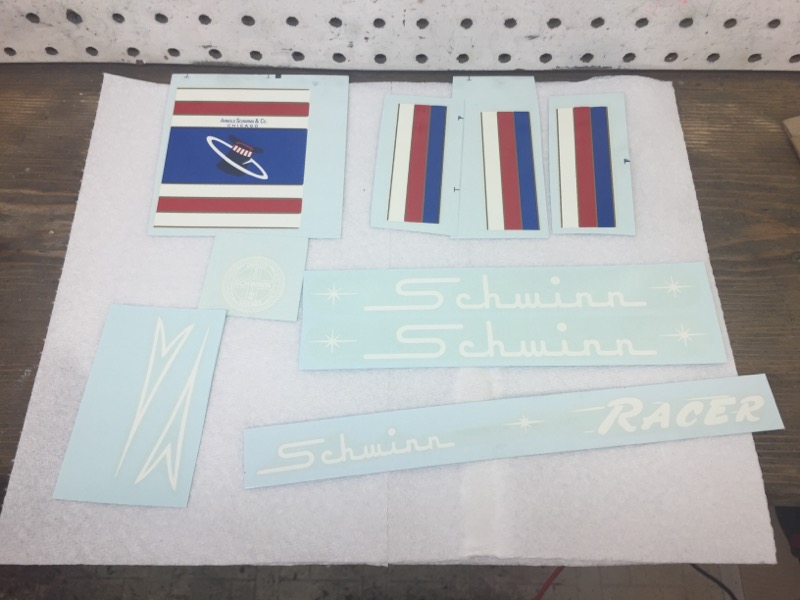 |
| Bill's 1963 Schwinn Racer De Luxe Restoration New Decal Set |
 |
| Bill's 1963 Schwinn Racer De Luxe Restoration Fork Decal - Installed |
 |
| Bill's 1963 Schwinn Racer De Luxe Restoration Fork Decal - Installed |
 |
| Bill's 1963 Schwinn Racer De Luxe Restoration Down Tube Decal - Installed You can seeing the masking tape guide lines. |
 |
| Bill's 1963 Schwinn Racer De Luxe Restoration Seat Tube Decal - Installed |
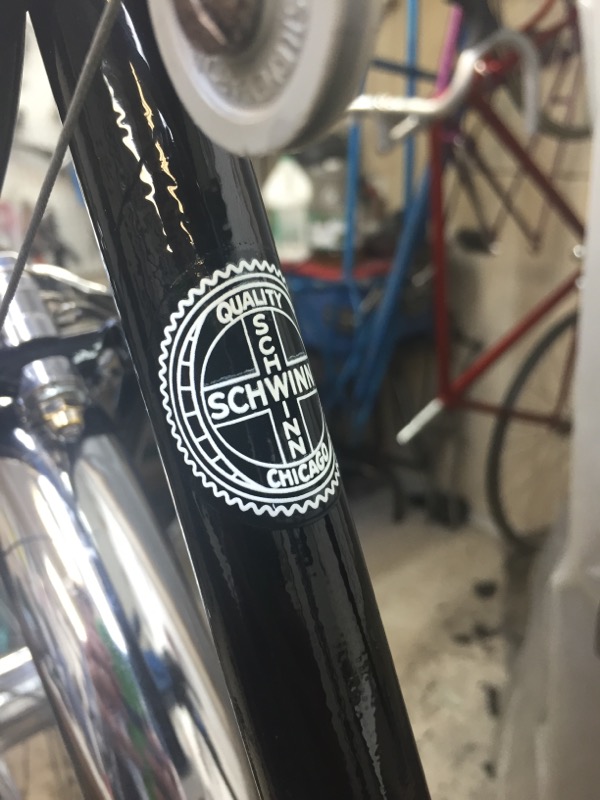 |
| Bill's 1963 Schwinn Racer De Luxe Restoration Chicago Decal - Installed |
 |
| Bill's 1963 Schwinn Racer De Luxe Restoration Chain Guard Decal - Installed |
 |
| Bill's 1963 Schwinn Racer De Luxe Restoration Down Tube Band Decal - Installed |
 |
| Bill's 1963 Schwinn Racer De Luxe Restoration Top Tube Banding Decals - Installed |
With the Racer complete and tuned it is time for the final photos. Light conditions where not perfect today but the photos still show how stunning the Schwinn Racer is. The chrome shines, the black shines, the decals make everything pop. I love it! I also really like the ride of the Racer. It is small for me but being small I still could tell how nice it rode and shifted.
I am very proud of the work that went into the Schwinn Racer. I could not be happier with the way it turned out.
 |
| Bill's 1963 Schwinn Racer De Luxe Restoration Bicycle Complete |
 |
| Bill's 1963 Schwinn Racer De Luxe Restoration Bicycle Complete |
 |
| Bill's 1963 Schwinn Racer De Luxe Restoration Bicycle Complete |
 |
| Bill's 1963 Schwinn Racer De Luxe Restoration Bicycle Complete - Handlebars |
 |
| Bill's 1963 Schwinn Racer De Luxe Restoration Bicycle Complete - Handlebars |
 |
| Bill's 1963 Schwinn Racer De Luxe Restoration Bicycle Complete - Front Brake |
 |
| Bill's 1963 Schwinn Racer De Luxe Restoration Bicycle Complete - Front Wheel Hub |
 |
| Bill's 1963 Schwinn Racer De Luxe Restoration Bicycle Complete - Front Wheel Rim |
 |
| Bill's 1963 Schwinn Racer De Luxe Restoration Bicycle Complete - Brake Lever |
 |
| Bill's 1963 Schwinn Racer De Luxe Restoration Bicycle Complete - Stem |
 |
| Bill's 1963 Schwinn Racer De Luxe Restoration Bicycle Complete - Fork Decal |
 |
| Bill's 1963 Schwinn Racer De Luxe Restoration Bicycle Complete - Down Tube Decals |
 |
| Bill's 1963 Schwinn Racer De Luxe Restoration Bicycle Complete - Front Half |
 |
| Bill's 1963 Schwinn Racer De Luxe Restoration Bicycle Complete - Front Fender |
 |
| Bill's 1963 Schwinn Racer De Luxe Restoration Bicycle Complete - Saddle |
 |
| Bill's 1963 Schwinn Racer De Luxe Restoration Bicycle Complete - Chicago Decal |
 |
| Bill's 1963 Schwinn Racer De Luxe Restoration Bicycle Complete - Seat Tube Decal |
 |
| Bill's 1963 Schwinn Racer De Luxe Restoration Bicycle Complete - Drive Train |
 |
| Bill's 1963 Schwinn Racer De Luxe Restoration Bicycle Complete - Crank |
 |
| Bill's 1963 Schwinn Racer De Luxe Restoration Bicycle Complete - Chain Guard |
 |
| Bill's 1963 Schwinn Racer De Luxe Restoration Bicycle Complete - Rear Three Speed Hub |
 |
| Bill's 1963 Schwinn Racer De Luxe Restoration Bicycle Complete - Seat Collar |
 |
| Bill's 1963 Schwinn Racer De Luxe Restoration Bicycle Complete - Rear Brake Caliper |
 |
| Bill's 1963 Schwinn Racer De Luxe Restoration Bicycle Complete - Rear Wheel Hub |
 |
| Bill's 1963 Schwinn Racer De Luxe Restoration Bicycle Complete - Rear Fender |
 |
| Bill's 1963 Schwinn Racer De Luxe Restoration Bicycle Complete |
 |
| Bill's 1963 Schwinn Racer De Luxe Restoration Bicycle Complete |
This comment has been removed by the author.
ReplyDeleteWow what a gorgeous and thorough resto John ! So cool that his bike has been with him for so long and got a rebirth. I may live in a place that isn't practical for 3 speeds (Hilly Seattle) but that doesn't stop me from loving the look and practicality of them. in a flatter place I'd have one in a heart-beat. I have a half baked plan to fit a classic Raleigh 3 speed with an 8 speed nexus hub on the someday list.
ReplyDelete