 |
| Steve T's Tour Easy Recumbent - Bicycle After |
This is Steve T's Tour Easy recumbent bicycle. The recumbent has a wonderful story. The recumbent was Steve's father in-law's, he put a lot of miles on the Tour Easy. Steve's father in-law passed away about 12 years ago and the family would like the recumbent restored. I love to find out the history of bicycles and this Tour Easy has a lot of history.
The Tour Easy has a very cool wind screen, a 27 inch rear wheel, a 20 inch front wheel, Sun Tour derailleurs, an original Jim Blackburn rack and maybe the best part, Sun Tour bar end shift levers.
The Tour Easy is in descent starting condition. The red paint is ins good shape and will polish very nice. The bright work should also polish nice. The Tour Easy will receive a total restoration along with all new cables, cable housings, bearings, new brake pads, new tires, tire tubes and handlebar grips. A new Tour Easy decal will be installed and a new head badge that the Tour easy does not not have now.
I am extremely excited to work on the Tour Easy. I have only restored one recumbent before and that was sometime ago. I have done many tune ups on recumbents but can't wait for the restoration.
Recumbents are a challenge to work on because of their size and length. It is hard to keep them balanced in a stand so it takes some creative thinking to work on them, which is part of the fun.
 |
| Steve T's Tour Easy Recumbent - Bicycle Before |
 |
Steve T's Tour Easy Recumbent - Bicycle Before
Front |
 |
Steve T's Tour Easy Recumbent - Bicycle Before
Headset |
 |
Steve T's Tour Easy Recumbent - Bicycle Before
Headset |
 |
| Steve T's Tour Easy Recumbent - Bicycle Before - Front Wheel |
 |
Steve T's Tour Easy Recumbent - Bicycle Before
Front Wheel Hub |
 |
| Steve T's Tour Easy Recumbent - Bicycle Before - Front Wheel |
 |
Steve T's Tour Easy Recumbent - Bicycle Before - Front Wheel Rim
Before |
 |
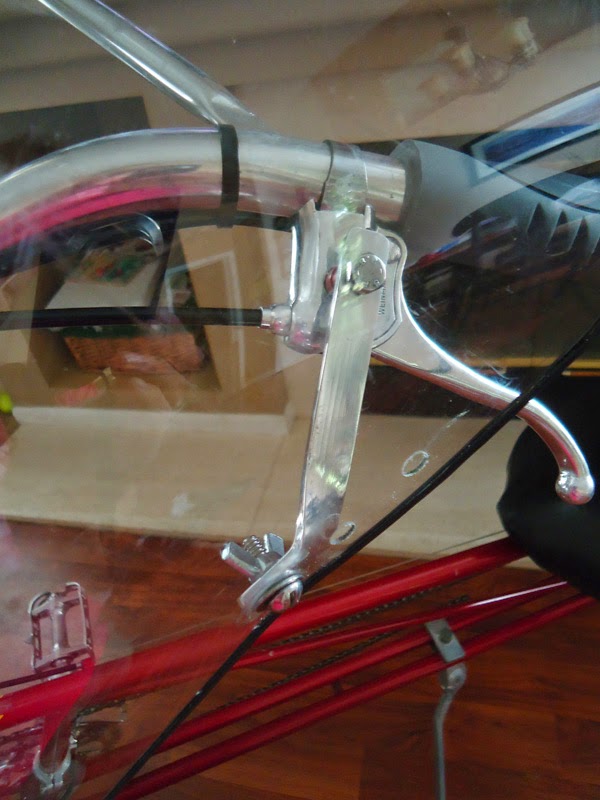
Steve T's Tour Easy Recumbent - Bicycle Before
Front Brake Caliper |
 |
| Steve T's Tour Easy Recumbent - Bicycle Before - Handlebars |
 |
Steve T's Tour Easy Recumbent - Bicycle Before - Bar End
Shift Levers |
 |
Steve T's Tour Easy Recumbent - Bicycle Before - Front
Frame |
 |
Steve T's Tour Easy Recumbent - Bicycle Before
Crank |
 |
| Steve T's Tour Easy Recumbent - Bicycle Before - Pedal |
 |
Steve T's Tour Easy Recumbent - Bicycle Before
Chain Tensioner |
 |
Steve T's Tour Easy Recumbent - Bicycle Before
Seat |
 |
| Steve T's Tour Easy Recumbent - Bicycle Before - Rear Rack |
 |
Steve T's Tour Easy Recumbent - Bicycle Before
Rear Derailleur |
 |
Steve T's Tour Easy Recumbent - Bicycle Before
Rear Wheel |
 |
Steve T's Tour Easy Recumbent - Bicycle Before
Rear Brake Caliper |
 |
Steve T's Tour Easy Recumbent - Bicycle Before
Rear Wheel Rim - Before |
 |
| Steve T's Tour Easy Recumbent - Bicycle Before - Rear |
With the Tour Easy in the shop I started breaking down the bike. There where no major surprises in breaking the bike down other then another Sun Tour freewheel with ramped and stripped notches for removal.
The frame paint looks to be in okay shape with no components on it. The frame paint also feels on the softer side so that should allow for a fantastic polished finish. I have noticed only a few small chips here and there.
I cleaned the bottom bracket and the old headset just because that who I am. I Then installed the new Velo Orange headset. The Velo Orange headset is a beautifully crafted headset and functions perfectly smooth.
The front wheel is a 20 inch wheel and is also extremely heavy duty but also a very very nice wheel.
I cleaned and polished the wheel hubs and rime, the hubs polished okay, they had a lot of heavy corrosion, the rims polished beautiful, one of the best results for a set of rims that I have polished. I installed the new bearings and grease and trued the wheel rims. I also installed he old tires for now while I finish the restoration of the Tour Easy, I will be rolling the recumbent around the shop and I don't want to get the new tires dirty.
Over all I am happy with the results of the wheels, they will look even better when the new tires are installed.
After thinking the derailleur through and the information I was pointed towards I decided to leave the upper jockey wheel a lone and just clean and lubricate it. It has a tendency to fail if taken apart and that would not be good considering its age.
I cleaned both derailleurs and polished them out, I polished the rear derailleur the best I could with it not disassembled. The derailleurs cleaned and polished very nice and function well, I like how nice they look installed against the pearl red paint.
 |
| Steve T's Tour Easy Recumbent - Derailleurs - Before |
 |
| Steve T's Tour Easy Recumbent - Front Derailleur - Before |
 |
| Steve T's Tour Easy Recumbent - Front Derailleur - Complete |
 |
| Steve T's Tour Easy Recumbent - Front Derailleur - Complete |
 |
| Steve T's Tour Easy Recumbent - Rear Derailleur - Before |
 |
| Steve T's Tour Easy Recumbent - Rear Derailleur - Some Exploded |
 |
| Steve T's Tour Easy Recumbent - Rear Derailleur - Before |
 |
| Steve T's Tour Easy Recumbent - Derailleur - Polished |
 |
| Steve T's Tour Easy Recumbent - Rear Derailleur - Complete |
 |
| Steve T's Tour Easy Recumbent - Rear Derailleur - Installed |
At this time I decided to installed the front tire, no particular reason at this point other then I wanted to see it installed. It looks great installed.
 |
| Steve T's Tour Easy Recumbent - New Front Tire Installed |
The rest of the day with the Tour Easy did not go as well. The rear seat braces are riveted to the back of the seat. The top two rivets are broken off and missing so the brace is not connected. I started with new rivets but they did not hold. I then went to bigger rivets and they did not hold. Tomorrow I am going to pick up new even bigger rivets and if they do not work I am going to have to come up with a way to screw the brace in place.
Check back later to see how the riveting goes.
I installed the rear tire, the tire is a Continental Sport tire. The tire looks fantastic installed.
 |
Steve T's Tour Easy Recumbent - New Continental
Tire |
 |
Steve T's Tour Easy Recumbent - Rear Tire
Installed |
 |
| Steve T's Tour Easy Recumbent - Rear Tire Installed |
I found rivets large enough to do the chop of connecting the brace tot he seat. In the photos below the difference between the before and after photos of the back of the seat, the back of the seat cleaned very nice.
I installed the new larger rivets and they worked very well. In one of the photos below you can see the new rivets installed and the two older rivets that where still holding, I replaced all the rivets just to be safe.
With the seat installed the recumbent is really looking like a recumbent again.
I apologize for the poor photos, I dropped my good camera and I am still waiting on the replacement lens to arrive.
I have also done a lot of the work in the living room to have room for the recumbent, my shop is very small and with the seat installed it is a little difficult to move around.
 |
| Steve T's Tour Easy Recumbent - Seat - Before |
 |
| Steve T's Tour Easy Recumbent - Broken Rivets |
 |
Steve T's Tour Easy Recumbent - New Rivets on Left
Old Rivets on Right |
 |
Steve T's Tour Easy Recumbent - Rivets Complete
Sorry for Bad Photo |
 |
| Steve T's Tour Easy Recumbent - Seat Installed |
 |
| Steve T's Tour Easy Recumbent - Seat Installed |
 |
| Steve T's Tour Easy Recumbent - Seat Installed |
Before I can wire the recumbent i needed to install the new handlebar grips, I had to modify them to fit with the brake levers and bar end shift levers. i think they look great installed.
 |
| Steve T's Tour Easy Recumbent - New Handlebar Grips |
 |
| Steve T's Tour Easy Recumbent - New Handlebar Grips - Installed |
I started wiring the recumbent, the front brake and front derailleur wired fine but my longest brake and shift cable where one inch to short, just one inch. I have had to order tandem bicycle cables. i hope the new cables will be here soon.
 |
| Steve T's Tour Easy Recumbent - Recumbent Almost Wired |
 |
Steve T's Tour Easy Recumbent - Recumbent
Almost Wired |
The long brake and shift cables came late last evening. Today I was able to finish the wiring of the Tour Easy. The wiring actually did not go as smooth as I would have liked or at least the rear brake did not. The early versions of the dual pivot brake calipers where not the easiest to tune to start with. This rear brake caliper was even more difficult mad by the last 5 inch piece of cable housing and the hard angle it takes into the brake caliper. In the end that last piece of cable housing had to be with in an 1/8 of an inch of a certain length to keep the caliper centered. in the end i finally got he rear brake caliper where it should be.
The rest of the cables and housing installed with no problems. I then took the recumbent out to test ride it. The test ride to a good deal of fine tuning because I was unable to stand tune the recumbent first. After the fine tuning the recumbent road very smooth and the sun Tour bar end shift levers work great, I am very happy with the ride.
I took a few photos out side of the recumbent all wired. After the photos and the fine tuning I raised the handlebars a little more, they where too tilted back towards the seat in the photos below.
 |
| Steve T's Tour Easy Recumbent - Bicycle Wired |
 |
| Steve T's Tour Easy Recumbent - Cables complete |
 |
| Steve T's Tour Easy Recumbent - Cables Complete |
Now that the recumbent is in a very nice riding condition it is time for all the details from this point on. The details will start with the rear rack, it needs a lot of cleaning and polishing. Then the win screen witch will also be a lot of cleaning and actually some very delicate work. after the wind screen there are just a few small details like a rear view mirror and toe clips. The devil is in he details.
Check back soon.
Having the Tour Easy in another part of the house away from the shop has made me forgetful on some photos. It does make a world of difference working on the recumbent outside of the shop where there is enough space for the recumbent, my shop is very small.
The wind shield is dirty and has a good deal of scratches. I cleaned the shield with warm soapy water and a very soft cloth, the shield is plastic and you never want to use a dry cloth or wash with a lot of pressure or more scratches will appear. I then applied a few coats of plastic polish and wax, a lot of the smaller scratches removed nicely and over all the wind shield turned out very nice. I am very happy with the results because I was worried the wind shield would not come back this nice.
 |
| Steve T's Tour Easy Recumbent - Wind Shield - Before |
 |
| Steve T's Tour Easy Recumbent - Wind Shield - Before |
 |
| Steve T's Tour Easy Recumbent - Wind Shield - Before |
 |
| Steve T's Tour Easy Recumbent - Wind Shield - Before |
 |
| Steve T's Tour Easy Recumbent - Wind Shield Hardware Brackets |
I replaced all of the wind shield nuts and bolts with stainless nuts an bolts. Some of the mounting hardware had some rust, polishing would have cleaned it up very nice but just the metal finish on the bolts it would have rusted quickly again.
 |
Steve T's Tour Easy Recumbent - Wind Shield
Complete |
 |
Steve T's Tour Easy Recumbent - Wind Shield
Complete - Mountain Bracket |
 |
Steve T's Tour Easy Recumbent - Wind Shield
Complete - Mounting Bracket |
I forgot to take a photo of the rack before. I cleaned the rack and then used a soft wire wheels to polish it up a bit. it is an original Jim Blackburn rack and is very nice.
 |
Steve T's Tour Easy Recumbent - Rack
Installed |
The last thing for now is the Tour Easy decal. The original decal is not horrible but it is peeling from the bottom some and there are a few air bubbles in it. Steve ordered a new decal and it looks great installed.
I removed the old decal with Goo Gone and a plastic knife and then polished the paint. I forgot to take a photo but with 1/8 inch painters tape I laid out a grid on the tube right where I wanted the decal to go. Taking the time to lay out the grid is well worth it, it gets the decal right where you want it the first time and you do not damage or ruin decals by removing it and doing it again.
The new decal looks fantastic, so much better then the old and the old was not horrible.
 |
| Steve T's Tour Easy Recumbent - Original Tour Easy Decal |
 |
| Steve T's Tour Easy Recumbent - Original Decal - Removed |
 |
Steve T's Tour Easy Recumbent - New Decal Installed
Poor Photo |
I would have liked to have taken final photos this afternoon but we have had one severe thunderstorm after another today and more through the evening, the final photos will have to wait until the morning.
I wish I remembered to take photos of the installation of the new brass head badge. I was talking to a gentleman about a week ago who worked in the welding, manufacturing and metal industries for 50 years, tapping the holes for the new head badge reminded me of the conversation we had. The conversation was about how to get young people to want to be welders and metal manufacturer today, they all want to be lawyers or famous. He asked me what gives me the interest or the want to do this stuff I could not come up with anything. I think you are just born with the interest, like tapping these holes for the head badge, I just really like tapping threads and seeing the results when something is installed, I am a nerd that way.
The test riding was completed sometime ago, I did take the Tour Easy for a final test ride and it rides great, it is a very solid bike and very smooth, it does take a lot of getting use to with the shape and center of gravity.
The final photos turned out nice, I really need that new lens for my new camera to show up, but that is the type of luck I get with Ebay. The Tour Easy looks amazing, the paint turned out fantastic, the bright work pops and I really like the black wall tires with the red paint, it has a mean look. I was worried about the wind screen, I thought it would be difficult to bring it back to acceptable levels but it turned out a lot better then acceptable. The head bade and new decal really bring it all together.
I am extremely happy with the Tour Easy, it really brings this Tour Easy's story full circle for many more years.
|
| Steve T's Tour Easy Recumbent - Bicycle Complete |
 |
| Steve T's Tour Easy Recumbent - Bicycle Complete |
 |
Steve T's Tour Easy Recumbent - Bicycle Complete
Front |
 |
| Steve T's Tour Easy Recumbent - Bicycle Complete - Front |
 |
Steve T's Tour Easy Recumbent - Bicycle Complete
Front Brake |
 |
Steve T's Tour Easy Recumbent - Bicycle Complete
New Head Badge |
 |
Steve T's Tour Easy Recumbent - Bicycle Complete
Front Wheel |
 |
Steve T's Tour Easy Recumbent - Bicycle Complete
Stem |
 |
Steve T's Tour Easy Recumbent - Bicycle Complete
New Decal |
 |
Steve T's Tour Easy Recumbent - Bicycle Complete
Drive Train |
 |
Steve T's Tour Easy Recumbent - Bicycle Complete
Handlebars |
 |
Steve T's Tour Easy Recumbent - Bicycle Complete
New Rivets |
 |
Steve T's Tour Easy Recumbent - Bicycle Complete
Rear Brake |
 |
Steve T's Tour Easy Recumbent - Bicycle Complete
Rear |
 |
Steve T's Tour Easy Recumbent - Bicycle Complete
Rear Wheel |
Thank You for all the interest and work,
John Z.


The Tunturi recumbent bike could easily match the mix at this price range. The situation with the Tunturi brand is that it is a Scandinavian company, with machines that are hand-built in Europe. This could make it tougher to be competitive with all of the more recognizable American companies. The bottom line is people have to look at the features and determine which machine will be a good fit. These people have no problem buying furniture at IKEA, and this should not make too much of an improvement either. Recumbent Exercise Bike Reviews
ReplyDeleteI need someone to pick out one best service from those on this list here.
ReplyDeleteTour Guide Training