Hello,
I started work on a customer's 1990s GT Outpost today. I was trying like heck to get it done by the weekend, I would have come close except for 2 problems today.
The early 1990s GT Triple Triangle Frames where legendary for there strength. This one was out in the elements for sometime. There was considerable rust. The chain needed to be cut off, all cables are shot and tubes and rim wrap where done. The frame is in fantastic condition for being out side so long. Other parts did not fair so well, but overall the bike is not to bad considering.
I did not take many before photos, I was rushing to get it done in 2 days, but now that I am waiting for a part to arrive I can post the bike and also take my time and not miss anything. I dismantled the bike and started the work on the wheels first. It took time to break the freewheel and lock nuts free. It took a good soak in PB Blaster. After that it was basic cleaning and polishing. I waxed the hubs, they where badly faded and matted. After waxing they look descent. I then greased and packed the bearings and polished the front wheel skewer. The skewer was very rusted, but polished nicely. I then trued the wheels in the wheel stand. The wheels turned out nice, they are straight and turn very smooth. The tires where in very good condition so I gave them a good cleaning and they look great.
 |
| Bike Before |
 |
| Before Front Derailleur & Crank |
 |
| Before Rear Derailleur |
 |
| Before Handle Bars |
 |
| Before Wheels |
 |
| Dirty Hub |
 |
| Bearings Packed |
 |
| Rear Wheel in Stand |
 |
| Skewer Before |
 |
| Polished Skewer |
I then cleaned and polished the frame. The frame was pretty dirty and dull. After two coats of wax the frame looks great. There are a few minor scrapes on the fork, but not bad at all for a 20 year old bike
.
Next I cleaned and polished the headset. The headset has a black powder coat, it was fairly dull. After polishing it looks pretty goad, the top nut is a little faded. I then packed the bearings and greased the fork tube. The headset turns very smoothly and looks great against the red of the frame.
 |
| Headset Cleaned & Polished |
 |
| Headset Cups Pressed |
 |
| Bearings Packed |
 |
| Headset & Forked Installed |
With the headset and fork installed I moved on to the stem and handlebars. The bars where pretty dull, after waxing they look pretty good. The stem polished very nice. The stem bolts where badly rusted, after hitting them with a wire wheel in the Dremil and some buffing on the wheel they look pretty good. I then greased the stem and installed the bars. Its starting to look like a bike again.
With the bars completed I moved on to the crank. The crank is black powder coated, where the powder coat was worn there was a lot of rust. I used the Dremil to remove the rust and then waxed the powder coating the best I could on an awkward shaped component. In the end the crank looks ok, it cleaned nice and polished ok. It looks a lot better then before.
 |
| Stem & Bars Cleaned & Polished |
 |
| Stem Greased |
 |
| Crank Before |
 |
| Crank Cleaned & Waxed |
With the crank installed I started work on the rear Derailleur. The derailleur was not to bad considering it was wedged into the freewheel by a rusted chain. I disassembled the Jockey Wheels and polished the metal cage on the buffer. The cage came out nice. I then overhauled and installed the Jockey Wheels. Tomorrow I am going to try a plastic polish on the derailleur. It has a plastic shell that is a little dull. I have not had much success with plastic polish, but will give it another shot. That is where I am today. Tomorrow things should move fast. I will run some new cables and hosing, overhaul the front derailleur, clean the shifters and work on the seat. I am sure I am forgetting something, but will catch it tomorrow. Good Night.
 |
| Before Derailleur |
 |
| Derailleur Cleaned & Polished |
 |
| Bike to this Point - Looking Good |
Good Morning, I flew through the rest of the bike this morning except for the front brake, I am waiting on a part for it. I apologize to the customer for not having the part on hand, I would have had it done easy for you by the weekend.
I started with the front derailleur this morning. The derailleur had a lot of rust but seemed to function fine. After polishing and oiling it looks and functions nicely. With the derailleurs in place I cut new cable housing and ran the cables. I had to replace the brake levers, one side had a bent adjustment furell that was to bent to fix, I tried. I also cleaned and polished the plastic of the shift levers, they turned out pretty nice considering they where badly faded from the elements. I also cleaned and polished the rear brake calipers and tuned the rear brake.
I next went to work on the rear freewheel and cogs. I was very worried that the rusting was deeper then I thought and after cleaning it would be too worn and the chain would slip on hard force applied. I had the freewheel and cogs soaking for a day in PB Blaster to loosing up the rust. I then hit it with a wire wheel in my drill, it cleaned up pretty good, not as new, but with oiling and a little use it will look even better. And it does not slip with hard peddling. With the freewheel and cogs in place I installed the new chain.
 |
| Before Front Derailleur |
 |
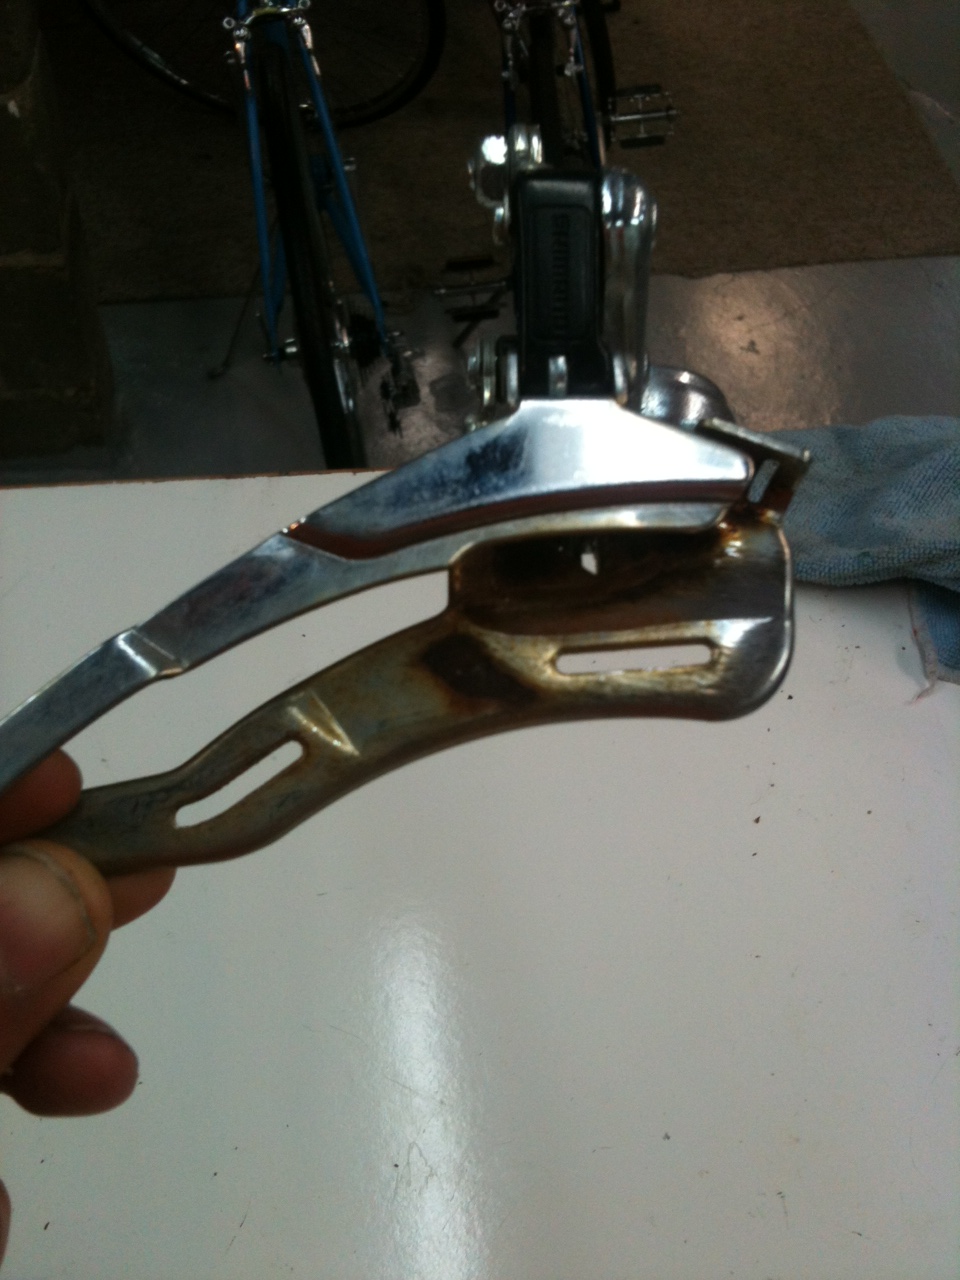
| Front Derailleur Before |
 |
| Front Derailleur Polished & Installed |
 |
| Cable Housing & Cables Installed |
At this point I moved on to the saddle area. The saddle post skewer was badly rusted. I cleaned of the rust with the Dremil and then polished it on the buffer. It turned out very nice, there is a little pitting though. I also polished the seat post on the buffer to make sure there was nothing to catch up on and then cleaned and waxed the seat components. I also gave the fabric a going over with a leather treatment.
With the bike almost complete I moved on to tuning the gears. I had all kinds of problems with the tuning. Everything was so out of whack that I had a hard time getting everything set to baseline to start tuning off of. And when I thought I had everything just right on the test ride a plastic bushing that connects the rear derailleur to the frame broke, so I had to start over. I replaced the plastic bushing with a metal washer and added a drop of Loctite to the bolt. I think the fix will be quite a bit stronger then the original.
With everything tuned correctly I took the bike for another test ride, about 2 miles. I am amazed at how smooth this bike rides especially with the state it was in. It is very comfortable and solid feeling. The bike also looks great. The red really polished out to a high shine. I would love to take it trail riding to see how the Triple Triangle frame performs, but I will leave that for the customer to get it dirty :). I just need to get the front brake on it when it arrives.
Overall I am thrilled with the results of this restoration. The bike looks good and also performs good, I think and hope the owner will be happy with it. And of course it is another saved bike back on the road. It just goes to prove that just about any bike is savable. I will update the last of the front brake when I am finished. Thanks for looking, John.
 |
| Seat Post Skewer Rusted & Dirty |
 |
| Seat Skewer & Post Polished |
 |
| Broken Bushing & Replacement Options |
 |
| Replacement Bushing - Middle Bolt |
 |
| Bike as of Now |
I finished the GT Outpost today. I got the brake parts I needed to finish of a parts bike I got at a flee Market this weekend, so we save $16 on the restoration. The bike rides very smooth and looks very nice. I am very pleased with the way it turned out and I think the customer was happy with it also. The customer dropped of the same bike today in a his and hers pair, so I will be starting a second one shortly. Thank you.
 |
| Finished Bike |
 |
| Finished Bike Drive Train |


I just picked up an unknown year GT Outpost. Looks like your before pic. I need specs, like what size parts I need, etc... since most parts will be ordered on eBay. Yours looks great!
ReplyDeleteHello Mike,
ReplyDeleteNot sure how to answer your question with out knowing what parts you need. If all it's pretty much a standard 26 inch mountain bike. If you want to elaborate I will be happy to help the best I can.
Thanks,
John Z.
Hi, awesome post. I need to know where I can find a cover to the head post for the handle bars, mine fell out or off....not sure what to do...
ReplyDeleteI really enjoy watching you do your magic on these vintage bikes and bring them back to life. Truly amazing.
ReplyDeleteHey I was cleaning out a shed and I found a Coca-Cola code red GT outpost trail mountain bike the owner gave it to me and I was wonderIng if you would know if it’s worth anything
ReplyDeleteHey I found a Coca-Cola code red outpost trail mountain bike in a shed I was cleaning out and the owner gave it to me and I was wondering if you would know if it’s worth anything?
ReplyDeleteHey I found a Coca-Cola code red outpost trail mountain bike in a shed I was cleaning out and the owner gave it to me and I was wondering if you would know if it’s worth anything?
ReplyDelete