 |
| Ralph's 1986 Cannondale SR600 Restoration Bicycle After Restoration |
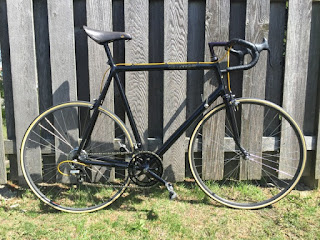
I think the Cannondale is about as cool as it can get with the black paint, the black Nitto stem, the black with gold band Nitto handlebars and then of course the Superbe Pro in black and gold!! Just awesome stuff!! The Cannondale also has sew up wheels which with today's sew up tires and glues are so much nicer and easier then they where before.
I have some good memories of the Cannndales from this era, I road a 1985 ST500 for many many miles, roughly 30,000+. I miss that bike a lot! I modified a lot of it and converted to 700c wheels. It road so nice.
The starting condition of the Cannondale is hard to tell with all the black color. There are a few small chips I can see. The frame and components are pretty dirty and dull but I think that is not a problem. Two of the top tube brake cable brackets are broken but I saw in the box that there are 3 new brackets. These brackets tend to break pretty easy. I can't wait to see the results and get a chance to ride the Sr600 before it goes back to Texas!!
 |
| Ralph's 1986 Cannondale SR600 Restoration Bicycle Before |
 |
| Ralph's 1986 Cannondale SR600 Restoration Bicycle Before |
 |
| Ralph's 1986 Cannondale SR600 Restoration Bicycle Before - Handlebars |
 |
| Ralph's 1986 Cannondale SR600 Restoration Bicycle Before - Brake Levers |
 |
| Ralph's 1986 Cannondale SR600 Restoration Bicycle Before - Stem & Handlebars |
 |
| Ralph's 1986 Cannondale SR600 Restoration Bicycle Before - Head Tube |
 |
| Ralph's 1986 Cannondale SR600 Restoration Bicycle Before - Head Tube |
 |
| Ralph's 1986 Cannondale SR600 Restoration Bicycle Before - Front Brake Caliper |
 |
| Ralph's 1986 Cannondale SR600 Restoration Bicycle Before - Front Wheel Hub |
 |
| Ralph's 1986 Cannondale SR600 Restoration Bicycle Before - Front Wheel Rim |
 |
| Ralph's 1986 Cannondale SR600 Restoration Bicycle Before - Nitto Stem |
 |
| Ralph's 1986 Cannondale SR600 Restoration Bicycle Before - Superbe Headset |
 |
| Ralph's 1986 Cannondale SR600 Restoration Bicycle Before - Superbe Headset |
 |
| Ralph's 1986 Cannondale SR600 Restoration Bicycle Before - Fork Crown |
 |
| Ralph's 1986 Cannondale SR600 Restoration Bicycle Before - Fork |
 |
| Ralph's 1986 Cannondale SR600 Restoration Bicycle Before - Front Wheel Hub |
 |
| Ralph's 1986 Cannondale SR600 Restoration Bicycle Before - Top Tube |
 |
| Ralph's 1986 Cannondale SR600 Restoration Bicycle Before - Superbe Shift Levers |
 |
| Ralph's 1986 Cannondale SR600 Restoration Bicycle Before - Saddle |
 |
| Ralph's 1986 Cannondale SR600 Restoration Bicycle Before - Seat Area |
 |
| Ralph's 1986 Cannondale SR600 Restoration Bicycle Before - Crank |
 |
| Ralph's 1986 Cannondale SR600 Restoration Bicycle Before - Superbe Pro Front Derailleur |
 |
| Ralph's 1986 Cannondale SR600 Restoration Bicycle Before - Bottom Bracket |
 |
| Ralph's 1986 Cannondale SR600 Restoration Bicycle Before - Rear Brake Caliper |
 |
| Ralph's 1986 Cannondale SR600 Restoration Bicycle Before - Rear Superbe Pro Derailleur |
 |
| Ralph's 1986 Cannondale SR600 Restoration Bicycle Before - Superbe Rear Wheel hub |
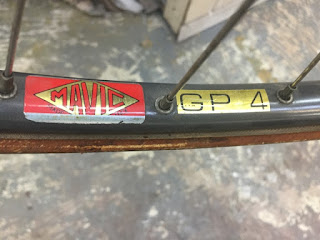 |
| Ralph's 1986 Cannondale SR600 Restoration Bicycle Before - Rear Wheel Rim |
I find black frames are hard to photograph but I think these turned out pretty well. I stripped the frame of the components. With the frame bare I see the frame is really dirty and also what looks to be paint bubbling up. There are a few chips here and there that should be easy to match and fill if the paint is not damaged.
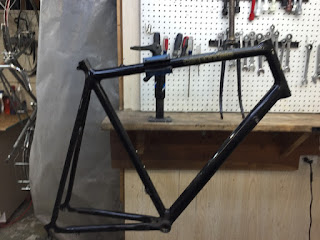 |
| Ralph's 1986 Cannondale SR600 Restoration Frame Before |
 |
| Ralph's 1986 Cannondale SR600 Restoration Frame Before - Head Tube - Paint damage or dirt? The head tube is the part that worries me. |
 |
| Ralph's 1986 Cannondale SR600 Restoration Frame Before - Head Tube |
 |
| Ralph's 1986 Cannondale SR600 Restoration Frame Before - Head Tube |
 |
| Ralph's 1986 Cannondale SR600 Restoration Frame Before - Top Tube - Broken Cable Bracket |
 |
| Ralph's 1986 Cannondale SR600 Restoration Frame Before - Top Tube Decal |
 |
| Ralph's 1986 Cannondale SR600 Restoration Frame Before - Down Tube |
 |
| Ralph's 1986 Cannondale SR600 Restoration Frame Before - Seat Area |
 |
| Ralph's 1986 Cannondale SR600 Restoration Frame Before - Seat Tube |
 |
| Ralph's 1986 Cannondale SR600 Restoration Frame Before - Bottom Bracket |
 |
| Ralph's 1986 Cannondale SR600 Restoration Frame Before - Bottom Bracket |
 |
| Ralph's 1986 Cannondale SR600 Restoration Frame Before - Bottom Bracket |
 |
| Ralph's 1986 Cannondale SR600 Restoration Frame Before - Seat Area |
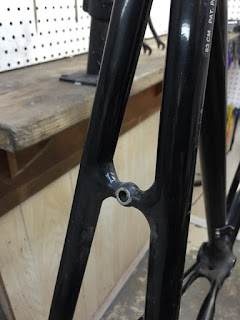 |
| Ralph's 1986 Cannondale SR600 Restoration Frame Before - Brake Bridge |
 |
| Ralph's 1986 Cannondale SR600 Restoration Frame Before - Chain Stays |
 |
| Ralph's 1986 Cannondale SR600 Restoration Frame Before - Drop Outs |
 |
| Ralph's 1986 Cannondale SR600 Restoration Frame Before - Fork |
 |
| Ralph's 1986 Cannondale SR600 Restoration Frame Before - Steer Tube |
 |
| Ralph's 1986 Cannondale SR600 Restoration Frame Before - Fork Crown |
 |
| Ralph's 1986 Cannondale SR600 Restoration Frame Before - Fork Crown |
 |
| Ralph's 1986 Cannondale SR600 Restoration Frame Before - Fork Blades |
 |
| Ralph's 1986 Cannondale SR600 Restoration Frame Before - Fork Drop Outs |
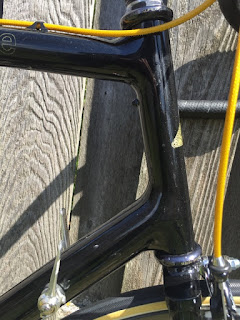
I started the cleaning of the frame. What looked like paint damage was very very hard and stubborn dirt. With a good amount of cleaning it was time to work through the polishing grits. I actually started with a very course grit that I rarely use. With a good deal of work and patience the frame and fork polished beautifully!! Just amazing!! The photos don't do justice to the deep luster and shine the black color has. I am so very happy that what looked like bad paint damage was hard dirt and the paint polished so nice. I love this stuff!!
The paint has some very subtle gold fleck that was not visible at first but very very cool! I will fill the paint chips later on in the build.
 |
| Ralph's 1986 Cannondale SR600 Restoration Frame Polished |
 |
| Ralph's 1986 Cannondale SR600 Restoration Frame Polished - Head Tube - Amazing!! Love the gold head badge and black paint! |
 |
| Ralph's 1986 Cannondale SR600 Restoration Frame Polished - Head Tube |
 |
| Ralph's 1986 Cannondale SR600 Restoration Frame Polished - Head Tube |
 |
| Ralph's 1986 Cannondale SR600 Restoration Frame Polished - Top Tube |
 |
| Ralph's 1986 Cannondale SR600 Restoration Frame Polished - Top Tube |
 |
| Ralph's 1986 Cannondale SR600 Restoration Frame Polished - Down Tube |
 |
| Ralph's 1986 Cannondale SR600 Restoration Frame Polished - Bottom Bracket |
 |
| Ralph's 1986 Cannondale SR600 Restoration Frame Polished - Bottom Bracket |
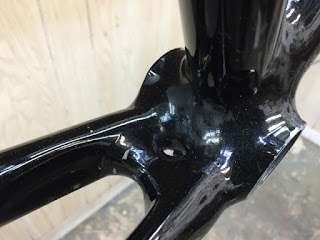 |
| Ralph's 1986 Cannondale SR600 Restoration Frame Polished - Bottom Bracket |
 |
| Ralph's 1986 Cannondale SR600 Restoration Frame Polished - Seat Area |
 |
| Ralph's 1986 Cannondale SR600 Restoration Frame Polished - Seat Stays |
 |
| Ralph's 1986 Cannondale SR600 Restoration Frame Polished - Chain Stays |
 |
| Ralph's 1986 Cannondale SR600 Restoration Frame Polished - Drop Outs |
 |
| Ralph's 1986 Cannondale SR600 Restoration Frame Polished - Fork |
 |
| Ralph's 1986 Cannondale SR600 Restoration Frame Polished - Fork Crown |
 |
| Ralph's 1986 Cannondale SR600 Restoration Frame Polished - Fork Crown |
 |
| Ralph's 1986 Cannondale SR600 Restoration Frame Polished - Fork Crown |
 |
| Ralph's 1986 Cannondale SR600 Restoration Frame Polished - Fork Drop Outs |
The components are going to be a challenge. The black color and the gold pieces can only be polished by hand to protect the color and finish. The headset is also Superbe Pro and so very cool. The chrome pieces of the headset and bottom bracket where polished on the polishing wheel. All other pieces where polished by a lot of hand work. The chrome pieces polished beautifully! The painted pieces polished very nice. I replaced the bearings in the cages of the headset and bottom bracket and packed them in new grease. Installed the headset and bottom bracket spin fantastic, so smooth!! Best of all the headset and bottom bracket look amazing! I am very happy with the results!
 |
| Ralph's 1986 Cannondale SR600 Restoration Headset & Bottom Bracket - Before |
 |
| Ralph's 1986 Cannondale SR600 Restoration Headset & Bottom Bracket - Polished |
 |
| Ralph's 1986 Cannondale SR600 Restoration Headset Bearings - Packed |
 |
| Ralph's 1986 Cannondale SR600 Restoration Pressing Headset Cups |
 |
| Ralph's 1986 Cannondale SR600 Restoration Headset Cups - Pressed |
 |
| Ralph's 1986 Cannondale SR600 Restoration Headset Complete |
 |
| Ralph's 1986 Cannondale SR600 Restoration Headset - Complete |
 |
| Ralph's 1986 Cannondale SR600 Restoration Bottom Bracket Bearings Packed |
 |
| Ralph's 1986 Cannondale SR600 Restoration Bottom Bracket - Complete |
 |
| Ralph's 1986 Cannondale SR600 Restoration Bottom Bracket - Complete |
 |
| Ralph's 1986 Cannondale SR600 Restoration Headset & Bottom Bracket - Complete |
The stem and handlebars are so cool! The black Nitto stem and the black Nitto handlebars. The stem is in good shape. I hand polished it and it turned out beautiful! There is a small scratch on the top that I will fill when I mix the touch up paint. The handlebars are so cool. The gold bands are so cool. I hand polished the center part of the handlebars and they turned out amazing. It is hard to see how amazing with the faded black that goes under the handlebar tape. So cool!! Installed they look even better!!
 |
| Ralph's 1986 Cannondale SR600 Restoration Handlebars & Stem - Before |
 |
| Ralph's 1986 Cannondale SR600 Restoration Handlebars & Stem - Before |
 |
| Ralph's 1986 Cannondale SR600 Restoration Brake Lever |
 |
| Ralph's 1986 Cannondale SR600 Restoration Handlebars & Stem - Before |
 |
| Ralph's 1986 Cannondale SR600 Restoration Handlebars - Before |
 |
| Ralph's 1986 Cannondale SR600 Restoration Stem - Before |
 |
| Ralph's 1986 Cannondale SR600 Restoration Stem - Exploded |
 |
| Ralph's 1986 Cannondale SR600 Restoration Stem & Handlebars - Polished |
 |
| Ralph's 1986 Cannondale SR600 Restoration Handlebars - Polished |
 |
| Ralph's 1986 Cannondale SR600 Restoration Stem - Polished |
 |
| Ralph's 1986 Cannondale SR600 Restoration Stem - Complete |
 |
| Ralph's 1986 Cannondale SR600 Restoration Stem & Hanldebars - Installed |
 |
| Ralph's 1986 Cannondale SR600 Restoration Stem & Handlebars - Installed |
 |
| Ralph's 1986 Cannondale SR600 Restoration Stem - Installed |
 |
| Ralph's 1986 Cannondale SR600 Restoration Stem & Handlebars - Installed |
As of now the brake claipers are missing a few things. Both cap lock nuts are missing. The front brake adjustment barrel and cable lock nut are missing. The brake pads are from a Shimano 600 Tri color brake caliper. For now I restored the brake calipers as I figure out what to do about the missing pieces and the brake pads. The brake calipers are so cool! They are Royal Gran Comps. I broke the calipers down and cleaned all the pieces. With the pieces cleaned I polished the chrome and alloy pieces on the polishing wheels and worked through the polishing of the black pieces by hand. The brake calipers really turned out nice! They will be perfect when I figure out what to do about the missing pieces. I love this stuff!!
 |
| Ralph's 1986 Cannondale SR600 Restoration Royal Gran Comp Calipers - Before |
 |
| Ralph's 1986 Cannondale SR600 Restoration Brake Calipers - Exploded |
 |
| Ralph's 1986 Cannondale SR600 Restoration Royal Gran Comp Calipers - Polished |
 |
| Ralph's 1986 Cannondale SR600 Restoration Royal Gran Comp Calipers - Complete for now. |
 |
| Ralph's 1986 Cannondale SR600 Restoration Front Brake Caliper - Installed |
 |
| Ralph's 1986 Cannondale SR600 Restoration Rear Brake Caliper - Installed |
Now is the really cool stuff, the Sun Tour Superbe Pro derailleurs. As off now I only have the front derailleur done. It took a good deal of cleaning and flushing of the pivot points to get clean and function smooth. With the front derailleur cleaned I worked through the polishing grits by hand and polished the silver pieces on the polishing wheels. The front derailleur turned out amazing! I am super happy with the results! The rear derailleur to come.
 |
| Ralph's 1986 Cannondale SR600 Restoration Superbe Pro Derailleur - Before |
 |
| Ralph's 1986 Cannondale SR600 Restoration Superbe Pro Front Derailleur - Before |
 |
| Ralph's 1986 Cannondale SR600 Restoration Superbe Pro Front Derailleur - Before |
 |
| Ralph's 1986 Cannondale SR600 Restoration Superbe Front Derailleur - Before |
 |
| Ralph's 1986 Cannondale SR600 Restoration Superbe Pro Front Derailleur - Exploded |
 |
| Ralph's 1986 Cannondale SR600 Restoration Superbe Pro Front Derailleur - Polished |
 |
| Ralph's 1986 Cannondale SR600 Restoration Superbe Pro Front Derailleur - Complete |
 |
| Ralph's 1986 Cannondale SR600 Restoration Superbe Pro Front Derailleur - Installed |
The rear derailleur is so cool but it took a while to get restored. I cleaned all of the pieces very carefully as the decals names on it are very delicate and fall apart a little. The cleaning went okay, as hard as I tried some of the decals flaked off. With the pieces cleaned I polished all the chrome pieces on the polishing wheels and all the gold and black pieces by hand. Everything really polished nice, both polishing wheels and by hand. Assembled with new grease and all the pivot points lubricated the derailleur function super smooth. When mixing a touch up paint for the frame I will also fill a few very small chips on the rear derailleur. Over all so far I am really happy with the rear derailleur. I lost the photo of the rear derailleur polished before assembly.
 |
| Ralph's 1986 Cannondale SR600 Restoration Rear Derailleur - Before |
 |
| Ralph's 1986 Cannondale SR600 Restoration Derailleur - Exploded |
 |
| Ralph's 1986 Cannondale SR600 Restoration Rear Suntou Superbe Derailleur - Complete |
 |
| Ralph's 1986 Cannondale SR600 Restoration Rear Derailleur - Installed |
The shift levers are very cool Superbe levers too. I cleaned all the pieces and then polished some of the silver pieces on the polishing wheels. The levers and the gold piece I had to very carefully polish by hand so the gold tone would not polish away. The gold tone already was faded so it had to be really careful. The shift levers with the points greased and installed work so smooth. These shift levers just feel awesome when trying them. I love this stuff.
 |
| Ralph's 1986 Cannondale SR600 Restoration Superbe Shift Levers - Before |
 |
| Ralph's 1986 Cannondale SR600 Restoration Superbe Shift Levers - Before |
 |
| Ralph's 1986 Cannondale SR600 Restoration Superbe Shift Levers - Before |
 |
| Ralph's 1986 Cannondale SR600 Restoration Superbe Shift Levers - Polished |
 |
| Ralph's 1986 Cannondale SR600 Restoration Superbe Shift Levers - Complete |
The seat post and saddle are in ok starting shape. For now I have only completed the seat post. The seat post went through the sonic cleaners and then was polished by hand. The seat post really polished nice by hand. Installed it looks great.
 |
| Ralph's 1986 Cannondale SR600 Restoration Saddle & Seat Post - Before |
 |
| Ralph's 1986 Cannondale SR600 Restoration Seat Post - Before |
 |
| Ralph's 1986 Cannondale SR600 Restoration Seat Post - Polished |
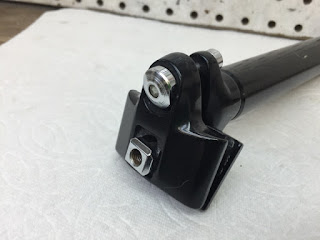 |
| Ralph's 1986 Cannondale SR600 Restoration Seat Post - Polished |
 |
| Ralph's 1986 Cannondale SR600 Restoration Seat Post - Installed |
The crank is just crazy cool! A Suntour all in black. The crank does have a few nicks and scratches and some wear in the chain ring teeth. I don't think the wear is to bad but we will see when a chain is installed. Usually wear in a chain ring doesn't cause problems but wear in a rear cog causes a lot of problems.
I disassembled the crank and worked on cleaning the pieces by hand and with the sonic cleaner. With the pieces cleaned I polished all the silver chrome pieces on the polishing wheels. The black pieces I polished by hand. It took a long time and a lot of work but the black pieces polished beautifully!! Assembled and installed the crank looks amazing! I am very happy with the results. We will see about the wear when we get farther along.
 |
| Ralph's 1986 Cannondale SR600 Restoration Crank - Before |
 |
| Ralph's 1986 Cannondale SR600 Restoration Crank - Exploded |
 |
| Ralph's 1986 Cannondale SR600 Restoration Crank - Exploded |
 |
| Ralph's 1986 Cannondale SR600 Restoration Crank - Polished |
 |
| Ralph's 1986 Cannondale SR600 Restoration Crank - Complete |
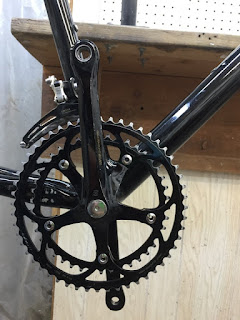 |
| Ralph's 1986 Cannondale SR600 Restoration Crank - Installed |
 |
| Ralph's 1986 Cannondale SR600 Restoration Crank - Installed |
The wheels are very cool. Sew up rims and Superbe wheel hubs. The hubs are not cartridge bearings but they are probably just before them. I disassembled the hubs and cleaned out all the old grease. With the hubs and rims cleaned I worked through polishing by hand. A very time consuming process but every second was worth it. The hubs looks amazing and the rims are perfect.
I installed new bearings and pressed the bearing cages in place. With the cages in place I packed in new grease. The wheels are so cool and now spin super super smooth. You can always tell high end wheels just by the feel of spinning the axle in your hand. So cool! Tires still need to be chosen.
 |
| Ralph's 1986 Cannondale SR600 Restoration Rear Wheel - Before |
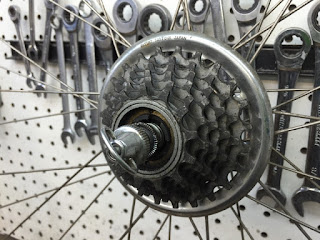 |
| Ralph's 1986 Cannondale SR600 Restoration Rear Wheel Hub - Before |
 |
| Ralph's 1986 Cannondale SR600 Restoration Rear Wheel Hub - Before |
 |
| Ralph's 1986 Cannondale SR600 Restoration Rear Wheel Rim - Before |
 |
| Ralph's 1986 Cannondale SR600 Restoration Rear Wheel Hub - Old Grease |
 |
| Ralph's 1986 Cannondale SR600 Restoration Rear Wheel Hub - Polished |
 |
| Ralph's 1986 Cannondale SR600 Restoration Rear Wheel Rim - Polished |
 |
| Ralph's 1986 Cannondale SR600 Restoration Axle Pieces - Ready |
 |
| Ralph's 1986 Cannondale SR600 Restoration New Rear Wheel Bearings |
 |
| Ralph's 1986 Cannondale SR600 Restoration Rear Wheel - Complete |
 |
| Ralph's 1986 Cannondale SR600 Restoration Rear Wheel - Complete |
 |
| Ralph's 1986 Cannondale SR600 Restoration Front Wheel - Before |
 |
| Ralph's 1986 Cannondale SR600 Restoration Front Wheel Hub - Before |
 |
| Ralph's 1986 Cannondale SR600 Restoration Front Wheel Rim - Before |
 |
| Ralph's 1986 Cannondale SR600 Restoration Front Wheel Hub - Old Grease |
 |
| Ralph's 1986 Cannondale SR600 Restoration Front Wheel Hub - Polished |
 |
| Ralph's 1986 Cannondale SR600 Restoration Front Wheel Rim - Polished |
 |
| Ralph's 1986 Cannondale SR600 Restoration Front Wheel Bearings - Packed |
 |
| Ralph's 1986 Cannondale SR600 Restoration Front Wheel - Complete |
 |
| Ralph's 1986 Cannondale SR600 Restoration Front Wheel - Complete |
 |
| Ralph's 1986 Cannondale SR600 Restoration Wheels - Complete |
More to come soon. The brake levers are still being worked on. Then the freewheel, pie plate, pedals and then wire the bike.
I should have updated the post sooner. I have been frustrated looking for an adjustment barrel for one of the brake calipers. Everything I cam across would not fit. Eventually a friend sent one from Minnesota that was close and I was able to modify it. But that will come lower in the post.
I like the shift levers a lot. they are gritty and sticky but very cool. There was some rust on the end screws that proved difficult to remove. The actual lever could only be polished very lightly to save some of the gold color. With everything cleaned and polished I lubricated all the areas and installed the levers. The levers turned out very nice and function very smooth.
The saddle looks a little rough but it really isn't in to bad of shape. The seat post is very very nice. I cleaned the seat post and then polished the black paint. The seat post turned out very nice. A very nice quality seat post.
The brake levers are very nice early aro levers. I gave the levers a deep cleaning, lubricated the pivot points and treat the brake lever hoods. The brake elvers turned out very nice! The last thing on the levers was I touched up a few paint scratches. The levers look great installed!
At this time I installed the new sew up style tires. These are a fairly good look to match the originals with the tan walls. I think the tires really start to bring the look of Cannondale together.
Below is the adjustment barrel a friend sent. It had thick enough walls I could cut some of to fit the brake caliper arm.
With the barrel found it was time to wire the bike. I chose metallic gold cable housings, I think they are just enough and the right accent for the Cannondale. Goes very well with the all black bike and the gold trim on the derailleurs.
I am still working on finding the photos for one step. They are here somewhere or I will take new photos. The three replacement top tube cable guides that Ralph had ended up being bad. They where very brittle and the plastic are deteriorating. I decided to use the three original cable guides. They where in good shape other then the broken pins that go into the frame. I made new little pins and combined the pins with strong epoxy and clamped the brackets to the frame. After the epoxy cured I removed the clamps. The brackets turned out nice and should hold great. Will find those photos.
I thought a lot about the handlebar tape. Something in a gold color, maybe silver or dark gray. I figured the only color that works with the Cannondale is black! Got to keep the black out look and highlight the gold housings and derailleurs.
Next are the pedals. The pedals still spin very smooth. I gave the pedals a good cleaning and lubricating. I am currently looking for a good touch up paint match to just top them off a little.
I installed the chain this morning. I am missing some photos that I am going to retake and post. I really wanted to test ride the Cannondale today but it has been raining all day and had some nasty hail in there. I am hoping tomorrow I can give the Cannondale a good test ride and take the final photos.
A final photo of the new chain going on. The drive train is very smooth!
That completes the Cannondale.
I had to lower the saddle a long ways on the Cannondale which is unusual for me being 6'4". When I got the saddle in a good position and leveled the saddle it was a lot better. I also noticed when adjusting and in the final photos a little tab sticking down from under the saddle. That got glued back down today. So now on to the test ride. (Which I made really long!) The Cannondale road fantastic, absolutely fantastic!! I could be happy on this bike for the rest of my life if it was the only bike I was aloud to own! But it has to go back to Texas.
I should have updated the post sooner. I have been frustrated looking for an adjustment barrel for one of the brake calipers. Everything I cam across would not fit. Eventually a friend sent one from Minnesota that was close and I was able to modify it. But that will come lower in the post.
I like the shift levers a lot. they are gritty and sticky but very cool. There was some rust on the end screws that proved difficult to remove. The actual lever could only be polished very lightly to save some of the gold color. With everything cleaned and polished I lubricated all the areas and installed the levers. The levers turned out very nice and function very smooth.
 |
| Ralph's 1986 Cannondale SR600 Restoration Shift Levers Exploded |
 |
| Ralph's 1986 Cannondale SR600 Restoration Shift Lever Exploded |
 |
| Ralph's 1986 Cannondale SR600 Restoration Shift Lever Exploded |
 |
| Ralph's 1986 Cannondale SR600 Restoration Shift Levers Polished |
 |
| Ralph's 1986 Cannondale SR600 Restoration Shift Levers Complete |
The saddle looks a little rough but it really isn't in to bad of shape. The seat post is very very nice. I cleaned the seat post and then polished the black paint. The seat post turned out very nice. A very nice quality seat post.
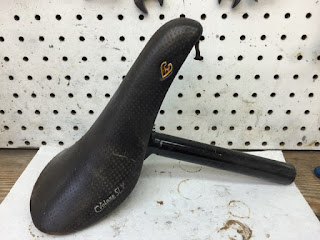 |
| Ralph's 1986 Cannondale SR600 Restoration Seat Post - Before |
 |
| Ralph's 1986 Cannondale SR600 Restoration Seat Post Before |
 |
| Ralph's 1986 Cannondale SR600 Restoration Seat Post Polished |
 |
| Ralph's 1986 Cannondale SR600 Restoration Seat Post Polished |
 |
| Ralph's 1986 Cannondale SR600 Restoration Seat Post Installed |
The brake levers are very nice early aro levers. I gave the levers a deep cleaning, lubricated the pivot points and treat the brake lever hoods. The brake elvers turned out very nice! The last thing on the levers was I touched up a few paint scratches. The levers look great installed!
 |
| Ralph's 1986 Cannondale SR600 Restoration Brake Levers Before |
 |
| Ralph's 1986 Cannondale SR600 Restoration Brake Levers Complete |
 |
| Ralph's 1986 Cannondale SR600 Restoration Brake Levers Installed |
At this time I installed the new sew up style tires. These are a fairly good look to match the originals with the tan walls. I think the tires really start to bring the look of Cannondale together.
 |
| Ralph's 1986 Cannondale SR600 Restoration New Tires |
 |
| Ralph's 1986 Cannondale SR600 Restoration Front Tire Complete |
 |
| Ralph's 1986 Cannondale SR600 Restoration Rear Tire Complete |
 |
| Ralph's 1986 Cannondale SR600 Restoration New Adjustment Barrel |
With the barrel found it was time to wire the bike. I chose metallic gold cable housings, I think they are just enough and the right accent for the Cannondale. Goes very well with the all black bike and the gold trim on the derailleurs.
I am still working on finding the photos for one step. They are here somewhere or I will take new photos. The three replacement top tube cable guides that Ralph had ended up being bad. They where very brittle and the plastic are deteriorating. I decided to use the three original cable guides. They where in good shape other then the broken pins that go into the frame. I made new little pins and combined the pins with strong epoxy and clamped the brackets to the frame. After the epoxy cured I removed the clamps. The brackets turned out nice and should hold great. Will find those photos.
 |
| Ralph's 1986 Cannondale SR600 Restoration New Gold Cable Housing & Cables |
 |
| Ralph's 1986 Cannondale SR600 Restoration Brakes Wired |
 |
| Ralph's 1986 Cannondale SR600 Restoration Rear Brake Wired |
 |
| Ralph's 1986 Cannondale SR600 Restoration Rear Brake Wired |
 |
| Ralph's 1986 Cannondale SR600 Restoration New Handlebar Tape |
 |
| Ralph's 1986 Cannondale SR600 Restoration Handlebar Tape Complete |
Next are the pedals. The pedals still spin very smooth. I gave the pedals a good cleaning and lubricating. I am currently looking for a good touch up paint match to just top them off a little.
 |
| Ralph's 1986 Cannondale SR600 Restoration Pedals Before |
 |
| Ralph's 1986 Cannondale SR600 Restoration Pedals Complete |
A final photo of the new chain going on. The drive train is very smooth!
 |
| Ralph's 1986 Cannondale SR600 Restoration Chain Installed |
 |
| Ralph's 1986 Cannondale SR600 Restoration Chain Installed |
 |
| Ralph's 1986 Cannondale SR600 Restoration Bicycle Complete |
I had to lower the saddle a long ways on the Cannondale which is unusual for me being 6'4". When I got the saddle in a good position and leveled the saddle it was a lot better. I also noticed when adjusting and in the final photos a little tab sticking down from under the saddle. That got glued back down today. So now on to the test ride. (Which I made really long!) The Cannondale road fantastic, absolutely fantastic!! I could be happy on this bike for the rest of my life if it was the only bike I was aloud to own! But it has to go back to Texas.
The Superbe Pro components are just like butter! They feel so smooth and easy and tight. The shifting is so sharp and smooth at the same time! It has that feeling of bike components that are as nice and as well made as possible. The feel you get from Dura Ace components, they just have a feel of quality. I am impressed beyond impressed! The wheels and new tires feel great and are very fast but then they should be very fast at 140 psi!
I am very happy with the way the Cannondale turned out visually. The all black and then just the metallic gold cable housings and decal are perfect. The perfect amount of accent for all the black! The paint chips in the frame cleaned and filled very nice. The original rear brake cable guides came out nice and the modification with epoxy and pins turned out very strong and they look good.
The weather is suppose to be nice tomorrow so one more "test" ride before packing the Cannondale up for its return home to Texas.
 |
| Ralph's 1986 Cannondale SR600 Restoration Bicycle Complete |
 |
| Ralph's 1986 Cannondale SR600 Restoration Bicycle Complete |
 |
| Ralph's 1986 Cannondale SR600 Restoration Bicycle Complete Handlebars |
 |
| Ralph's 1986 Cannondale SR600 Restoration Bicycle Complete - Stem & Handlebars |
 |
| Ralph's 1986 Cannondale SR600 Restoration Bicycle Complete - Head Tube |
 |
| Ralph's 1986 Cannondale SR600 Restoration Bicycle Complete - Front Brake Caliper |
 |
| Ralph's 1986 Cannondale SR600 Restoration Bicycle Complete - Front Wheel Hub |
 |
| Ralph's 1986 Cannondale SR600 Restoration Bicycle Complete - Front Wheel Rim |
 |
| Ralph's 1986 Cannondale SR600 Restoration Bicycle Complete - Stem |
 |
| Ralph's 1986 Cannondale SR600 Restoration Bicycle Complete - Handlebars |
 |
| Ralph's 1986 Cannondale SR600 Restoration Bicycle Complete - Head Tube |
 |
| Ralph's 1986 Cannondale SR600 Restoration Bicycle Complete - Front Half |
 |
| Ralph's 1986 Cannondale SR600 Restoration Bicycle Complete - Top Tube |
 |
| Ralph's 1986 Cannondale SR600 Restoration Bicycle Complete - Saddle |
 |
| Ralph's 1986 Cannondale SR600 Restoration Bicycle Complete - Seat Area |
 |
| Ralph's 1986 Cannondale SR600 Restoration Bicycle Complete - Bottom Bracket |
 |
| Ralph's 1986 Cannondale SR600 Restoration Bicycle Complete - Drive Train |
 |
| Ralph's 1986 Cannondale SR600 Restoration Bicycle Complete - Front Derailleur |
 |
| Ralph's 1986 Cannondale SR600 Restoration Bicycle Complete - Crank |
 |
| Ralph's 1986 Cannondale SR600 Restoration Bicycle Complete - Seat Area |
 |
| Ralph's 1986 Cannondale SR600 Restoration Bicycle Complete - Rear Brake Caliper |
 |
| Ralph's 1986 Cannondale SR600 Restoration Bicycle Complete - Rear Derailleur |
 |
| Ralph's 1986 Cannondale SR600 Restoration Bicycle Complete - Rear Wheel Hub |
 |
| Ralph's 1986 Cannondale SR600 Restoration Bicycle Complete |
Really great work on a beautiful bike John. I have a little bad news for you though. That is an SR800 rather than an SR600. I have that exact bike in a 54 cm frame. I will try to get you a picture of the chain stay protector sticker that says SR800. The only other difference that I see is the sew up rims he has. Mine has Wolber Super Champion Alpine clincher rims, and I know they are original. I have been trying to figure out a way to update the drivetrain a little with index shifting and more gears, but have not figured out how to do it without destroying the aesthetics of that bike. Suggestions? I found a black set of accushift shifters and I can upgrade to a 7 speed freewheel and new chain from the original 6 speed. That should all work with the original superbe pro derailleur. I would love to get more gears if I can but I think that would require me to change the rear derailleur to get enough range. And there are no other derailleurs that look as good.
ReplyDelete