|
| Joel's Schwinn Super Sport Restoration - Bicycle After Restoration |
 |
Joel's Schwinn Super Sport Restoration
Delivering the Super Sport! |
As I wait on a few things to finish up the other restoration going on now I started work on Joel's Schwinn Super Sport. The Super Sport is a wonderful bicycle. A very versatile bicycle and a very comfortable Cadillac like bicycle. The geometry of a Super Sport is relaxed just enough to make it an all day rider but just aggressive enough to make it fairly fast.
Joel already has a Super Sport that has been heavily modified. His girl friend has a beautiful yellow step through Super Sport. The Super Sport can be like a blank canvas, many many changes can be made and built up in many different ways. I got to test ride his modified Super Sport and it is wonderful. It has a bottom bracket conversion with a beautiful Super Maxy crank, new wheels, a beautiful green Brooks saddle and Brooks handlebar tape. A stunner in that green and photoed below.
 |
| Joel's Schwinn Super Sport Restoration - His Other Super Sport |
 |
| Joel's Schwinn Super Sport Restoration - His Other Super Sport |
Joel's blue Schwinn Super Sport will be restored to a more stock build but with a Brooks saddle and Brooks handlebar tape. The blue Super Sport is in pretty good starting shape, there are just a few chips and scratches in the paint. The paint is a soft paint and it looks as if the previous owner used a very course scrub brush to clean it. It will take a lot of polishing and polishing compound to work back to a smooth paint finish. The components are in very good condition with hardly any rust.
The Super Sport will receive a total restoration along with new cables and cable housings, new bearings and brake pads, new Panaracer tires, a new Brooks saddle and new Brooks handlebar tape. I think the Super Sport will turn out amazing and I can't wait to give it a test ride.
 |
| Joel's Schwinn Super Sport Restoration - Bicycle Before |
 |
Joel's Schwinn Super Sport Restoration - Bicycle Before
Handlebars |
 |
Joel's Schwinn Super Sport Restoration - Bicycle Before
Brake Lever |
 |
Joel's Schwinn Super Sport Restoration - Bicycle Before
Stem |
 |
Joel's Schwinn Super Sport Restoration - Bicycle Before
Head Tube |
 |
Joel's Schwinn Super Sport Restoration - Bicycle Before
Front Brake Caliper |
 |
Joel's Schwinn Super Sport Restoration - Bicycle Before
Front Wheel Hub |
 |
Joel's Schwinn Super Sport Restoration - Bicycle Before
Front Wheel Rim |
 |
Joel's Schwinn Super Sport Restoration - Bicycle Before
Stem |
 |
Joel's Schwinn Super Sport Restoration - Bicycle Before
Head Tube |
 |
Joel's Schwinn Super Sport Restoration - Bicycle Before
Fork Crown |
 |
Joel's Schwinn Super Sport Restoration - Bicycle Before
Front Wheel Hub |
 |
Joel's Schwinn Super Sport Restoration - Bicycle Before
Front |
 |
Joel's Schwinn Super Sport Restoration - Bicycle Before
Top Tube |
 |
Joel's Schwinn Super Sport Restoration - Bicycle Before
Down Tube |
 |
Joel's Schwinn Super Sport Restoration - Bicycle Before
Saddle |
 |
Joel's Schwinn Super Sport Restoration - Bicycle Before
Chicago Decal |
 |
Joel's Schwinn Super Sport Restoration - Bicycle Before
Bottom Bracket |
 |
Joel's Schwinn Super Sport Restoration - Bicycle Before
Crank |
 |
Joel's Schwinn Super Sport Restoration - Bicycle Before
Front Derailleur |
 |
Joel's Schwinn Super Sport Restoration - Bicycle Before
Front Derailleur |
 |
Joel's Schwinn Super Sport Restoration - Bicycle Before
Pedal |
 |
Joel's Schwinn Super Sport Restoration - Bicycle Before
Seat Collar |
 |
Joel's Schwinn Super Sport Restoration - Bicycle Before
Rear Brake Caliper |
 |
Joel's Schwinn Super Sport Restoration - Bicycle Before
Rear Derailleur |
 |
Joel's Schwinn Super Sport Restoration - Bicycle Before
Rear Wheel Hub |
 |
Joel's Schwinn Super Sport Restoration - Bicycle Before
Rear Wheel Rim |
 |
| Joel's Schwinn Super Sport Restoration - Bicycle Before |
I stripped the frame of the components. I had some trouble getting the stem to break free but I tried a few of my tricks and it eventually broke free. With the components removed you can really see the damage the stiff scrub brush did to the paint. I think it should all polish out though. The frame also has a sticky layer of goop on some areas of the frame. Overall all though there are only a few paint chips. Some chips have been filled a long time ago but i hope to refill those with a better match.
 |
| Joel's Schwinn Super Sport Restoration - Frame Before |
 |
Joel's Schwinn Super Sport Restoration - Frame Before
Head Tube |
 |
Joel's Schwinn Super Sport Restoration - Frame Before
Head Tube |
 |
Joel's Schwinn Super Sport Restoration - Frame Before
Head Tube |
 |
Joel's Schwinn Super Sport Restoration - Frame Before
Head Tube |
 |
Joel's Schwinn Super Sport Restoration - Frame Before
Down Tube |
 |
Joel's Schwinn Super Sport Restoration - Frame Before
Down Tube |
 |
Joel's Schwinn Super Sport Restoration - Frame Before
Seat Lug |
 |
Joel's Schwinn Super Sport Restoration - Frame Before
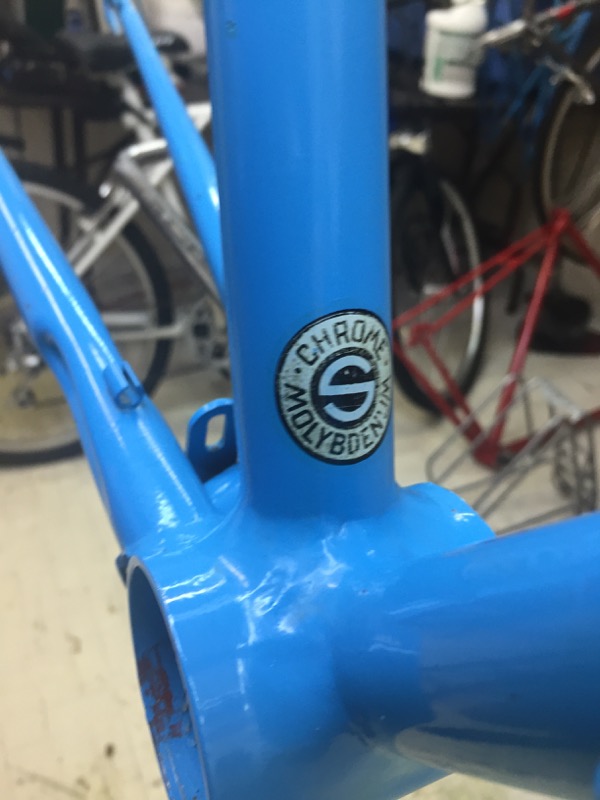
Chicago Decal |
 |
Joel's Schwinn Super Sport Restoration - Frame Before
Decal |
 |
Joel's Schwinn Super Sport Restoration - Frame Before
Bottom Bracket |
 |
Joel's Schwinn Super Sport Restoration - Frame Before
Bottom Bracket |
 |
Joel's Schwinn Super Sport Restoration - Frame Before
Bottom Bracket |
 |
Joel's Schwinn Super Sport Restoration - Frame Before
Seat Stays |
 |
Joel's Schwinn Super Sport Restoration - Frame Before
Chain Stays |
 |
Joel's Schwinn Super Sport Restoration - Frame Before
Drop Outs |
 |
| Joel's Schwinn Super Sport Restoration - Frame Before |
 |
Joel's Schwinn Super Sport Restoration - Frame Before
Fork |
 |
Joel's Schwinn Super Sport Restoration - Frame Before
Fork Crown |
 |
Joel's Schwinn Super Sport Restoration - Frame Before
Fork Crown |
 |
Joel's Schwinn Super Sport Restoration - Frame Before
Fork Blades |
 |
Joel's Schwinn Super Sport Restoration - Frame Before
Fork Drop Outs |
 |
Joel's Schwinn Super Sport Restoration - Frame Before
Fork Blades |
I gave the frame a really good cleaning. I removed that sticky goop too. I started with a very course polishing grit and was very careful not to burn through the paint, just enough to remove the scrub brush scratches. Then on to the much finer grits. The frame really polished beautifully. The shine in the photos does not do it justice, it doesn't seem to photo graph well the blue color. I am super happy with the polishing results. I think I will give the frame one more light polishing later on. I also have not applied the sealer wax yet because a few decals will be replaced and the wax will make that go poorly. A touch up paint will be applied before the wax also, I have not mixed the touch up yet.
 |
| Joel's Schwinn Super Sport Restoration - Frame Polished |
 |
Joel's Schwinn Super Sport Restoration - Frame Polished
Head Tube |
 |
Joel's Schwinn Super Sport Restoration - Frame Polished
Head Tube |
 |
Joel's Schwinn Super Sport Restoration - Frame Polished
Head Tube |
 |
Joel's Schwinn Super Sport Restoration - Frame Polished
Head Tube Area |
 |
Joel's Schwinn Super Sport Restoration - Frame Polished
Down Tube |
 |
Joel's Schwinn Super Sport Restoration - Frame Polished
Seat Lug |
 |
Joel's Schwinn Super Sport Restoration - Frame Polished
Chicago Decal |
 |
Joel's Schwinn Super Sport Restoration - Frame Polished
Seat Lug |
 |
Joel's Schwinn Super Sport Restoration - Frame Polished
Bottom Bracket |
 |
Joel's Schwinn Super Sport Restoration - Frame Polished
Bottom Bracket |
 |
Joel's Schwinn Super Sport Restoration - Frame Polished
Bottom Bracket |
 |
Joel's Schwinn Super Sport Restoration - Frame Polished
Bottom Bracket |
 |
Joel's Schwinn Super Sport Restoration - Frame Polished
Seat Stays |
 |
Joel's Schwinn Super Sport Restoration - Frame Polished
Chain Stays |
 |
Joel's Schwinn Super Sport Restoration - Frame Polished
Drop Outs |
 |
Joel's Schwinn Super Sport Restoration - Frame Polished
Fork |
 |
Joel's Schwinn Super Sport Restoration - Frame Polished
Fork Crown |
 |
Joel's Schwinn Super Sport Restoration - Frame Polished
Fork Blades |
 |
Joel's Schwinn Super Sport Restoration - Frame Polished
Fork Drop Outs |
Joel found a new old stock head badge to replace the original that is dull and faded. You can see on the old head badge the damage the stiff scrub brush did to it. I installed the new head badge now and it looks fantastic against the polished paint.
 |
Joel's Schwinn Super Sport Restoration
New & Old Head Badge |
 |
Joel's Schwinn Super Sport Restoration
New Head Badge - Installed |
I finally caught up on the restorations that are documented before Joel's Super Sport so check those out. With those caught up I have been able to focus more and more on the Super Sport. First step was the headset. Below is a photo of the headset and the bottom bracket components before cleaning and polishing. The bottom bracket completion will come later when the crank is complete. For now just the headset.
The headset was in nice starting shape. I cleaned all the pieces and polished everything on the industrial polishers. I replaced the ball bearings but kept the bearing cages. It is to bad on the Schwinn set up that it is not seen after assembly but the top bearing cap is my favorite of all time, it has such a nice shape. I packed the bearings in new grease and the headset spins beautifully. A Schwinn headset may be over built in its heavy duty pieces but there are no headsets that spin as easy and as nice as a Schwinn headset.
I also restored the Schwinn Big Stick shift levers as they are part of the headset. I cleaned and polished all the pieces of the shift levers and lubricated and assembled the levers. The levers look great and function really smooth. One of the lock wing nuts is broken on the shift levers, I have a replacement in a very nice storage box in storage. When I get it out of storage I will replace the broken wing nut.
The cable hanger has a little bit of rust pitting, this is not uncommon for these cable hangers. This one is not to bad.
 |
Joel's Schwinn Super Sport Restoration
Headset & Bottom Bracket - Before |
 |
Joel's Schwinn Super Sport Restoration
Schwinn Shift Levers - Before |
 |
Joel's Schwinn Super Sport Restoration
Schwinn Shift Levers - Before |
 |
Joel's Schwinn Super Sport Restoration
Schwinn Shift Levers - Before |
 |
Joel's Schwinn Super Sport Restoration
Headset & Shift Levers - Polished |
 |
Joel's Schwinn Super Sport Restoration
Shift Levers - Polished |
 |
Joel's Schwinn Super Sport Restoration
Shift Levers - Polished |
 |
Joel's Schwinn Super Sport Restoration
Pressing Headset Cups |
 |
Joel's Schwinn Super Sport Restoration
Headset Cups - Pressed |
 |
Joel's Schwinn Super Sport Restoration
Bearings - Packed |
 |
Joel's Schwinn Super Sport Restoration
Headset Top Cap - Installed
That is the part that I like the design of. |
 |
Joel's Schwinn Super Sport Restoration
Headset - Complete |
 |
Joel's Schwinn Super Sport Restoration
Headset - Complete |
 |
Joel's Schwinn Super Sport Restoration
Headset Complete - Slight Pitting on Cable Hanger. |
 |
Joel's Schwinn Super Sport Restoration
Headset - Complete |
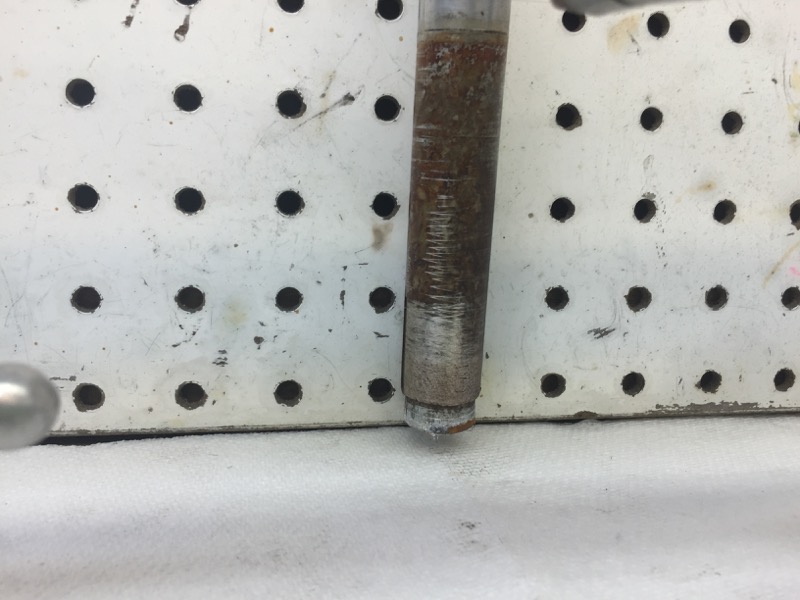
With the headset complete its time to move on to the stem and handlebars. The stem is the very nice and very light "S" logo stem. I cleaned the stem and then worked though the polishing. The stem polished beautifully. The stem was stuck in the fork tube and you can see in the before photo the rust stains from the fork tube, all of those rust stains polished away.
The handlebars that Schwinn used are one of my favorites, the shape is a very comfortable shape with the slight rise in the flats and the flare out of the drops, they are basically Ranndonneur style handlebars. The handlebars polished beautifully, I am ver pleased with the results.
Installed the stem looks fantastic and the handlebars and stem really go well with the polished headset and paint. I love this stuff!!
 |
Joel's Schwinn Super Sport Restoration
Stem & Handlebars - Before |
 |
Joel's Schwinn Super Sport Restoration
Handlebars - Before |
 |
Joel's Schwinn Super Sport Restoration
Stem - Before |
 |
Joel's Schwinn Super Sport Restoration
Stem - Exploded |
 |
Joel's Schwinn Super Sport Restoration
Stem where it was stuck. |
 |
Joel's Schwinn Super Sport Restoration
Stem & Handlebars - Polished |
 |
Joel's Schwinn Super Sport Restoration
Handlebars - Polished |
 |
Joel's Schwinn Super Sport Restoration
Stem - Polished |
 |
Joel's Schwinn Super Sport Restoration
Stem - Polished - Greasy finger prints. |
 |
Joel's Schwinn Super Sport Restoration
Stem - Complete |
 |
Joel's Schwinn Super Sport Restoration
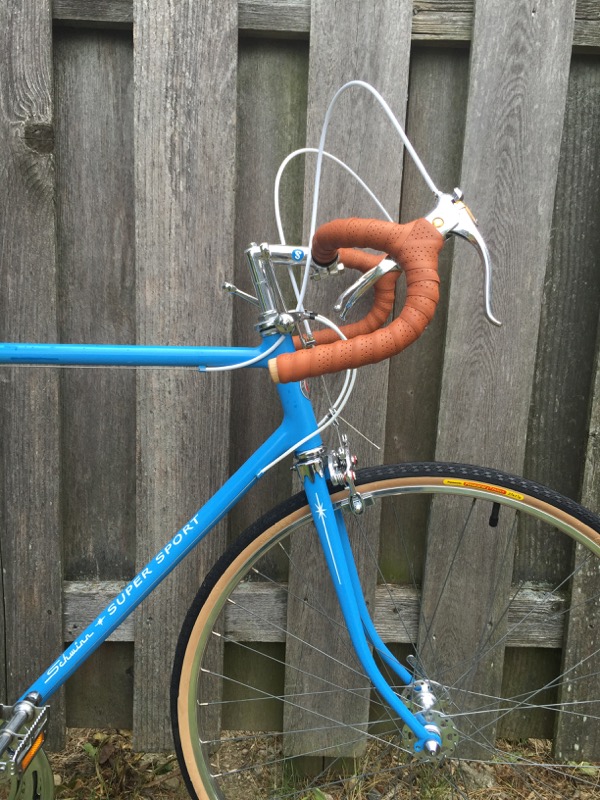
Stem & Handlebars - Complete |
 |
Joel's Schwinn Super Sport Restoration
Stem & Handlebars - Complete |
 |
Joel's Schwinn Super Sport Restoration
Stem & Handlebars - Complete |
 |
Joel's Schwinn Super Sport Restoration
Stem & Handlebars - Complete |
 |
Joel's Schwinn Super Sport Restoration
Brake Levers - Before |
 |
Joel's Schwinn Super Sport Restoration
Brake Levers - Before |
 |
Joel's Schwinn Super Sport Restoration
Brake Levers - Polished |
 |
Joel's Schwinn Super Sport Restoration
Brake Levers - Polished |
 |
Joel's Schwinn Super Sport Restoration
Brake Levers - Installed |
 |
Joel's Schwinn Super Sport Restoration
Brake Levers - Installed |
 |
Joel's Schwinn Super Sport Restoration
Brake Levers - Installed |
I ran out of time for photos before I have to go for the day now. The Super Sport is a little farther along then this. Check back later.
This morning I started work on the brake calipers. The calipers are nice Die-Comp center pull brakes. I like the center pull brakes from this era a lot. They polish and look beautiful and they actually work very well in stopping also.
There are a lot of pieces to center pull brakes and they are the most time consuming piece of a restoration. It is a real joy assembling pieces when they have been cleaned and polished and restored.
I assembled all the pieces of the calipers and applied grease and lubrication to all the pivot points. The brake calipers turned out amazing. They polished beautifully and look fantastic installed. I love this stuff!!
I did install the basic black brake pads as a place holder until some Gray Matter pads arrive.
 |
Joel's Schwinn Super Sport Restoration
Die-Comp Center Pull Brake Calipers - Before |
 |
Joel's Schwinn Super Sport Restoration
Die-Comp Center Pull Brake Calipers - Exploded |
 |
Joel's Schwinn Super Sport Restoration
Die-Comp Center Pull Brake Calipers - Polished |
 |
Joel's Schwinn Super Sport Restoration
Die-Comp Center Pull Brake Calipers - Complete |
 |
Joel's Schwinn Super Sport Restoration
Front Die-Comp Center Pull Brake Calipers - Installed |
 |
Joel's Schwinn Super Sport Restoration
Rear Die-Comp Center Pull Brake Calipers - Installed |
Next I installed the seat post collar and rear brake cable hanger. The cable hanger and collar was a little rough. I cleaned all the pieces and worked through the industrial polishing wheels. The collar and hanger polished beautifully and look fantastic. There are a few nicks that where a little to deep to polish away but they should not stand out to much. Over all I am pleased with the results of the collar and cable hanger.
 |
Joel's Schwinn Super Sport Restoration
Seat Tube Collar & Cable Hanger - Before |
 |
Joel's Schwinn Super Sport Restoration
Seat Tube Collar & Cable Hanger - Exploded |
 |
Joel's Schwinn Super Sport Restoration
Seat Tube Collar & Cable Hanger - Polished |
 |
Joel's Schwinn Super Sport Restoration
Seat Tube Collar & Cable Hanger - Complete |
 |
Joel's Schwinn Super Sport Restoration
Seat Tube Collar & Cable Hanger - Installed |
The front derailleur is in good starting shape, just dirty, a little dull and stiff. I cleaned the front derailleur pieces and then polished everything on the polishers. With everything polished I worked on lubricating a loosening up the pivot points. The derailleur turned out very nice and now functions better too. I am very happy with the front derailleur.
In the photo of the front derailleur installed you can see the paint damage. I will have to remove the derailleur to touch up that paint but for now I wanted to see the derailleur installed.
 |
Joel's Schwinn Super Sport Restoration
Front Derailleur - Before |
 |
Joel's Schwinn Super Sport Restoration
Front Derailleur - Before |
 |
Joel's Schwinn Super Sport Restoration
Front Derailleur - Before |
 |
Joel's Schwinn Super Sport Restoration
Front Derailleur - Exploded |
 |
Joel's Schwinn Super Sport Restoration
Front Derailleur - Polished |
 |
Joel's Schwinn Super Sport Restoration
Front Derailleur - Complete |
 |
Joel's Schwinn Super Sport Restoration
Front Derailleur - Installed |
The rear derailleur is a little bit complicated as far as rear derailleurs go. I disassembled the rear derailleur and cleaned all the pieces. With the pieces cleaned I could start the polishing process. With the pieces polished I assembled the derailleur lubricating all of the correct areas. The derailleur looks good and functions smooth. The derailleur looks great installed but needs the chain installed to put the proper tension in the derailleur.
 |
Joel's Schwinn Super Sport Restoration
Rear Derailleur - Before |
 |
Joel's Schwinn Super Sport Restoration
Rear Derailleur - Before |
 |
Joel's Schwinn Super Sport Restoration
Rear Derailleur - Exploded |
 |
Joel's Schwinn Super Sport Restoration
Rear Derailleur - Polished |
 |
Joel's Schwinn Super Sport Restoration
Rear Derailleur - Complete |
 |
Joel's Schwinn Super Sport Restoration
Rear Derailleur - installed |
Next I installed the drop out guide on the opposite side of the derailleur. The guide polished very nice and looks great installed.
 |
Joel's Schwinn Super Sport Restoration
Drop Outs Guide - Polished |
 |
Joel's Schwinn Super Sport Restoration
Drop Out Guide - Installed |
I started work on the wheels next. The crank has been a slow polishing process poising it by hand and will be installed when ready. The wheels where a break from the crank. I disassembled the wheels and started cleaning the axle components and the hubs and rims.
The wheel hubs polished very nice, the wheel hubs had a lot of scratching from the stiff scrub brush that was used on the bike. I was not able to completely remove those scrub brush scratches but over all the hubs polished very nice and the scratches are not that big of a problem. I cleaned and prepared the axle components and installed new bearings and grease.
The front wheel I think had new grease installed not to long ago but I don't think the old dry grease was completely cleaned out first.
With the wheels spinning nice and the rims looking great polished I installed the new Panaracer Pasela tires. The Panaracer Tan wall tires are perfect for the Super Sport and will ride great. The wheels installed om the Super Sport are fantastic, they complement the blue color very well and over all the wheels look great and spin even better. I have always really like the Schwinn High Flange wheels. Schwinn also put very nice wheels on the Super Sport, I am very pleased with the results.
 |
Joel's Schwinn Super Sport Restoration
Front Wheel - Before |
 |
Joel's Schwinn Super Sport Restoration
Front Wheel Hub - Before |
 |
Joel's Schwinn Super Sport Restoration
Front Wheel Hub - Before |
 |
Joel's Schwinn Super Sport Restoration
Front Wheel Rim - Before |
 |
Joel's Schwinn Super Sport Restoration
Front Wheel Hub - Old Grease |
 |
Joel's Schwinn Super Sport Restoration
Front Wheel Hub - Polished |
 |
Joel's Schwinn Super Sport Restoration
Front Wheel Rim - Polished |
 |
Joel's Schwinn Super Sport Restoration
Wheel Axle Components - Ready |
 |
Joel's Schwinn Super Sport Restoration
Front Wheel Bearings - Packed |
 |
Joel's Schwinn Super Sport Restoration
New Panaracer Tires |
 |
Joel's Schwinn Super Sport Restoration
Front Wheel Complete |
 |
Joel's Schwinn Super Sport Restoration
Front Wheel Complete |
 |
Joel's Schwinn Super Sport Restoration
Rear Wheel - Before |
 |
Joel's Schwinn Super Sport Restoration
Rear Wheel Hub - Before |
 |
Joel's Schwinn Super Sport Restoration
Rear Wheel Hub - Before |
 |
Joel's Schwinn Super Sport Restoration
Rear Wheel hub - Before |
 |
Joel's Schwinn Super Sport Restoration
Rear Wheel Rim - Before |
 |
Joel's Schwinn Super Sport Restoration
Rear Wheel Hub - Old Grease |
 |
Joel's Schwinn Super Sport Restoration
Rear Wheel Hub - Polished |
 |
Joel's Schwinn Super Sport Restoration
Rear Wheel Hub - New Bearings & grease |
 |
Joel's Schwinn Super Sport Restoration
Rear Wheel - Complete |
 |
Joel's Schwinn Super Sport Restoration
Rear Wheel - Complete |
 |
Joel's Schwinn Super Sport Restoration
Wheels - Complete |
The bottom bracket was in descent starting shape, just a some hard dried grease to remove. I replaced the bearings and polished the pieces. The pieces polished very nice. The bearings cups on the inside where a little rough but after polishing the area where the bearings make contact is very smooth.
The crank took sometime to get to look good. It had a very stubborn film on everything that did not remove easily. Once I got that film off I did all the polishing by hand as a crank can be difficult and dangerous to polish on the industrial polishers. Once you get a chain ring impaled in your shoulder you tend not to want to polish that way again..lol...
The crank polished very nicely, there was some slight rust pitting but it is not noticeable after polishing and should not cause a problem. The crank installed looks fantastic and spins perfect. The crank is hard to photograph because it shines so much. I am very happy with the results of the crank and bottom bracket.
|
Joel's Schwinn Super Sport Restoration
Bottom Bracket - Before |
 |
Joel's Schwinn Super Sport Restoration
Bottom Bracket - Polished |
 |
Joel's Schwinn Super Sport Restoration
Crank - Before |
 |
Joel's Schwinn Super Sport Restoration
Crank - Before |
 |
Joel's Schwinn Super Sport Restoration
Crank - Exploded |
 |
Joel's Schwinn Super Sport Restoration
Crank Bolts - Before |
 |
Joel's Schwinn Super Sport Restoration
Crank - Polished |
 |
Joel's Schwinn Super Sport Restoration
Crank - Complete |
 |
Joel's Schwinn Super Sport Restoration
Bearing Cups - Installed |
 |
Joel's Schwinn Super Sport Restoration
Bearings - Packed |
 |
Joel's Schwinn Super Sport Restoration
Crank - Complete |
 |
Joel's Schwinn Super Sport Restoration
Crank - Complete |
 |
Joel's Schwinn Super Sport Restoration
Bottom Bracket - Complete |
While I was searching for my drawer with the Schwinn Seat collars in it (I have many many drawers of components) I found the drawer with all the small pieces for shift levers. I found a nice wing nut for the Big Stick shift levers and replaced that .
 |
Joel's Schwinn Super Sport Restoration
Before and Replacement Wing Nut |
 |
Joel's Schwinn Super Sport Restoration
New Wing Nut - Installed |
I searched through the drawer of Schwinn Seat collars. I could not find the correct collar. I had a lot of smaller diameter collars and then a lot of the mattress spring saddle type collars. I will have to see what I can do but for now I installed a generic collar with the correct size diameter. It is black in collar. I also discovered that a standard seat collar might be way to wide for the Brooks saddle, the Brooks saddle is a narrow model and the only way to fit a standard seat collar with the saddle is to move the saddle way up. I will have to think about this for a while.
The new saddle is very very cool, a Brooks Professional which I already forgo the model number, I will have to look that up when I go back in the shop. I love the color and the color installed against the blue. So so very cool!! A cool factor of 10!!
 |
Joel's Schwinn Super Sport Restoration
New Brooks Saddle |
 |
Joel's Schwinn Super Sport Restoration
New Brooks Saddle - Installed |
 |
Joel's Schwinn Super Sport Restoration
Generic Seat Collar Set Way Back |
 |
Joel's Schwinn Super Sport Restoration
Brooks Saddle - Installed |
Hitting the home stretch. I just wish the decals and brake pads would show up.
On Saturday the decals came for the Super Sport. That meant the old decals needed to be removed. The old decals fought me hard, they did not want to be removed.
The decals seem to be pretty nice quality. Sorry for some of the photos being not orientated the best.
 |
Joel's Schwinn Super Sport Restoration
New Deal Set |
 |
Joel's Schwinn Super Sport Restoration
Old Decal |
 |
Joel's Schwinn Super Sport Restoration
Old Seat Tube Decal |
 |
Joel's Schwinn Super Sport Restoration
Old Down Tube Deal |
 |
Joel's Schwinn Super Sport Restoration
Old Down Tube Decal |
 |
Joel's Schwinn Super Sport Restoration
Super Sport No Decals - Naked |
The Super Sport looks dull with no decals.