This is David's Raleigh Sprite I started this last week. I love the Raleigh Sprite, one of the most underrated bicycles around. And this on is in Ruby Red!! The Sprite is a work horse type of bike. It can get you around ton running errands or getting a coffee. It can also be an all day rider and just great for getting lot in the country side. I love them!
This Raleigh Sprite is in fairly good starting shape. It is not caked with dirt so that makes prepping things a little easier, there is some surface rust here and there on the components but the paint I think will be spectacular. There is a few chips here and there but nothing to much. That Ruby Red should shine beautifully when it complete.
The Sprite will receive a total restoration which will be an original paint save, along with new tires, tubes, new saddle, new cables and cable housings, new bearings and a new wider chain. A wider chain works a lot better on these Hurret derailleur Sprites then the original chain does.
I can't wait to see that red paint Shine!!
 |
| David's Ruby Red Raleigh Sprite Restoration - Bicycle Before |
 |
| David's Ruby Red Raleigh Sprite Restoration - Bicycle BeforeHandlebars & Stem |
 |
| David's Ruby Red Raleigh Sprite Restoration - Bicycle Before Head Tube |
 |
| David's Ruby Red Raleigh Sprite Restoration - Bicycle Before Front Brake |
 |
| David's Ruby Red Raleigh Sprite Restoration - Bicycle Before Front Wheel Hub |
 |
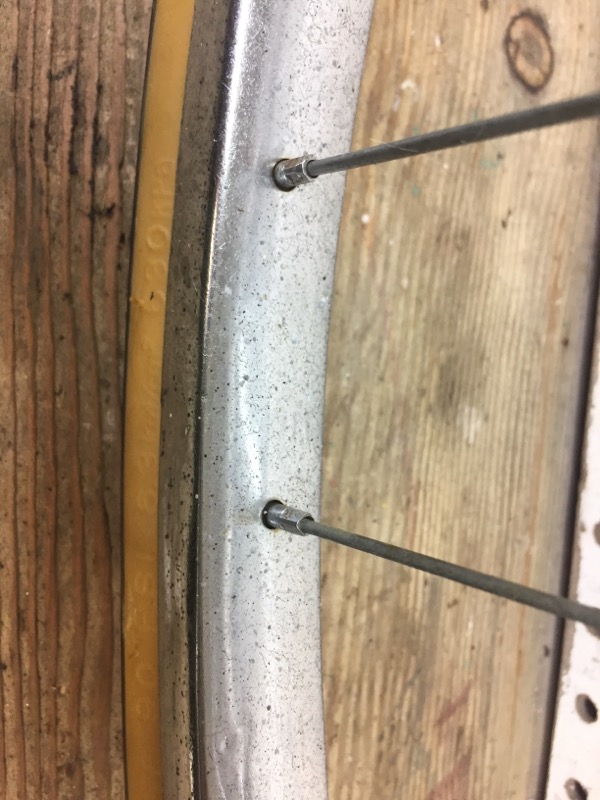
| David's Ruby Red Raleigh Sprite Restoration - Bicycle Before Front Wheel Rim |
 |
| David's Ruby Red Raleigh Sprite Restoration - Bicycle Before Stem |
 |
| David's Ruby Red Raleigh Sprite Restoration - Bicycle Before Headset |
 |
| David's Ruby Red Raleigh Sprite Restoration - Bicycle Before Head Tube |
 |
| David's Ruby Red Raleigh Sprite Restoration - Bicycle Before Headset |
 |
| David's Ruby Red Raleigh Sprite Restoration - Bicycle Before Fork |
 |
| David's Ruby Red Raleigh Sprite Restoration - Bicycle Before Fork |
 |
| David's Ruby Red Raleigh Sprite Restoration - Bicycle Before Top Tube |
 |
| David's Ruby Red Raleigh Sprite Restoration - Bicycle Before Cable Stop |
 |
| David's Ruby Red Raleigh Sprite Restoration - Bicycle Before Down Tube |
 |
| David's Ruby Red Raleigh Sprite Restoration - Bicycle Before Seat Lug |
 |
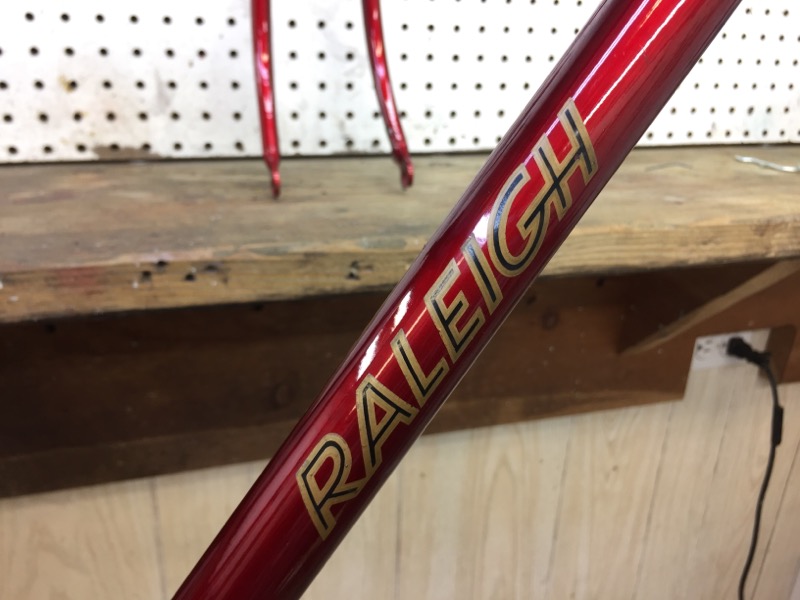
| David's Ruby Red Raleigh Sprite Restoration - Bicycle Before Seat Tube Tubing Decal |
 |
| David's Ruby Red Raleigh Sprite Restoration - Bicycle Before Bottom Bracket |
 |
| David's Ruby Red Raleigh Sprite Restoration - Bicycle Before Drive Train |
 |
| David's Ruby Red Raleigh Sprite Restoration - Bicycle Before Seat Lug |
 |
| David's Ruby Red Raleigh Sprite Restoration - Bicycle Before Rear Brake Caliper |
 |
| David's Ruby Red Raleigh Sprite Restoration - Bicycle Before Rear Derailleur |
 |
| David's Ruby Red Raleigh Sprite Restoration - Bicycle Before Rear Wheel hub |
 |
| David's Ruby Red Raleigh Sprite Restoration - Frame Before |
 |
| David's Ruby Red Raleigh Sprite Restoration - Frame Before Head Tube |
 |
| David's Ruby Red Raleigh Sprite Restoration - Frame Before Head Tube |
 |
| David's Ruby Red Raleigh Sprite Restoration - Frame Before Head Tube |
 |
| David's Ruby Red Raleigh Sprite Restoration - Frame Before Top Tube |
 |
| David's Ruby Red Raleigh Sprite Restoration - Frame Before Down Tube |
 |
| David's Ruby Red Raleigh Sprite Restoration - Frame Before Seat Lug |
 |
| David's Ruby Red Raleigh Sprite Restoration - Frame Before Seat Tube Decal |
 |
| David's Ruby Red Raleigh Sprite Restoration - Frame Before Seat Tube Decal |
 |
| David's Ruby Red Raleigh Sprite Restoration - Frame Before Bottom Bracket |
 |
| David's Ruby Red Raleigh Sprite Restoration - Frame Before Bottom Bracket |
 |
| David's Ruby Red Raleigh Sprite Restoration - Frame Before Bottom Bracket |
 |
| David's Ruby Red Raleigh Sprite Restoration - Frame Before Seat Lug |
 |
| David's Ruby Red Raleigh Sprite Restoration - Frame Before Seat Stays |
 |
| David's Ruby Red Raleigh Sprite Restoration - Frame Before Chain Stays |
 |
| David's Ruby Red Raleigh Sprite Restoration - Frame Before Chain Stays |
 |
| David's Ruby Red Raleigh Sprite Restoration - Frame Before Drop Outs |
 |
| David's Ruby Red Raleigh Sprite Restoration - Frame Before Fork |
 |
| David's Ruby Red Raleigh Sprite Restoration - Frame Before Fork Crown |
 |
| David's Ruby Red Raleigh Sprite Restoration - Frame Before Fork Crown |
 |
| David's Ruby Red Raleigh Sprite Restoration - Frame Before Fork Blades |
 |
| David's Ruby Red Raleigh Sprite Restoration - Frame Before Fork Drop Outs |
 |
| David's Ruby Red Raleigh Sprite Restoration - Frame Before Fork Blades |
 |
| David's Ruby Red Raleigh Sprite Restoration - Frame Polished |
 |
| David's Ruby Red Raleigh Sprite Restoration - Frame Polished Head Tube |
 |
| David's Ruby Red Raleigh Sprite Restoration - Frame Polished Head Tube |
 |
| David's Ruby Red Raleigh Sprite Restoration - Frame Polished Head Tube |
 |
| David's Ruby Red Raleigh Sprite Restoration - Frame Polished Top Tube |
 |
| David's Ruby Red Raleigh Sprite Restoration - Frame Polished Down Tube |
 |
| David's Ruby Red Raleigh Sprite Restoration - Frame Polished Seat Lug |
 |
| David's Ruby Red Raleigh Sprite Restoration - Frame Polished Seat Tube |
 |
| David's Ruby Red Raleigh Sprite Restoration - Frame Polished Bottom Bracket |
 |
| David's Ruby Red Raleigh Sprite Restoration - Frame Polished Bottom Bracket |
 |
| David's Ruby Red Raleigh Sprite Restoration - Frame Polished Bottom Bracket |
 |
| David's Ruby Red Raleigh Sprite Restoration - Frame Polished Seat Stays |
 |
| David's Ruby Red Raleigh Sprite Restoration - Frame Polished Chain Stays & My Thumb |
 |
| David's Ruby Red Raleigh Sprite Restoration - Frame Polished Drop Outs |
 |
| David's Ruby Red Raleigh Sprite Restoration - Frame Polished Fork |
 |
| David's Ruby Red Raleigh Sprite Restoration - Frame Polished Fork Crown |
 |
| David's Ruby Red Raleigh Sprite Restoration - Frame Polished Fork Crown |
 |
| David's Ruby Red Raleigh Sprite Restoration - Frame Polished Fork Blades |
 |
| David's Ruby Red Raleigh Sprite Restoration - Frame Polished Fork Blades |
 |
| David's Ruby Red Raleigh Sprite Restoration - Frame Polished Fork Blades |
I put the headset and bottom bracket into the crock pot for cleaning. The pieces cleaned very nice. With the pieces cleaned I worked through the polishing wheels. The headset and bottom bracket polished beautifully. Better yet is how the polished pieces look with the polished ruby red paint! And of course both the headset and bottom bracket spin very smooth with new grease and new bearings.
 |
| David's Ruby Red Raleigh Sprite Restoration - Headset & Bottom Bracket Before |
 |
| David's Ruby Red Raleigh Sprite Restoration - Headset & Bottom Bracket Polished |
 |
| David's Ruby Red Raleigh Sprite Restoration Pressing Headset Cups |
 |
| David's Ruby Red Raleigh Sprite Restoration Headset Cups Pressed |
 |
| David's Ruby Red Raleigh Sprite Restoration Headset Fork Race Installed |
 |
| David's Ruby Red Raleigh Sprite Restoration Headset Bearings Packed |
 |
| David's Ruby Red Raleigh Sprite Restoration Headset Complete |
 |
| David's Ruby Red Raleigh Sprite Restoration Headset Complete |
 |
| David's Ruby Red Raleigh Sprite Restoration Bottom Bracket Bearings Packed |
 |
| David's Ruby Red Raleigh Sprite Restoration Bottom Bracket Complete |
 |
| David's Ruby Red Raleigh Sprite Restoration - Headset & Bottom Bracket Complete |
The handlebars had some deep spots of rust pitting. I polished them the best they would but that rust has damaged the chrome in some spots. The handlebars do look a lot better though. Te stem cleaned very nice and after some time spent on the polishing wheels the stem look fantastic! I really love seeing all the chrome go on the polished paint! I love this stuff!
 |
| David's Ruby Red Raleigh Sprite Restoration - Stem & Handlebars Before |
 |
| David's Ruby Red Raleigh Sprite Restoration - Handlebars Before |
 |
| David's Ruby Red Raleigh Sprite Restoration - Handlebars Before |
 |
| David's Ruby Red Raleigh Sprite Restoration - Stem Before |
 |
| David's Ruby Red Raleigh Sprite Restoration - Stem Exploded |
 |
| David's Ruby Red Raleigh Sprite Restoration - Handlebars & Stem Polished |
 |
| David's Ruby Red Raleigh Sprite Restoration - Stem Polished |
 |
| David's Ruby Red Raleigh Sprite Restoration Handlebars & Stem Complete |
 |
| David's Ruby Red Raleigh Sprite Restoration Stem & Handlebars Complete |
 |
| David's Ruby Red Raleigh Sprite Restoration - Handlebars Polished Rough Spot |
 |
| David's Ruby Red Raleigh Sprite Restoration Stem Complete |
 |
| David's Ruby Red Raleigh Sprite Restoration - Stem & Handlebars Complete |
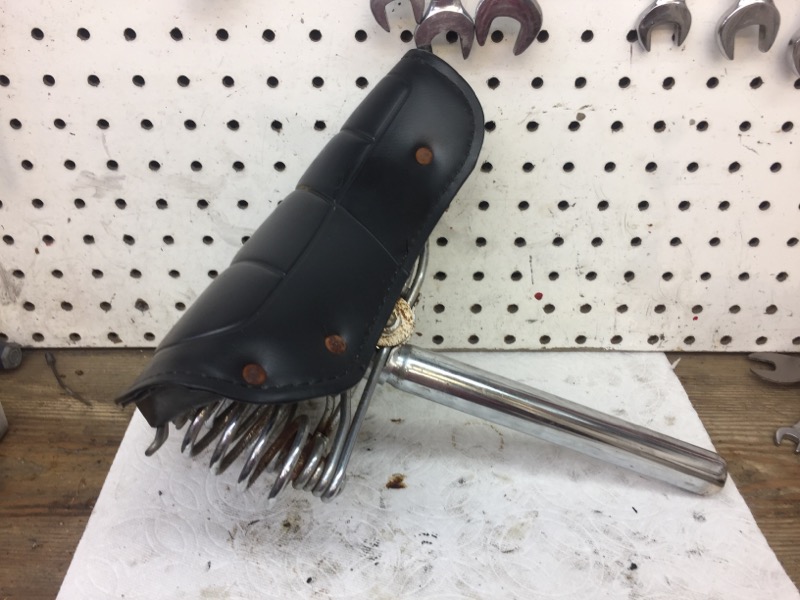 |
| David's Ruby Red Raleigh Sprite Restoration - Seat & Seat Post Before |
 |
| David's Ruby Red Raleigh Sprite Restoration - Seat & Seat Post Before |
 |
| David's Ruby Red Raleigh Sprite Restoration - Seat Post & Bolt Polished |
 |
| David's Ruby Red Raleigh Sprite Restoration Seat Post & Binder Bolt Installed |
 |
| David's Ruby Red Raleigh Sprite Restoration - Seat Post Installed |
The shift levers have just one lever as the Sprite is a 5 speed. I broke the shift lever down and cleaned and polished all the pieces. With the pieces polished I assembled and lubricated the lever. The lever turned out great and functions so smooth.
 |
| David's Ruby Red Raleigh Sprite Restoration Shift Levers Before |
 |
| David's Ruby Red Raleigh Sprite Restoration Shift Levers Before |
 |
| David's Ruby Red Raleigh Sprite Restoration Shift Levers Exploded |
 |
| David's Ruby Red Raleigh Sprite Restoration - Shift Lever Polished |
 |
| David's Ruby Red Raleigh Sprite Restoration Shift Levers Complete |
 |
| David's Ruby Red Raleigh Sprite Restoration Shift Levers Complete |
 |
| David's Ruby Red Raleigh Sprite Restoration Shift Levers Installed |
The wheels are in okay starting shape. The rear freewheel would not remove easily and it had a socket pattern I have not seen before. I modified a Suntour pattern freewheel remove and required a little heat and the 3 foot crescent wrench but eventually the freewheel removed. With the freewheel removed I found the old grease in the hub to be kind of nasty.
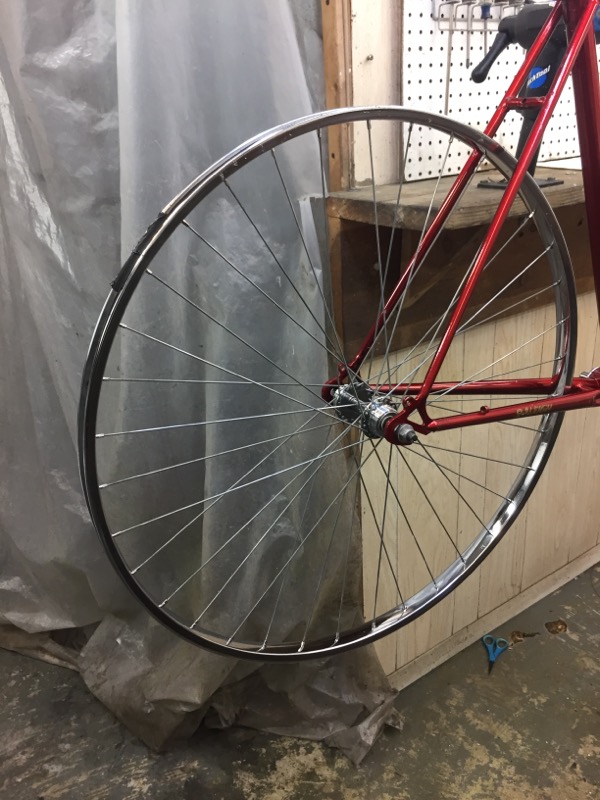
I cleaned both hubs and prepared the axles. With the hubs cleaned I did the polishing and cleaning of the galvanized spokes. The hubs polished very nicely along with the rims, with new grease and bearings the wheels spin beautifully! I am very happy with the wheels and they look great with the polished ruby red paint.
 |
| David's Ruby Red Raleigh Sprite Restoration Rear Wheel Before |
 |
| David's Ruby Red Raleigh Sprite Restoration Rear Wheel Hub Before |
 |
| David's Ruby Red Raleigh Sprite Restoration Rear Wheel Hub Before |
 |
| David's Ruby Red Raleigh Sprite Restoration Rear Wheel Rim Before |
 |
| David's Ruby Red Raleigh Sprite Restoration Modified Freewheel Tool |
 |
| David's Ruby Red Raleigh Sprite Restoration Raleigh Pie Plate Before |
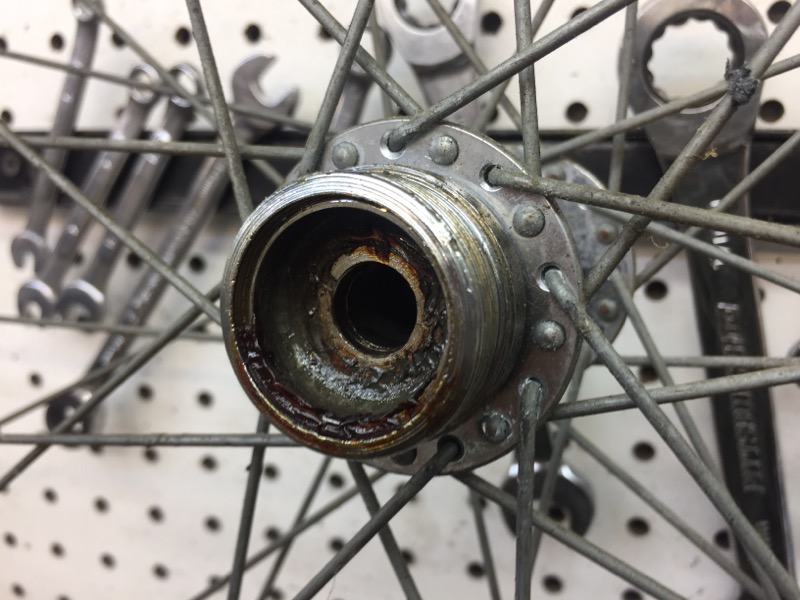 |
| David's Ruby Red Raleigh Sprite Restoration Rear Wheel Old Grease |
 |
| David's Ruby Red Raleigh Sprite Restoration Rear Wheel Hub Polished |
 |
| David's Ruby Red Raleigh Sprite Restoration Rear Wheel Rim Polished |
 |
| David's Ruby Red Raleigh Sprite Restoration Axles Pieces Ready |
 |
| David's Ruby Red Raleigh Sprite Restoration Rear Wheel Bearings Packed |
 |
| David's Ruby Red Raleigh Sprite Restoration Rear Wheel Hub Complete |
 |
| David's Ruby Red Raleigh Sprite Restoration Rear Wheel Rim Complete |
 |
| David's Ruby Red Raleigh Sprite Restoration Rear Wheel Complete |
 |
| David's Ruby Red Raleigh Sprite Restoration Front Wheel Before |
 |
| David's Ruby Red Raleigh Sprite Restoration Front Wheel Hub Before |
 |
| David's Ruby Red Raleigh Sprite Restoration Front Wheel Rim Before |
 |
| David's Ruby Red Raleigh Sprite Restoration Front Wheel Hub Old Grease |
 |
| David's Ruby Red Raleigh Sprite Restoration Front Wheel Hub Polished |
 |
| David's Ruby Red Raleigh Sprite Restoration Front Wheel Bearings Packed |
 |
| David's Ruby Red Raleigh Sprite Restoration Front Wheel Hub Complete |
 |
| David's Ruby Red Raleigh Sprite Restoration Front Wheel Complete |
 |
| David's Ruby Red Raleigh Sprite Restoration Front Wheel Rim Complete |
 |
| David's Ruby Red Raleigh Sprite Restoration Wheels Complete |
The crank was a real bear to remove, I had to drill the cotter pins. With the crank free I broke it down, gave it a good cleaning and then worked through the polishing wheels. The crank pieces polished beautifully. I installed the crank with new heavily greased cotter pins and the released I did not install the chain guard ring. Installed the chain guard rings makes the crank look even better.
 |
| David's Ruby Red Raleigh Sprite Restoration Crank Exploded View |
 |
| David's Ruby Red Raleigh Sprite Restoration Crank Polished & New Cotter Pins |
 |
| David's Ruby Red Raleigh Sprite Restoration Crank Complete |
 |
| David's Ruby Red Raleigh Sprite Restoration Crank Installed |
 |
| David's Ruby Red Raleigh Sprite Restoration Crank Chain Guard Installed |
 |
| David's Ruby Red Raleigh Sprite Restoration Crank Complete |
The brake calipers took a good deal of work, they where very gritty to start and the main through bolts did not want to remove. Disassembled and cleaned I moved to the polishing wheels. The caliper pieces polished great. Assembled the calipers look fantastic and installed they look even better next to the polished ruby paint.
 |
| David's Ruby Red Raleigh Sprite Restoration Brake Calipers Before |
 |
| David's Ruby Red Raleigh Sprite Restoration Brake Calipers Exploded View |
 |
| David's Ruby Red Raleigh Sprite Restoration Brake Calipers Polished |
 |
| David's Ruby Red Raleigh Sprite Restoration Brake Calipers Complete |
 |
| David's Ruby Red Raleigh Sprite Restoration Front Brake Caliper Installed |
 |
| David's Ruby Red Raleigh Sprite Restoration Rear Brake Caliper Installed |
The brake lever are an interesting lever Raleigh used for a while. They have a ratcheting action. I broke down the calipers and cleaned, lubricated and polished all the pieces. The brake levers work great now.
 |
| David's Ruby Red Raleigh Sprite Restoration Brake Levers Before |
 |
| David's Ruby Red Raleigh Sprite Restoration Brake Levers Complete |
 |
| David's Ruby Red Raleigh Sprite Restoration Brake Calipers Installed |
The rear derailleur is a Huirret. Every time I post this rear derailleur I get the same person ranting on how he hates this derailleur and can't tune it. I question his tuning skills and it turns into a big thing. This derailleur works great if you know one thing, the original chain Raleigh installed was to narrow, all you have to do is install a 1/8 inch chain and the derailleur works great. I am very pleased how the derailleur turned out.
 |
| David's Ruby Red Raleigh Sprite Restoration Rear Derailleur Before |
 |
| David's Ruby Red Raleigh Sprite Restoration Rear Derailleur Exploded View |
 |
| David's Ruby Red Raleigh Sprite Restoration Rear Derailleur Polished |
 |
| David's Ruby Red Raleigh Sprite Restoration Rear Derailleur Installed |
 |
| David's Ruby Red Raleigh Sprite Restoration Rear Derailleur Installed |
David wanted tires with some tread that will allow him more traction on trails. The Kenda cross tires in 27 x 1 3/8 will fit great and do the trick. They look great installed!
 |
| David's Ruby Red Raleigh Sprite Restoration New Cross Tires |
 |
| David's Ruby Red Raleigh Sprite Restoration Tires Installed |
Time to wire the Sprite. I chose the dark ice grey brake cable housings, I think they by far look the best with the ruby red color paint.
 |
| David's Ruby Red Raleigh Sprite Restoration New Cables & Housings |
 |
| David's Ruby Red Raleigh Sprite Restoration Brake Cables Installed |
 |
| David's Ruby Red Raleigh Sprite Restoration Rear Brake Cable Installed |
 |
| David's Ruby Red Raleigh Sprite Restoration Cables Complete |
The fenders are next. The fenders are a little rough but in the big picture they are in great shape. Fenders take such a beating. They get banged around, the front can hit things when the wheel is turned. The lower areas of fenders can hit curbs and pick up all the grime and chemicals from the road. Considering all of that these fenders are in great starting shape.
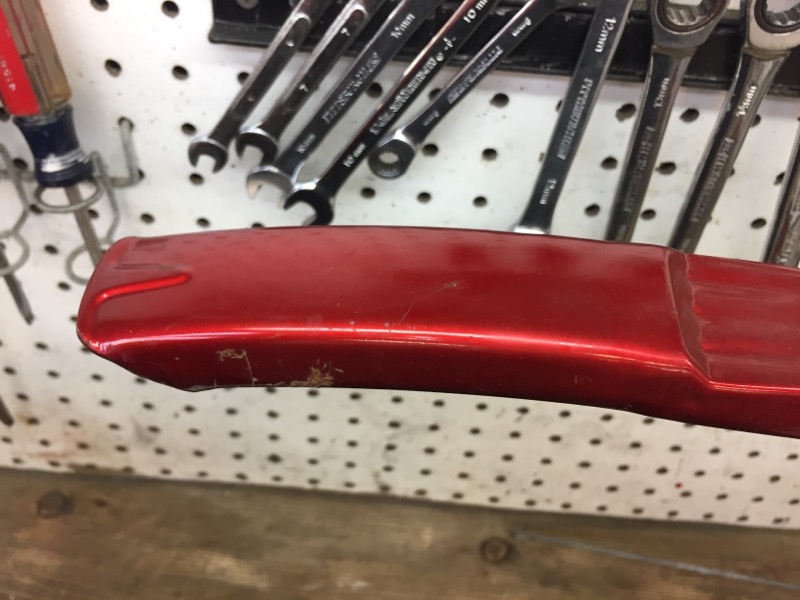
I broke down the fenders and gave them a deep cleaning. With the fenders cleaned I worked through the polishing grits. The fenders have a few paint chips but they polished absolutely beautifully. I straightened the fender struts on the anvil and with nylon hammers. With the struts straight I soaked them in a solution to rejuvenate the galvanized look. My favorite part of the fenders is how the rear reflector turned out.
 |
| David's Ruby Red Raleigh Sprite Restoration Front Fender Before |
 |
| David's Ruby Red Raleigh Sprite Restoration Front Fender Before |
 |
| David's Ruby Red Raleigh Sprite Restoration Front Fender Before |
 |
| David's Ruby Red Raleigh Sprite Restoration Front Fender Before |
 |
| David's Ruby Red Raleigh Sprite Restoration Front Fender Before |
 |
| David's Ruby Red Raleigh Sprite Restoration Front Fender Before |
 |
| David's Ruby Red Raleigh Sprite Restoration Front Fender Before |
 |
| David's Ruby Red Raleigh Sprite Restoration Front Fender Polished |
 |
| David's Ruby Red Raleigh Sprite Restoration Front Fender Polished |
 |
| David's Ruby Red Raleigh Sprite Restoration Front Fender Polished |
 |
| David's Ruby Red Raleigh Sprite Restoration Front Fender Polished |
 |
| David's Ruby Red Raleigh Sprite Restoration Front Fender Polished |
 |
| David's Ruby Red Raleigh Sprite Restoration Rear Fender Before |
 |
| David's Ruby Red Raleigh Sprite Restoration Rear Fender Before |
 |
| David's Ruby Red Raleigh Sprite Restoration Rear Fender Before |
 |
| David's Ruby Red Raleigh Sprite Restoration Rear Fender Before |
 |
| David's Ruby Red Raleigh Sprite Restoration Rear Fender Before |
 |
| David's Ruby Red Raleigh Sprite Restoration Rear Fender Before |
 |
| David's Ruby Red Raleigh Sprite Restoration Rear Fender Before |
 |
| David's Ruby Red Raleigh Sprite Restoration Rear Fender Before |
 |
| David's Ruby Red Raleigh Sprite Restoration Rear Fender Polished |
 |
| David's Ruby Red Raleigh Sprite Restoration Rear Fender Polished |
 |
| David's Ruby Red Raleigh Sprite Restoration Rear Fender Polished |
 |
| David's Ruby Red Raleigh Sprite Restoration Rear Fender Polished |
 |
| David's Ruby Red Raleigh Sprite Restoration Rear Fender Polished |
 |
| David's Ruby Red Raleigh Sprite Restoration Rear Fender Polished |
 |
| David's Ruby Red Raleigh Sprite Restoration Rear Fender Polished |
 |
| David's Ruby Red Raleigh Sprite Restoration Front Fender Complete |
 |
| David's Ruby Red Raleigh Sprite Restoration Front Fender Complete |
 |
| David's Ruby Red Raleigh Sprite Restoration Front Fender Complete |
 |
| David's Ruby Red Raleigh Sprite Restoration Rear Fender Complete |
 |
| David's Ruby Red Raleigh Sprite Restoration Rear Fender Complete |
 |
| David's Ruby Red Raleigh Sprite Restoration Rear Fender Complete |
 |
| David's Ruby Red Raleigh Sprite Restoration Rear Fender Complete |
 |
| David's Ruby Red Raleigh Sprite Restoration Rear Reflector Before |
 |
| David's Ruby Red Raleigh Sprite Restoration Rear Reflector Before |
 |
| David's Ruby Red Raleigh Sprite Restoration Rear Reflector Complete |
The pedals are in descent shape. I gave them a good cleaning and then polished the chrome on the polishing wheels. A good flushing and lubricating and the pedals spin great and look great.
 |
| David's Ruby Red Raleigh Sprite Restoration Pedals Before |
 |
| David's Ruby Red Raleigh Sprite Restoration Pedals Before |
 |
| David's Ruby Red Raleigh Sprite Restoration Pedals Complete |
 |
| David's Ruby Red Raleigh Sprite Restoration Pedals Complete |
|
| David's Ruby Red Raleigh Sprite Restoration Pie Plate Before |
|
| David's Ruby Red Raleigh Sprite Restoration Freewheel Before |
 |
| David's Ruby Red Raleigh Sprite Restoration Pie Plate Polished - Freewheel Overhauled |
 |
| David's Ruby Red Raleigh Sprite Restoration New Chain - Drive Train Complete |
 |
| David's Ruby Red Raleigh Sprite Restoration Drive Train Complete |
The new Brooks saddle arrived. Is there anything more classic then a Brooks saddle on a Raleigh. The black Brooks looks perfect with the Ruby Red color. I had to find a different seat coupler because the original on does not fit with anything but the old mattress style saddle.
 |
| David's Ruby Red Raleigh Sprite Restoration New Brooks Saddle |
 |
| David's Ruby Red Raleigh Sprite Restoration Replacement Seat Coupler |
 |
| David's Ruby Red Raleigh Sprite Restoration Brooks Saddle Installed |
 |
| David's Ruby Red Raleigh Sprite Restoration Brooks Saddle Installed |
 |
| David's Ruby Red Raleigh Sprite Restoration Rear Rack Installed |
 |
| David's Ruby Red Raleigh Sprite Restoration New Rear Rack Hardware |
 |
| David's Ruby Red Raleigh Sprite Restoration Bicycle Complete |
While I had sun I took the outdoor photos. I love the Ruby Red. The Red looks so good when its polished. The Brooks saddle brings it all together. The saddle is set very high for me to test ride. I wish I set it lower for photos for better proportions. I love the Raleigh Sprite, It is such a great bike and so underrated!!
I will update on the tires.
 |
| David's Ruby Red Raleigh Sprite Restoration Bicycle Complete |
 |
| David's Ruby Red Raleigh Sprite Restoration Bicycle Complete |
 |
| David's Ruby Red Raleigh Sprite Restoration Bicycle Complete - Front Brake |
 |
| David's Ruby Red Raleigh Sprite Restoration Bicycle Complete - Front Wheel Hub |
 |
| David's Ruby Red Raleigh Sprite Restoration Bicycle Complete - Front Wheel Rim |
 |
| David's Ruby Red Raleigh Sprite Restoration Bicycle Complete - Stem |
 |
| David's Ruby Red Raleigh Sprite Restoration Bicycle Complete - Head Tube |
 |
| David's Ruby Red Raleigh Sprite Restoration Bicycle Complete - Front Half |
 |
| David's Ruby Red Raleigh Sprite Restoration Bicycle Complete - Brooks Saddle |
 |
| David's Ruby Red Raleigh Sprite Restoration Bicycle Complete - Seat Tube |
 |
| David's Ruby Red Raleigh Sprite Restoration Bicycle Complete - Seat Tube |
 |
| David's Ruby Red Raleigh Sprite Restoration Bicycle Complete - Down Tube |
 |
| David's Ruby Red Raleigh Sprite Restoration Bicycle Complete - Crank |
 |
| David's Ruby Red Raleigh Sprite Restoration Bicycle Complete - Rear Derailleur |
 |
| David's Ruby Red Raleigh Sprite Restoration Bicycle Complete - Rear Brake |
 |
| David's Ruby Red Raleigh Sprite Restoration Bicycle Complete - Rear Fender |
 |
| David's Ruby Red Raleigh Sprite Restoration Bicycle Complete |
Thank you
John Z.
This comment has been removed by the author.
ReplyDeleteWow, all your excellent work with Paint and chrome makes the Sprite look like its coming off the show room floor and that Brooks adds that extra touch of Class. I was sorry to hear about your issues with the Kenda K161 cross tire, I have good experiences with Kenda but I wouldn't be pleased either if they game me a bad ride. I built up and sold an old Tiger 10 speed around the K161 cross tires as a winter commuter about 7 years ago and really liked the look of the tires. I am using the standard 27 x 1/3/8 road Kenda (K40) on the 1986 Schwinn Passage I just reburbished and love their plush ride compared to the standard 27 x 1 1/4 Specialized tri cross tires it came with which felt both narrow and heavy. Amazing how tires can affect the ride for both good and bad.
ReplyDelete