 |
Early 80's Motobecane Grand Touring Restoration
Bicycle After Restoration |
May is mostly tune up month around here. The temps start getting nice, the chill is gone, at least sometimes and things dry out which gets everyone thinking about there bike and a tune up. That slows down restoration work a bit but between the tune ups I have been able to start work on this early 1980's Motobecane Grand Touring. I place it in the early 1980's mainly on that a lot of the quirky things about a 1970's Motobecane are not here.
At first glance at the Motobecane Grand Touring I see a very understated but very classy bike under the grime and dullness. The Grand Touring has some nice Rigida alloy wheels, center pull brakes that I prefer over the side pull brakes from the era and what I think is going to be a very nice paint color when polished.
The Motobecane is in descent starting shape, the paint is dull and has a few chips but I think it will polish beautifully. I think all the alloy will polish beautifully and in the end the Motobecane will be a stunner.
 |
| Early 80's Motobecane Grand Touring Restoration - Bicycle Before |
 |
Early 80's Motobecane Grand Touring Restoration - Bicycle Before
Handlebars |
 |
Early 80's Motobecane Grand Touring Restoration - Bicycle Before
Brake Levers |
 |
Early 80's Motobecane Grand Touring Restoration - Bicycle Before
Stem |
 |
Early 80's Motobecane Grand Touring Restoration - Bicycle Before
Head Badge |
 |
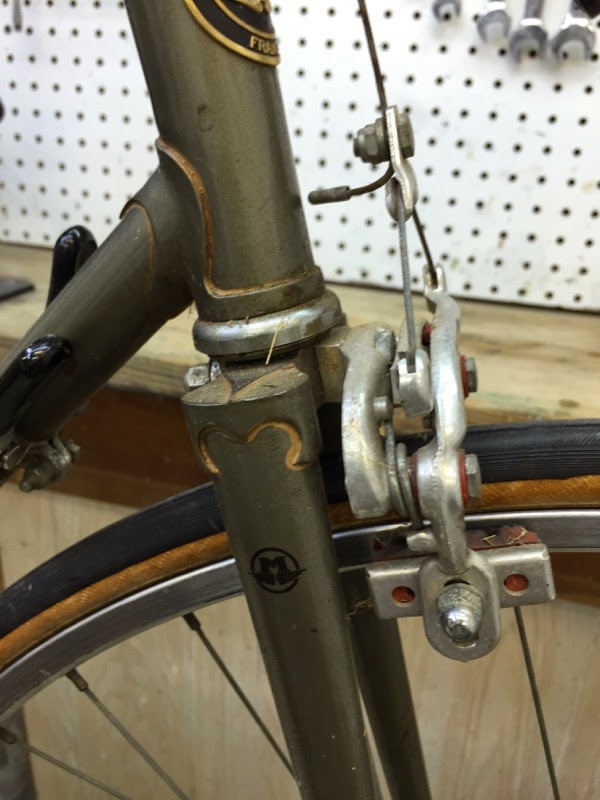
Early 80's Motobecane Grand Touring Restoration - Bicycle Before
Front Brake |
 |
Early 80's Motobecane Grand Touring Restoration - Bicycle Before
Fork Crown |
 |
Early 80's Motobecane Grand Touring Restoration - Bicycle Before
Front Wheel Hub |
 |
Early 80's Motobecane Grand Touring Restoration - Bicycle Before
Front Wheel Rim |
 |
Early 80's Motobecane Grand Touring Restoration - Bicycle Before
SR Stem |
 |
Early 80's Motobecane Grand Touring Restoration - Bicycle Before
Top Tube Decal |
 |
Early 80's Motobecane Grand Touring Restoration - Bicycle Before
Shift Levers |
 |
Early 80's Motobecane Grand Touring Restoration - Bicycle Before
Down Tube Decal |
 |
Early 80's Motobecane Grand Touring Restoration - Bicycle Before
Saddle |
 |
Early 80's Motobecane Grand Touring Restoration - Bicycle Before
Tubing Decal |
 |
Early 80's Motobecane Grand Touring Restoration - Bicycle Before
Crank |
 |
Early 80's Motobecane Grand Touring Restoration - Bicycle Before
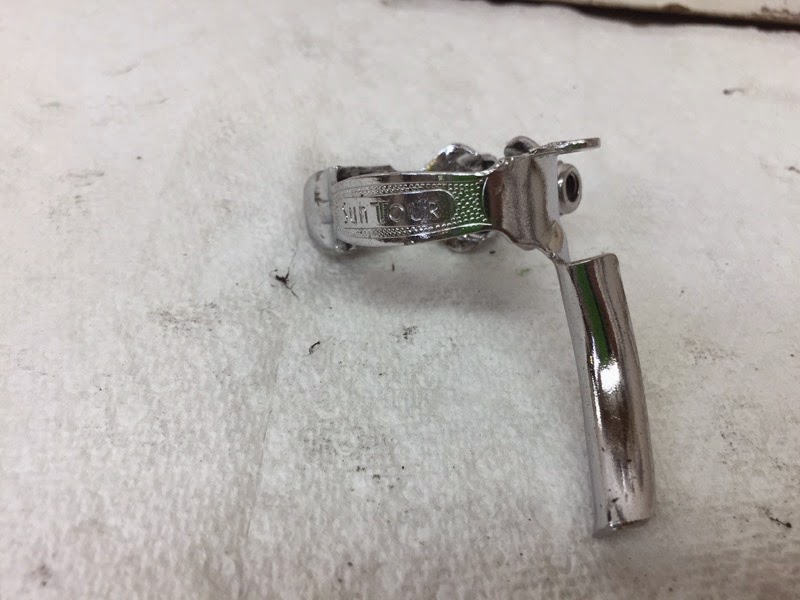
Sun Tour Front Derailleur |
 |
Early 80's Motobecane Grand Touring Restoration - Bicycle Before
Bottom Bracket |
 |
Early 80's Motobecane Grand Touring Restoration - Bicycle Before
Pedals |
 |
Early 80's Motobecane Grand Touring Restoration - Bicycle Before
Cable Hanger |
 |
Early 80's Motobecane Grand Touring Restoration - Bicycle Before
Rear Brake |
 |
Early 80's Motobecane Grand Touring Restoration - Bicycle Before
Sun Tour Rear Derailleur |
 |
Early 80's Motobecane Grand Touring Restoration - Bicycle Before
Rear Wheel Hub |
I really like the color of the frame, its kind of between a khaki green and a bronze. I think its a cool understated color. Not crazy bright but rather classy. With the components striped from the frame I see the paint to be in okay shape. There is a lot of dullness and some chips and scuffing but I still think it will polish very nice.
 |
| Early 80's Motobecane Grand Touring Restoration - Frame Before |
 |
Early 80's Motobecane Grand Touring Restoration - Frame Before
Head Tube |
 |
Early 80's Motobecane Grand Touring Restoration - Frame Before
Head Tube |
 |
Early 80's Motobecane Grand Touring Restoration - Frame Before
Top Tube |
 |
Early 80's Motobecane Grand Touring Restoration - Frame Before
Down Tube |
 |
Early 80's Motobecane Grand Touring Restoration - Frame Before
Seat Lug |
 |
Early 80's Motobecane Grand Touring Restoration - Frame Before
Seat Lug |
 |
Early 80's Motobecane Grand Touring Restoration - Frame Before
Seat Tube |
 |
Early 80's Motobecane Grand Touring Restoration - Frame Before
Bottom Bracket |
 |
Early 80's Motobecane Grand Touring Restoration - Frame Before
Bottom Bracket |
 |
Early 80's Motobecane Grand Touring Restoration - Frame Before
Bottom Bracket |
 |
Early 80's Motobecane Grand Touring Restoration - Frame Before
Seat Lug |
 |
Early 80's Motobecane Grand Touring Restoration - Frame Before
Seat Stays |
 |
Early 80's Motobecane Grand Touring Restoration - Frame Before
Chain Stays |
 |
Early 80's Motobecane Grand Touring Restoration - Frame Before
Drop Outs |
 |
Early 80's Motobecane Grand Touring Restoration - Frame Before
Fork |
 |
Early 80's Motobecane Grand Touring Restoration - Frame Before
Fork Crown |
 |
Early 80's Motobecane Grand Touring Restoration - Frame Before
Fork Crown - Cool Black Accents |
 |
Early 80's Motobecane Grand Touring Restoration - Frame Before
Fork Blade |
 |
Early 80's Motobecane Grand Touring Restoration - Frame Before
Chrome Fork Drop Outs |
 |
Early 80's Motobecane Grand Touring Restoration - Frame Before
Fork Blade |
I did a deep cleaning of the frame and started the polishing with a course grit to remove the scuffs and scratches. With the course grit complete I worked threw a few finer grits. I am thrilled with the results, the frame looks fantastic with mainly just a few spots of cable rub and where the cable brackets go. The color is a really nice classy color and the black and gold accents are perfect!
 |
| Early 80's Motobecane Grand Touring Restoration - Frame Polished |
 |
Early 80's Motobecane Grand Touring Restoration - Frame Polished
Head Tube |
 |
Early 80's Motobecane Grand Touring Restoration - Frame Polished
Head Tube |
 |
Early 80's Motobecane Grand Touring Restoration - Frame Polished
Head Tube |
 |
Early 80's Motobecane Grand Touring Restoration - Frame Polished
Top Tube |
 |
Early 80's Motobecane Grand Touring Restoration - Frame Polished
Down Tube |
 |
Early 80's Motobecane Grand Touring Restoration - Frame Polished
Top Tube |
 |
Early 80's Motobecane Grand Touring Restoration - Frame Polished
Seat Lug |
 |
Early 80's Motobecane Grand Touring Restoration - Frame Polished
Bottom Bracket |
 |
Early 80's Motobecane Grand Touring Restoration - Frame Polished
Bottom Bracket |
 |
Early 80's Motobecane Grand Touring Restoration - Frame Polished
Bottom Bracket |
 |
Early 80's Motobecane Grand Touring Restoration - Frame Polished
Seat Stays |
 |
Early 80's Motobecane Grand Touring Restoration - Frame Polished
Chain Stays |
 |
Early 80's Motobecane Grand Touring Restoration - Frame Polished
Drop Outs |
 |
Early 80's Motobecane Grand Touring Restoration - Frame Polished
Fork |
 |
Early 80's Motobecane Grand Touring Restoration - Frame Polished
Fork Crown |
 |
Early 80's Motobecane Grand Touring Restoration - Frame Polished
Fork Crown |
 |
Early 80's Motobecane Grand Touring Restoration - Frame Polished
Fork Chrome Drop Outs |
The bottom bracket and headset went into the crock pot for cleaning and then polishing. The pieces cleaned and polished beautifully, I am very pleased. One of my favorite photos during a restoration is always the one of the polished headset and bottom bracket pieces, there is always such a big difference before and after.
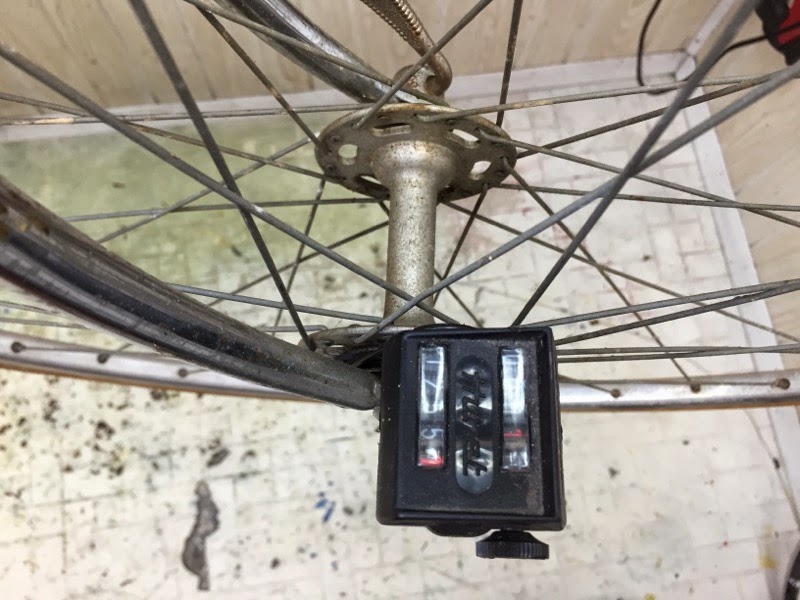
Somehow I forgot to take before photos of the rear wheel. The wheels really came out nice, the hubs look great polished, the rims really look great polished and the wheels are true and spin forever. I love this stuff!
Just for posterity, the little odometer on the front wheel was at 2436 miles. Cool to know.
 |
Early 80's Motobecane Grand Touring Restoration
Front Wheel - Before |
 |
Early 80's Motobecane Grand Touring Restoration - Front Wheel Hub
Before |
 |
Early 80's Motobecane Grand Touring Restoration - Front Wheel Rim
Before |
 |
Early 80's Motobecane Grand Touring Restoration - Front Wheel Hub
Old Grease |
 |
Early 80's Motobecane Grand Touring Restoration - Front Wheel Hub
Polished |
 |
Early 80's Motobecane Grand Touring Restoration - Wheel Axle Pieces
Ready |
 |
Early 80's Motobecane Grand Touring Restoration - Front Wheel
Bearings Packed |
 |
Early 80's Motobecane Grand Touring Restoration
New Tires & Tubes |
 |
Early 80's Motobecane Grand Touring Restoration
Front Wheel Complete |
 |
Early 80's Motobecane Grand Touring Restoration - Rear Wheel Hub
Old Grease |
 |
Early 80's Motobecane Grand Touring Restoration - Rear Wheel Hub
Polished |
 |
Early 80's Motobecane Grand Touring Restoration - Rear Wheel Bearings
Packed |
 |
Early 80's Motobecane Grand Touring Restoration
Rear Wheel Complete |
 |
| Early 80's Motobecane Grand Touring Restoration - Wheels Complete |
Its now time to wire the Grand Tour and install the handlebar tape. I think the Ice Grey cable housings and black handlebar tape are the way to go on the Motobecane. The Motobecane really looks good with the handlebar tape installed and the cables run.
 |
| Early 80's Motobecane Grand Touring Restoration - New Bits & Pieces |
 |
| Early 80's Motobecane Grand Touring Restoration - Bicycle Wired |
 |
| Early 80's Motobecane Grand Touring Restoration - Bicycle Wired |
 |
| Early 80's Motobecane Grand Touring Restoration - Bicycle Wired |
 |
Early 80's Motobecane Grand Touring Restoration - Handlebar Tape
Installed |
Last thing is the pedals, pedals take a beating and these pedals have taken a beating but they still spin really smooth so I am going to try to save them. I cleaned the pedals and started the hand polishing. The pedals cleaned really nice and polished pretty good considering how they started. They spin extremely smooth and look pretty good installed.
 |
Early 80's Motobecane Grand Touring Restoration - Pedals
Before |
 |
Early 80's Motobecane Grand Touring Restoration - Pedals
Complete |
That completes the Motobecane. It was raining at the time of completion today so tomorrow I will test ride the Motobecane and take the final photos. The Mototbecane looks great on the stand.
 |
Early 80's Motobecane Grand Touring Restoration - Bicycle
Complete |
I was able to test ride the Motobecane this morning, after a few adjustments I am shocked by the ride, very nimble, very fast and smooth, I was not expecting that at all! I figured the Motobecane would be more on the heavy side for the era which is not a bad thing because the heavier bikes from the era ride like Cadillacs. The Motobecane rode more like a sports car.
Another surprise was the brakes, I don't know if it was the weather or what but they worked so well I almost flipped it on the first brake test, amazing.
I am extremley pleased with the Motobecane Grand Touring, it rides like lighting and feels great. The best part might be its understated classy looks, its a snake in the grass.
When I was carrying the Motobecane around and riding it it felt a lot lighter then I was thinking so when I was done with the test ride I decided to weigh it. The Motobecane comes in at 25 lbs 1 oz, very very respectably for steel and the era, very cool!.
 |
Early 80's Motobecane Grand Touring Restoration
25 lbs 13 Oz |
 |
| Early 80's Motobecane Grand Touring Restoration - Bicycle Complete |
 |
| Early 80's Motobecane Grand Touring Restoration - Bicycle Complete |
 |
Early 80's Motobecane Grand Touring Restoration - Bicycle Complete
Front |
 |
Early 80's Motobecane Grand Touring Restoration - Bicycle Complete
Handlebars |
 |
Early 80's Motobecane Grand Touring Restoration - Bicycle Complete
Handlebars |
 |
Early 80's Motobecane Grand Touring Restoration - Bicycle Complete
Head Badge |
 |
Early 80's Motobecane Grand Touring Restoration - Bicycle Complete
Front Brake |
 |
Early 80's Motobecane Grand Touring Restoration - Bicycle Complete
Front Wheel Hub |
 |
Early 80's Motobecane Grand Touring Restoration - Bicycle Complete
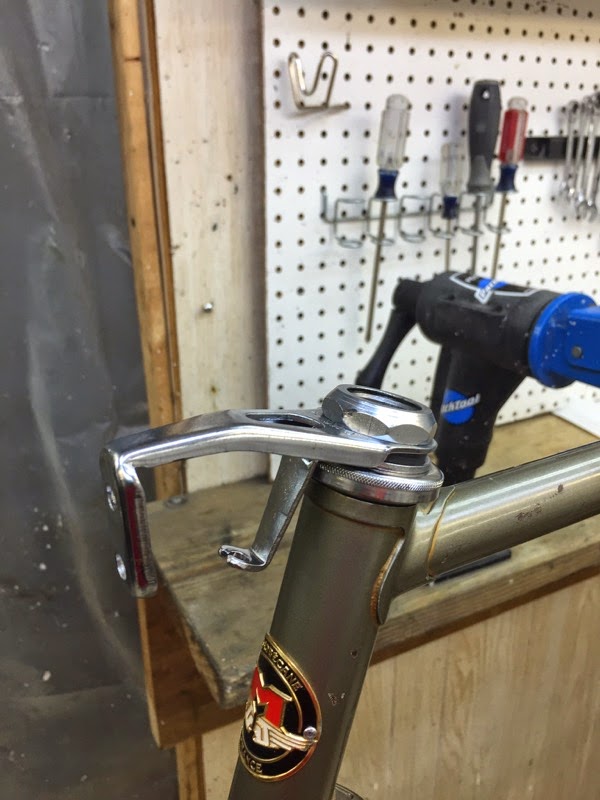
Stem |
 |
Early 80's Motobecane Grand Touring Restoration - Bicycle Complete
Head Tube |
 |
Early 80's Motobecane Grand Touring Restoration - Bicycle Complete
Shift Levers |
 |
Early 80's Motobecane Grand Touring Restoration - Bicycle Complete
Front Half |
 |
Early 80's Motobecane Grand Touring Restoration - Bicycle Complete
Top Tube |
 |
Early 80's Motobecane Grand Touring Restoration - Bicycle Complete
Down Tube |
 |
Early 80's Motobecane Grand Touring Restoration - Bicycle Complete
Seat Tube |
 |
Early 80's Motobecane Grand Touring Restoration - Bicycle Complete
Bottom Bracket |
 |
Early 80's Motobecane Grand Touring Restoration - Bicycle Complete
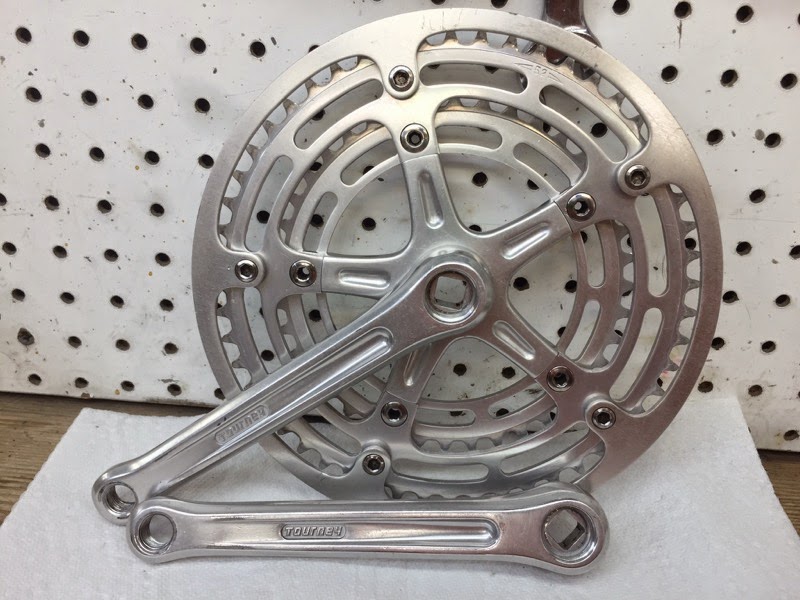
Crank |
 |
Early 80's Motobecane Grand Touring Restoration - Bicycle Complete
Front Derailleur |
 |
Early 80's Motobecane Grand Touring Restoration - Bicycle Complete
Rear Derailleur |
 |
Early 80's Motobecane Grand Touring Restoration - Bicycle Complete
Saddle |
 |
Early 80's Motobecane Grand Touring Restoration - Bicycle Complete
Rear Brake |
 |
Early 80's Motobecane Grand Touring Restoration - Bicycle Complete
Rear Wheel Hub |
 |
Early 80's Motobecane Grand Touring Restoration - Bicycle Complete
Rear |
Thank You!
John Z.


I have this exact model from a few year earlier -77 or 78 - in the same color scheme, even the Vitus tubing decal on seat tube has worn the same! (http://ryansrebuilds.blogspot.com/2014_05_01_archive.html) I bought it a year ago after looking for one for years and plan do to the complete tear down this summer. Very cool to see yours go through your process and come out beautifully as usual.
ReplyDeleteI have two of this model- Motobecane Grand Touring from very early 80's. On one, I did a tour from California to Massachusetts in 1995. On the other, I did Alaska to Florida in 2008 and an 8,000 mile All-48-US-States tour in 2014. I love this bike. It fits me well and rides like a dream. I will never tour on any other. Currently restoring both to do RAGBRAI with my nephew this summer. Thank you for showing your restoration in such great detail.
ReplyDeleteAmazing! How many hours did you spend on this restoration and what kind of polishing tools do you use?
ReplyDelete