I wanted a challenge. I thought for a day and came up with the challenge.
First the back story. Here in Illinois I live in Lake County, it is the most norther county on lake Michigan, about 40 miles form the city and the last county before going into my home state of Wisconsin. Here in Lake County we have Forest Preserves totaling over 30,000 acres covering near 7% of Lake County. Through these preserves there are many hundreds of miles (I believe near 450 miles but that is not guaranteed accurate, mainly a number I remember.) of crushed gravel bike paths. These totals do not even include the 300 miles of paths in surrounding Cook county and the many hundreds of preserve miles in other surrounding counties.
Whats really nice about these bike paths is they have been building tunnels under many of the busy roads to make it easier and safer to connect to the preserves. My usual morning ride consists of near 30 miles and using up to 6 of these tunnels or under passes. The wonderful thing about these forest preserve paths is you can get to just about anywhere in the county with out a lot of high traffic roads by going from preserve to preserve. My sister lived 6 miles away with only two major roads going in here area. Roads with high traffic travailing 55 mph. By using the forest preserve I only had to cross one lightly traveled road and one more major road but with great cross walks. Now my sister lives 11 miles away in Libertyville and I only need to cross one busier road and that has great cross lights. I then follow the Des Plains River trail all the way to here neighborhood. It really is a great path system, now if they only could connect a grocery store to one, that seems to be the most dangerous to get to.
Here is the challenge, to make the perfect bike for all the forest preserve crushed gravel paths and the city riding for daily errands and meeting up with the forest preserves. First off a straight modern road bike is awful for this purpose. Narrow tires do not work well at all. Second a mountain bike is not efficient for the gravel paths either. A mountain bike is for attacking steep grades either up or down, jumping obstacles and plowing through heavy mud and terrain, it is a slow and inefficient bike for riding gravel paths. That eliminates two type of bikes.
Now the question is what are some requirements for the Forest Preserve Gravel Path Bike. Lets start with the riding surface. The Forest Preserve maintains the gravel paths very well but you still get areas of loose gravel and and wash board surface. A 12 mph speed is actually travailing at a pretty good pace on the paths. So speed is not a priority, at least a 35 mm tire will be needed or even wider, preferably with some tread. I like tread but not for rear wheel traction which is usually not a problem but traction for turning in loose or rough surfaces. I also want them to 700c wheels. 26 inch are inefficient for the purpose and the 29ers are over kill for the purpose even though they are really 700c wheels..
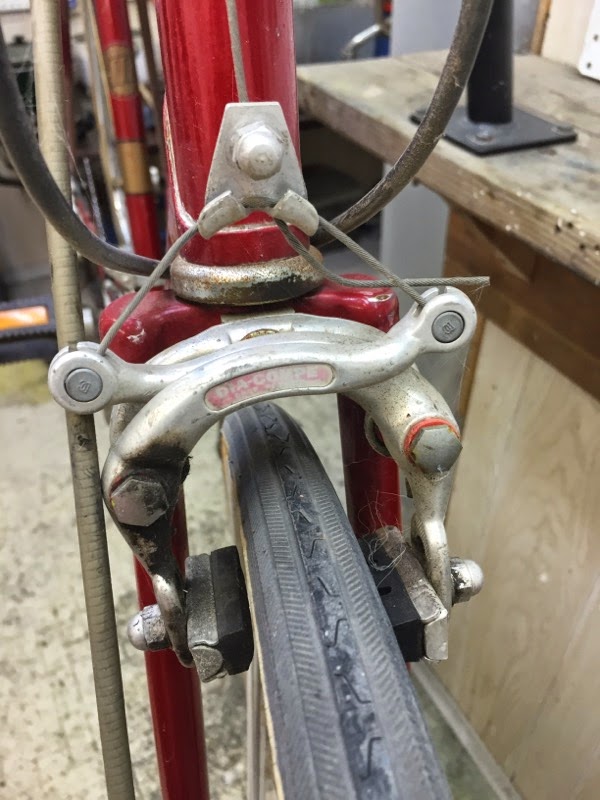
Having wide tires I would like to have cantilever brake calipers for clearance and there superior stopping power compared to side pull or dual pivot calipers.
I think a simple single speed set up is the way to go, there is little elevation change (Hey! Its Illinois!) and with speed being a pretty constant 12 mph or so you really don't need a bunch of gear ratios. So lets keep it simple.
Of course a steel frame for durability and ride quality for rough surfaces.
I also want the bicycle to be very comfortable for going out riding and getting lost in the Preserves from sun up to sun down. An all day rider.
This is where an old steel frame with 27 inch wheels will be perfect. Discard the 27 inch wheels and you gain tons of clearance.
The plan for the bike build is only the first part of the challenge. The second part is taking this old Mikado bicycle that is built up with very poor components and the components are rusted away anyways. I have had the Mikado around the shop for a while and did not know what to do with it, I think it will be a perfect start for this project.
Bicycle Before is below.
 |
| Single Speed Gravel Bike Build - Bicycle Before |
 |
| Single Speed Gravel Bike Build - Bicycle Before |
 |
| Single Speed Gravel Bike Build - Bicycle Before |
 |
| Single Speed Gravel Bike Build - Bicycle Before |
 |
| Single Speed Gravel Bike Build - Bicycle Before |
 |
| Single Speed Gravel Bike Build - Bicycle Before |
 |
| Single Speed Gravel Bike Build - Bicycle Before |
 |
| Single Speed Gravel Bike Build - Bicycle Before |
 |
| Single Speed Gravel Bike Build - Bicycle Before |
 |
| Single Speed Gravel Bike Build - Bicycle Before |
 |
| Single Speed Gravel Bike Build - Bicycle Before |
 |
| Single Speed Gravel Bike Build - Bicycle Before |
 |
| Single Speed Gravel Bike Build - Bicycle Before |
 |
| Single Speed Gravel Bike Build - Bicycle Before |
 |
| Single Speed Gravel Bike Build - Bicycle Before |
 |
| Single Speed Gravel Bike Build - Bicycle Before |
 |
| Single Speed Gravel Bike Build - Bicycle Before |
I probably showed more before photos then really needed but I wanted to show how bad the components where.
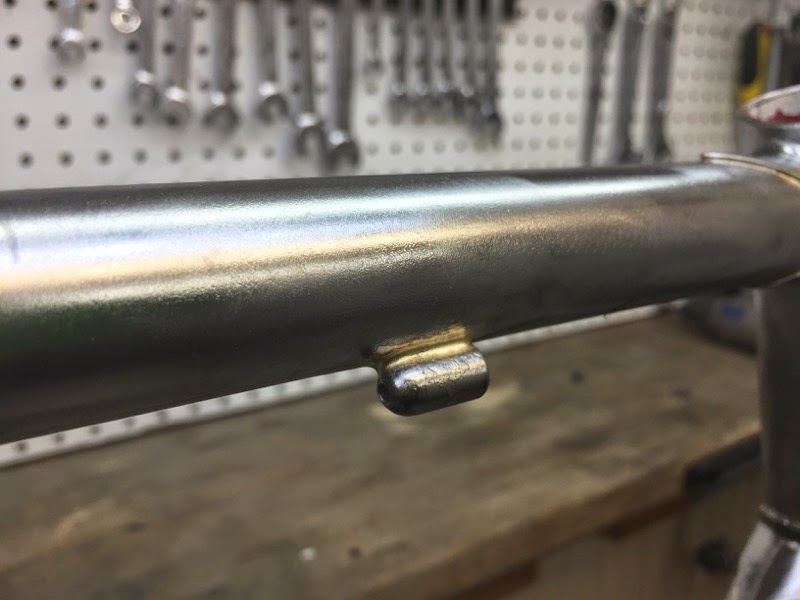
With the components stripped from the frame we find a solid frame that has some really strange down tube cable stops, a bad way of routing the rear brake cable, lake of rack mounts and of course lack of cantilever brake studs.
 |
| Single Speed Gravel Bike Build - Frame Before |
 |
| Single Speed Gravel Bike Build - Frame Before Head Tube |
 |
| Single Speed Gravel Bike Build - Frame Before Head Tube |
 |
| Single Speed Gravel Bike Build - Frame Before Seat Lug |
 |
| Single Speed Gravel Bike Build - Frame Before Bottom Bracket |
 |
| Single Speed Gravel Bike Build - Frame Before - Bottom Bracket |
 |
| Single Speed Gravel Bike Build - Frame Before - Bottom Bracket |
 |
| Single Speed Gravel Bike Build - Frame Before Seat Lug |
 |
| Single Speed Gravel Bike Build - Frame Before Drop Outs |
I stripped the frame of the old paint and then heated and removed the old brazings. They snap right of with heat and a pliers then ssome hand filing and clean up work.
 |
| Single Speed Gravel Bike Build - Frame Stripped of Paint |
 |
| Single Speed Gravel Bike Build - Frame Stripped of Paint Head Tube |
 |
| Single Speed Gravel Bike Build - Frame Stripped of Paint Poor Rear Brake Cable Routing |
 |
| Single Speed Gravel Bike Build - Frame Stripped of Paint Poor Rear Brake Cable Routing |
 |
| Single Speed Gravel Bike Build - Frame Stripped of Paint Seat Lug |
 |
| Single Speed Gravel Bike Build - Frame Stripped of Paint Bottom Bracket |
 |
| Single Speed Gravel Bike Build - Frame Stripped of Paint Bottom Bracket |
 |
| Single Speed Gravel Bike Build - Frame Stripped of Paint Seat Lug |
 |
| Single Speed Gravel Bike Build - Frame Stripped of Paint Poor Rear Derailleur Routing |
 |
| Single Speed Gravel Bike Build - Frame Stripped of Paint Drop Outs |
 |
| Single Speed Gravel Bike Build - Frame Stripped of Paint Very Strange & Cheap Down Tube Cable Stops |
 |
| Single Speed Gravel Bike Build - Frame Stripped of Paint Very Strange & Cheap Down Tube Cable Stops |
 |
| Single Speed Gravel Bike Build - Frame Stripped of Paint Cable Stop - Removed |
 |
| Single Speed Gravel Bike Build - Frame Stripped of Paint Cable Stop - Removed |
 |
| Single Speed Gravel Bike Build - Frame Stripped of Paint Cable Stop Removed |
 |
| Single Speed Gravel Bike Build - Frame Stripped of Paint Cable Stop - Removed |
 |
| Single Speed Gravel Bike Build - Frame Stripped of Paint Cable Stop Removed |
 |
| Single Speed Gravel Bike Build - Frame Stripped of Paint Cable Stop - Hand Filed |
 |
| Single Speed Gravel Bike Build - Frame Stripped of Paint Cable Stop Removed - Cleaned Up |
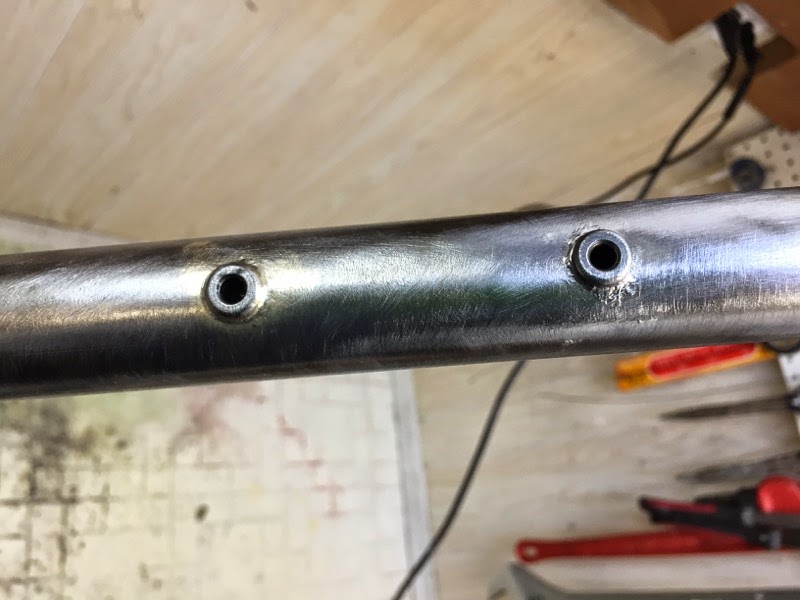
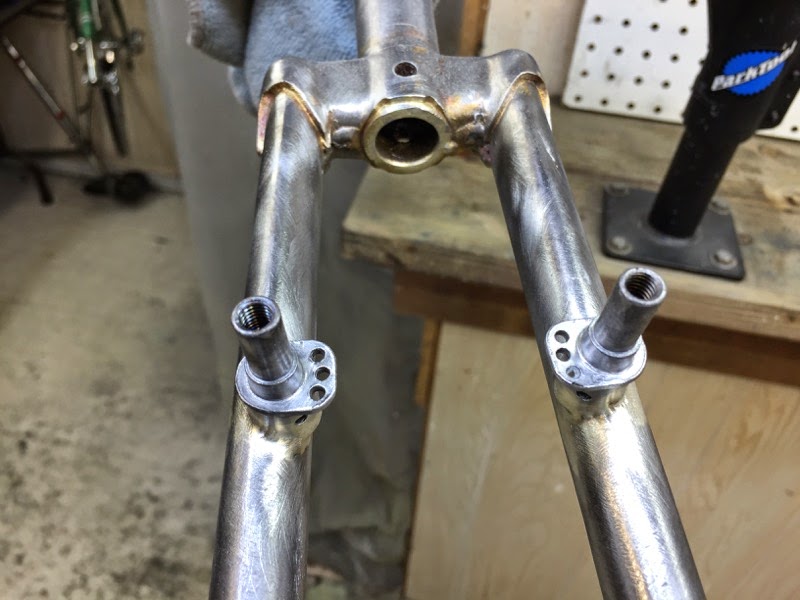
Now for the pieces that will be needed. I will route the rear brake cable on top of the top tube with three cable brackets. A continuous cable housing will be run from the brake lever to the brake caliper to keep the cable clean and in good shape. Two water bottle cage mounts will be added on the seat tube and down tube. Rack mounts by the seat lug will be added. Rear cantilever brake studs will be brazed on. Front cantilever brake studs will be brazed on the fork. A rear brake cable hanger will be brazed between the seat stays.
Below is a photo of one of the couple brazing components cases I have.
 |
| Single Speed Gravel Bike Build - Brazing Pieces |
I started by laying out where I wanted pieces to go. I then applied a heavy coat of brazing flux and started the brazing process. I really don't know exactly how to write up the brazing process yet so for now the photos will have to tell the story.
 |
| Single Speed Gravel Bike Build - Laying out Water Bottle Cage Mounts |
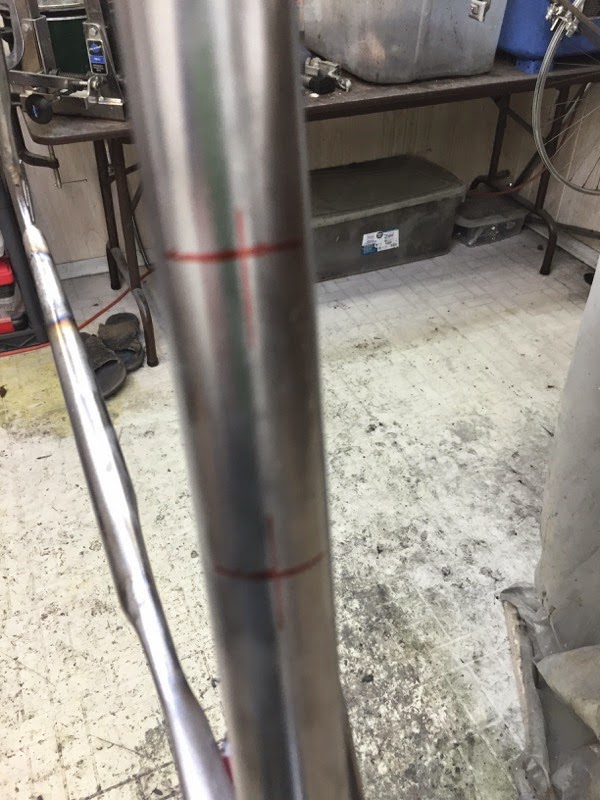 |
| Single Speed Gravel Bike Build - Laying Out Water Bottle Cage Mounts - Seat Tube |
 |
| Single Speed Gravel Bike Build - Water Bottle Cage Mounts - Drilled |
 |
| Single Speed Gravel Bike Build - Water Bottle Cage Mounts Brazed |
 |
| Single Speed Gravel Bike Build - Cantilever Brake Studs Fork Layout |
 |
| Single Speed Gravel Bike Build - Fork Cantilever Brake Studs Alignment Jig (Homemade Jig) |
 |
| Single Speed Gravel Bike Build - Fork Cantilever Brake Studs Brazed |
 |
| Single Speed Gravel Bike Build - Fork Cantilever Brake Studs Brazed |
 |
| Single Speed Gravel Bike Build - Fork Cantilever Brake Studs Brazed |
 |
| Single Speed Gravel Bike Build - Fork Cantilever Brake Studs Brazed |
 |
| Single Speed Gravel Bike Build - Fork Cantilever Brake Studs Test Fit |
 |
| Single Speed Gravel Bike Build - Fork Cantilever Brake Studs Test Fit |
 |
| Single Speed Gravel Bike Build - Top Tube Cable Brackets |
 |
| Single Speed Gravel Bike Build - Top Tube Cable Brackets Brazed |
 |
| Single Speed Gravel Bike Build - Top Tube Cable Brackets Old Spoke Jig |
 |
| Single Speed Gravel Bike Build - Top Tube Cable Brackets Brazed |
 |
| Single Speed Gravel Bike Build - Top Tube Cable Brackets - Brazed |
 |
| Single Speed Gravel Bike Build - Rear Cantilever Brake Studs Brazed (Homemade Jig) |
 |
| Single Speed Gravel Bike Build - Rear Cantilever Brake Studs Brazed |
 |
| Single Speed Gravel Bike Build - Rear Cantilever Brake Studs Brazed |
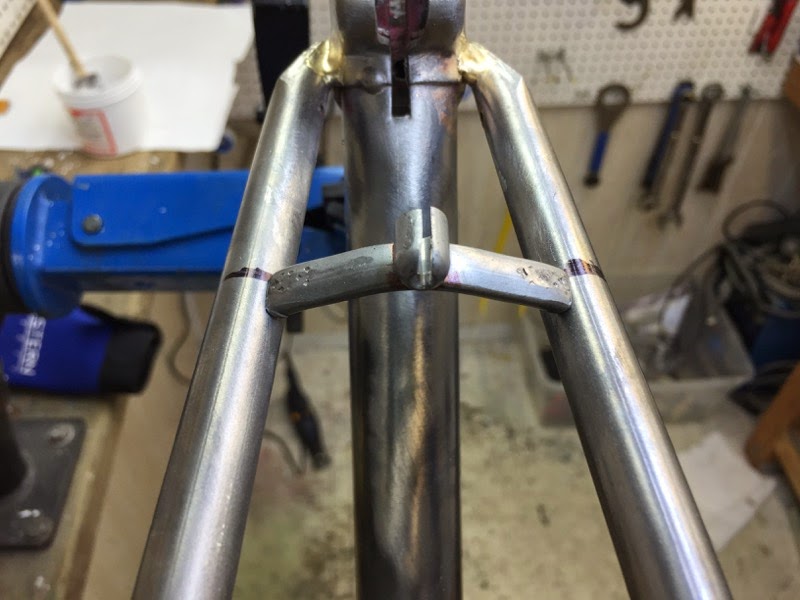 |
| Single Speed Gravel Bike Build - Rear Cable Hanger Stop Test Fit |
 |
| Single Speed Gravel Bike Build - Rear Cable Hanger Stop Brazed |
 |
| Single Speed Gravel Bike Build - Brazing Rear Rack Mounts |
 |
| Single Speed Gravel Bike Build - Rear Rack Mounts - Brazed I have since straightened the right one. |
 |
| Single Speed Gravel Bike Build - Rear Brazing Complete |
 |
| Single Speed Gravel Bike Build - Brazing Complete |
 |
| Single Speed Gravel Bike Build - Water Bottle Cage Mounts Cleaned Up |
 |
| Single Speed Gravel Bike Build - Top Tube Cable Brackets Cleaned Up |
 |
| Single Speed Gravel Bike Build - Rear Brazing Cleaned Up |
 |
| Single Speed Gravel Bike Build - Fork Brazings Cleaned Up |
 |
| Single Speed Gravel Bike Build - More Brazing to file and clean. |
 |
| Single Speed Gravel Bike Build - Fork Brazing Half Cleaned - More Flinging to come. |
With the brazing done its time to test mock up the bike. I cleaned and polished the original headset to use for mock up while the new headset is on order.
 |
| Single Speed Gravel Bike Build - Mock Up Headset - Complete |
 |
| Single Speed Gravel Bike Build - Mock Up Headset Complete |
I got this bronze crank and a bicycle swap that I turned into a single speed crank. I really like the colors however after installation I discovered a missing spacer and it will not work. I used a black FSA crank instead and turned it into a single speed.
An FSA bottom bracket is also being installed, a nice external cartridge bearing bottom bracket.
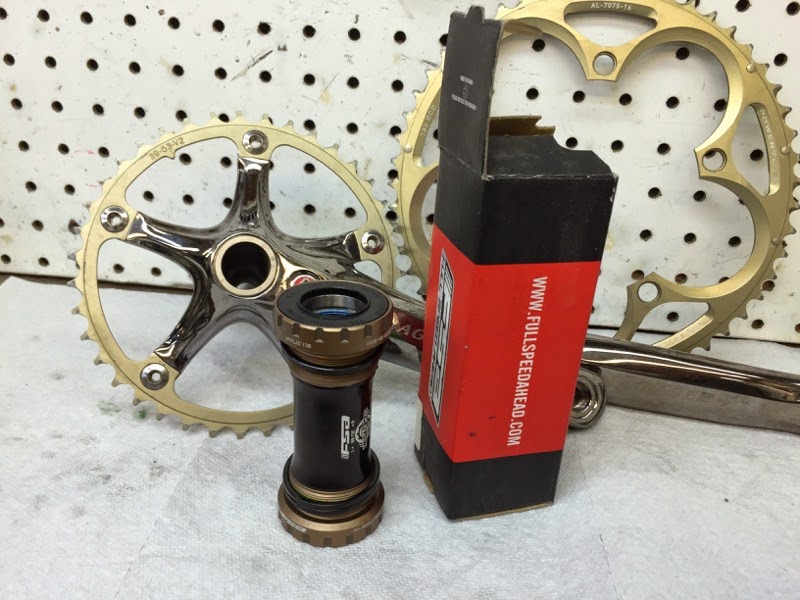 |
| Single Speed Gravel Bike Build - First Crank & Bottom Bracket |
I think I will probably keep these wheels for final build up as they are nice and have no miles on them, just shop dust. The tires are old but will work for mock up, they are 40 mm tires. i think I probably can get up to 48 mm tires on the bike.
In the photo of the rear tire you can see the crank I had to go with, in the photo there are no chain rings installed yet.
 |
| Single Speed Gravel Bike Build - Rear Wheel & Tire - Test Fit |
 |
| Single Speed Gravel Bike Build - Rear Wheel & Tire - Test Fit |
 |
| Single Speed Gravel Bike Build - Front Wheel & Tire - Test Fit |
 |
| Single Speed Gravel Bike Build - Front Wheel & Tire - Test Fit |
I just quickly grabbed any old handlebars out of the hundreds I have around. I really wasn't getting to picky, just something to mock up with. I don't know why but installed I really like the shape and lines of these handlebars installed. They have at least a 50/50 chance of making the final build.
The stem is just a Custom stem I grabbed out of the hundreds of stems around the shop. The stretch I don't think is enough. I think I will be searching eBay for a Nitto stem in rough shape (RS=LC, Rough Shape = Low Cost). In rough shape I can glass bead blast a nice texture back on the stem.
 |
| Single Speed Gravel Bike Build - Handlebar Mock Up |
 |
| Single Speed Gravel Bike Build - Handlebar & Stem - Mock Up |
With most thing mocked up I installed the chain ring and chain. The chain ring is a 39 tooth, I would at least like a 42-46 chain ring. I will see what I can find.
I am kind of really like the raw metal look at this point.
 |
| Single Speed Gravel Bike Build - Crank Installed |
 |
| Single Speed Gravel Bike Build - Chain - Installed Maybe a mm of adjustment out for chain line. |
 |
| Single Speed Gravel Bike Build - Chain - Installed |
Now time to install brake levers and wire the bike. The brake levers are Tektro but I think I will order some all black Tektro linear pull levers.
 |
| Single Speed Gravel Bike Build - Rear Brake Wired |
 |
| Single Speed Gravel Bike Build - Brake Levers - Installed |
A Brooks Flyer saddle in dark brown Installed, what else could be installed but a Brooks!
 |
| Single Speed Gravel Bike Build - Brooks Flyer Installed |
That completes the mock up. I really am liking the raw metal look but I ordered a two colors of powder for it either a Cream Soda blue or a Red. I am thinking the blue.
 |
| Single Speed Gravel Bike Build - Mock Up - Complete |
I road the mocked up version down the street today. I really liked it in that short ride but not long enough to really tell anything.
The temp was 4 degrees with a 35 mph wind so I really did not want to ride any longer.
 |
| Single Speed Gravel Bike Build - Mock Up Test Ride |
Check back soon.
So did you ever painted it?
ReplyDeleteThanks for providing recent updates regarding the concern, I look forward to read more. mtb bike rims
ReplyDelete