 |
| Schwinn Le Tour Luxe - Bicycle - After |
 |
| Schwinn Le Tour Luxe - Bicycle Before |
This is Pat's Schwinn Le Tour Luxe. It is Pat's favorite bicycle, he has toured Ireland with it. We all have a favorite bike that is just right in some way. Mine was a 1985 Cannondale ST500. I loved that bicycle and had multiple, multiple, ten of thousands of miles on it and for some stupid reason I sold it some time ago. Still looking for its replacement.
This Schwinn Le Tour Luxe is getting a restoration and some modifications to make it better for touring. The first modification is a water bottle cage brazes on the seat tube to replace the clamp version. The down tube already has water bottle cage brazes. The second modification is brazes on the fork for the front rack, currently it has a u-bolt to hold the front rack on.
The rear rack is an original Jim Blackburn rack that will be painted matte black to match the front touring rack. For now the frame will receive matte black paint in the areas of the brazing and will be decided later if the whole frame will go matte black.
The riser handlebars will be replaced with the original drop bars and a new riser stem. It took some effort to find a 21.1 mm riser stem but did find one.
Lastly maybe bar end shift levers will be installed if I can find some older friction levers for a good price, it is not easy to find them at a good price and new bar end shift levers are for 9 and ten speed rears and run in the hundreds of dollars.
I am very excited to work on this Le Tour, touring bicycles are my favorite and making this a better tourer will be fun.
 |
| Schwinn Le Tour Luxe - Bicycle Before |
 |
Schwinn Le Tour Luxe
Handlebars - Before |
 |
Schwinn Le Tour Luxe
Crank / Seat Tube - Before |
 |
Schwinn Le Tour Luxe
Front Brake - Before |
 |
Schwinn Le Tour Luxe
Crank - Before |
 |
Schwinn Le Tour Luxe
Rear Derailleur - Before |
 |
Schwinn Le Tour Luxe
Rear Brake - Before |
 |
| Schwinn Le Tour Luxe - Pedal |
 |
| Schwinn Le Tour Luxe - Stem - Before |
 |
| Schwinn Le Tour Luxe - Rear Rack - Before |
 |
Schwinn Le Tour Luxe - Shift Levers
Before |
 |
Schwinn Le Tour Luxe - Front Wheel
Before |
 |
| Schwinn Le Tour Luxe - Original Handlebars - Before |
The frame paint is in okay shape and dirty. For now it will stay the dark gold color maybe in the future a matte black or raw look. I actually like the gold, back in 1984 when I was 7 or 8 someone in the neighborhood got a new Corvette this same color and I thought it was the most beautiful car I have seen, not so much now though. The decals are shot and are going to be removed.
The paint polished very nice, there are a lot of scrapes and chips though. For how much the decals flaked of what remains is extremely stubborn, they should have made the entire decal the way they made the remaining!
 |
| Schwinn Le Tour Luxe - Frame - Before Polishing |
 |
| Schwinn Le Tour Luxe - Decals - Before |
 |
| Schwinn Le Tour Luxe - Frame Before - Drop Outs |
 |
| Schwinn Le Tour Luxe - Frame Before - Bottom Bracket |
 |
| Schwinn Le Tour Luxe - Fork Before |
 |
| Schwinn Le Tour Luxe - Frame Polished |
 |
| Schwinn Le Tour Luxe - Frame Polished - Bottom Bracket |
 |
| Schwinn Le Tour Luxe - Frame Polished - Seat Lug |
 |
| Schwinn Le Tour Luxe - Frame Polished - Decal Removed |
In the bottom bracket photo above you can see the threads are pretty rusty and dry, I cleaned them and gave them a quick re-tapping since, they look much better.
At this point I started work on the water bottle cage bosses. I removed the paint with a wire wheel in a grinder and then laid out where I wanted the cages. The down tube bottom boss is 5 3/8 inches from the bottom bracket, to put the seat tube bosses the same distance would just cause to much trouble with the front derailleur so I moved it up to 6 inches.
I metal punched a starting prick for the drill bit, it is important to hit the punch firm and only one strike, multiple strikes may make a mess of things. I then drilled the holes with just a small shot of WD-40 and a very slow drill speed so I don't put any stress on the bit, I hate buying new bits when some common seance will make them last a long time.
I used a Cinelli water bottle boss reinforce diamond to match the ones on the down tube, not exactly the same shape but hard to tell. The brazing went very good and the cage looks straight. i am happy with the results.
 |
Schwinn Le Tour Luxe - Water Bottle Bosses
Position Marked |
 |
| Schwinn Le Tour Luxe - Punching Location |
 |
| Schwinn Le Tour Luxe - Holes Drilled |
 |
Schwinn Le Tour Luxe - Water Bottle Bosses
& Reinforces |
 |
| Schwinn Le Tour Luxe - Bosses Brazes |
 |
| Schwinn Le Tour Luxe - Test Water Bottle Cage |
At this time I also put the bottom bracket and headset components in the crock pot with soapy water to clean. Both the headset and bottom bracket where very dry, new bearings should make a nice difference.
 |
| Schwinn Le Tour Luxe - Headset & Bottom Bracket - Before |
Because there is so much work being done to the frame the order of this post is going to be a little different, I spent some time today and restored the components of the Le Tour. Usually the order goes restore install take photo of the component installed but until the frame is ready it will just be photos of the components.
I started with the crank, the crank is a very nice triple heavy duty for touring. The chain rings are not light but very strong and nicely finished. Over all the crank looks beautiful, perfect form fallows function, all 20 pieces.
 |
| Schwinn Le Tour Luxe - Crank before |
 |
| Schwinn Le Tour Luxe - Crank Disassembled |
 |
| Schwinn Le Tour Luxe - Crank - Polished |
 |
| Schwinn Le Tour Luxe - Crank Complete |
Next was the brake levers and calipers. The brake levers where a little difficult to clean and polish with the hoods on but I did not want to remove the hoods because I did not think they would survive the process, they are on the verge of drying out.
The calipers are in good shape, everything was polished and cleaned and all the moving points where freshly lubricated. In the end the calipers function perfectly and look probably better then new!
 |
| Schwinn Le Tour Luxe - Brakes Calipers - Before |
 |
| Schwinn Le Tour Luxe - Front Brake - Exploded View |
 |
| Schwinn Le Tour Luxe - Front Brake - Polished |
 |
| Schwinn Le Tour Luxe - Brake Calipers - Before & After |
 |
| Schwinn Le Tour Luxe - Rear Brake - Polished |
 |
| Schwinn Le Tour Luxe - Brake Calipers - Complete |
 |
| Schwinn Le Tour Luxe - Brake Levers - Complete |
The derailleurs where ok start, they where pretty gritty in the pivot points. I cleaned them both and then flushed the pivot points with oil. The derailleurs now function very smooth and cleaned up and polished nice. The Sun Tour front is a very nice derailleur but then it has to be to function well with the triple crank.
 |
| Schwinn Le Tour Luxe - Derailleurs - Before |
 |
| Schwinn Le Tour Luxe - Rear Derailleur |
 |
| Schwinn Le Tour Luxe - Rear Derailleur - Complete |
 |
| Schwinn Le Tour Luxe - Front Derailleur - Complete |
I also polished the headset and bottom bracket components, they polished nice and I then placed then in a plastic bag until called for.
 |
| Schwinn Le Tour Luxe - Headset & Bottom Bracket - Polished |
From there just a few miscellaneous parts, the seat post, handlebars and rear brake bracket. The handlebars are very road Champions and polished nice. I like the seat post but I always like fluted seat posts.
I did clean, oil and polish the brake levers, bar end shifters are going to replace them but i restored them now with everything else just in case.
 |
| Schwinn Le Tour Luxe - Handlebars - Before |
 |
| Schwinn Le Tour Luxe - Handlebars - Polished |
 |
| Schwinn Le Tour Luxe - Seat Post - Before |
 |
| Schwinn Le Tour Luxe - Seat Post - Polished |
 |
Schwinn Le Tour Luxe - Shift Levers
Before |
 |
Schwinn Le Tour Luxe - Shift Levers
Complete |
Lastly a photo of the components complete on a shelf.
 |
| Schwinn Le Tour Luxe - Components Complete on a Shelf |
I overhauled the wheels today. The front wheel took a lot of polishing to get looking good, or at least the front wheel hub did. The rim seems fairly new. I replaced all the bearings and cleaned and greased everything. The wheel are in good shape.
 |
| Schwinn Le Tour Luxe - Front Wheel - Before |
 |
| Schwinn Le Tour Luxe - Front Wheel Before |
 |
| Schwinn Le Tour Luxe - Front Wheel - Old Grease |
 |
| Schwinn Le Tour Luxe - Front Wheel - Polished |
 |
| Schwinn Le Tour Luxe - Front Wheel - Complete |
 |
| Schwinn Le Tour Luxe - Rear Wheel - Before |
 |
| Schwinn Le Tour Luxe - Rear Wheel - Before |
 |
| Schwinn Le Tour Luxe - Rear Wheel - Old Grease |
 |
| Schwinn Le Tour Luxe - Rear Wheel - Polished |
 |
| Schwinn Le Tour Luxe - Rear Wheel - New Bearings & Grease |
 |
| Schwinn Le Tour Luxe - Rear Wheel - Complete |
The front rack was dropped off so I got started on the fork. I mocked up the rack on the fork and mark the location I want the rack bosses. I then marked the location with a metal punch and drilled the holes. I decided to use the water bottle cage reinforce diamonds on the fork, it can't hurt for strength and I think it looks good matched with the water bottle cages. I had to shape the diamond to the fork with a hammer. The brazing went well and I think the diamond looks good.
I then installed the rack for now but I need to get a few spacers and longer hex bolts for a better fit, right now the fit pinches the rack to far in, the spacers will make a better fit.
From here I will be painting the frame areas that I did the brazing in and painting the rear rack, the painting will not happen for 5 or 6 days, I have a lot of other things to get ready for painting and it is a lot more efficient to do all the painting in one day.
Check back later.
 |
Schwinn Le Tour Luxe - Fork Bearing Cupe
Pressed for Mock Up |
 |
| Schwinn Le Tour Luxe - Front Rack - Mock up |
 |
Schwinn Le Tour Luxe - Front Rack
Mock Up |
 |
| Schwinn Le Tour Luxe - Rack Bosses - Holes Drilled |
 |
| Schwinn Le Tour Luxe - Diamond Reinforce Fitted |
 |
| Schwinn Le Tour Luxe - Brazing -Complete |
 |
Schwinn Le Tour Luxe - Front Rack Complete - Waiting for
Spacers. |
Painting has been a nightmare with this extreme cold, the cold air flows right down my exhaust vent so i cant get the fumes out of the paint booth with out it freezing the paint and i cant turn the heater on to bake the paint with the fumes so its been pretty much paint and wait a long time for drying.
The extreme cold being said I have gotten some painting done, the slow way. I stripped the fork and cleaned it and also sanded the part of the frame being painted and masked it off.
 |
Schwinn Le Tour Luxe - Fork Stripped
Ready for Primer |
 |
| Schwinn Le Tour Luxe - Frame Masked |
The fork and the section on the frame is receiving a flat black paint job, this will consist of a black primer layer, followed by a flat black paint layer and finally a matte clear coat layer. The primer and black layer look great. I have to wait a couple of days for them to dry properly and then the clear coat will be applied.
 |
Schwinn Le Tour Luxe - Fork
Primer and Color Layer |
 |
Schwinn Le Tour Luxe - Fork
Primer and Color Layer |
 |
Schwinn Le Tour Luxe - Frame
Prier and Color Layer |
 |
| Schwinn Le Tour Luxe - Primer and Color Layer |
The Le Tour Luxe has an original Jim Blackburn rack, the more valuable racks. You can tell original or early Jim Black burn racks because they have labeled Jim Blackburn later racks are just labeled Blackburn. You can see this in the photos below.
 |
| Schwinn Le Tour Luxe - Jim Blackburn Rack - Before |
 |
| Schwinn Le Tour Luxe - Racke Before - Jim Blackburn Lable |
 |
Schwinn Le Tour Luxe - Rack Wire Brushed Cleaned
Ready for Primer |
 |
Schwinn Le Tour Luxe - Rack Wire Brushed Cleaned
Ready for Primer |
The rack is currently being primed, hoping that goes faster now that the temps are above -13.
I have been able to finish up the paint on the frame and fork, the rack I am waiting on a little more dry time for the clear coat. The stripe on the frame and the painting of the fork turned out really nice. I was shooting for a flat finish but also a finish that is very durable. I have a finish on my Cyclocross bike that is flat but also tough and durable, that is what I was trying to match. This type of finish does have a texture to it, not like a orange peal texture but more like a texture you would find in an industrial setting or in a truck bed but not as extreme. To get this I use a very heavy flat clear coat, I layer a few coats on, I then ad a few layers of a satin clear coat and then knock down the finish with very fine steal wool, but only very lightly. I am very pleased with the results.
 |
| Schwinn Le Tour Luxe - Fork - Paint Complete |
 |
| Schwinn Le Tour Luxe - Removing the Masking |
 |
| Schwinn Le Tour Luxe - Frame Stripe - Complete |
 |
Schwinn Le Tour Luxe - Finish on my Cyclocross Bicycle
Ignore the Dust Please! |
With the frame painting complete I have started assembly. The headset was cleaned and polished a while ago and new bearings installed in the cages. I completed the headset and it spins very smooth and I think the fork looks fantastic in the flat black. A new stem was also installed. The new stem is taller and will get the original drop handlebars above the level of the saddle making the rid a lot more comfortable. This will also make the flat BMX handlebars unnecessary.
 |
| Schwinn Le Tour Luxe - Headset Bearings - Packed |
 |
| Schwinn Le Tour Luxe - Headset Complete |
 |
| Schwinn Le Tour Luxe - New Stem - Installed |
The bottom bracket installation went fast with no problems, a little new grease and it spins smooth. I also installed the crank at this time and the front derailleur. The crank and front derailleur look fantastic installed.
 |
| Schwinn Le Tour Luxe - Bottom Bracket - New Grease |
 |
| Schwinn Le Tour Luxe - Bottom Bracket - Complete |
 |
Schwinn Le Tour Luxe - Crank - Installed
I love this crank! |
 |
Schwinn Le Tour Luxe - Front Derailleur
Installed |
Next I installed the wheels and brake calipers, I really like the large wheels, large wheels are actually faster then high pressure narrow wheels on all surfaces except a perfect surface and how often do we get a perfect surface? I really like the shine of the calipers against the frame and wheels.
 |
| Schwinn Le Tour Luxe - Front Wheel - Installed |
 |
| Schwinn Le Tour Luxe - Rear Wheel - Installed |
 |
| Schwinn Le Tour Luxe - Front Brake- Installed |
 |
| Schwinn Le Tour Luxe - Rear Brake - Installed |
 |
| Schwinn Le Tour Luxe - Front Wheel Hub - After |
I actually installed the rear derailleur before the the wheels, the rear derailleur is nice all polished out and lubricated.
 |
Schwinn Le Tour Luxe - Rear Derailleur
Installed |
Last for today is the seat post, saddle, rear brake cable hanger and the brake levers. All installed fine, I put a heavy coat of grease on the seat post. I love the Brooks saddle on this bicycle with the gold and flat black.
 |
| Schwinn Le Tour Luxe - Brake Levers - Installed |
 |
Schwinn Le Tour Luxe - Seat Post
Cable Hanger & Brooks Saddle
Installed |
So that is the Le Tour Luxe so far, below is a photo of the bicycle at the end of today. I am super happy with the results so far. Check back in a couple of days for the completion.
 |
| Schwinn Le Tour Luxe - Bicycle After Today |
The Schwinn Le Tour Luxe is 99% complete. I was installing the rear rack and was not happy with a spot on the underneath so I am giving it a slight touch up spray, it will take a day or two.
The cables are run and new housings also. New Brooks black leather handlebar tape was installed and the front rack was installed with new mounting hardware. Just have the rear rack to go.
The photos below start with the installation of the replacement bar end shift levers, they cleaned and polished nice and function nice after flushing and lubricating.
 |
Schwinn Le Tour Luxe - New Cables, Housings & Brooks Black
Handlebar Tape |
 |
| Schwinn Le Tour Luxe - New Down Tube Cable Stop |
 |
| Schwinn Le Tour Luxe - Bar End Shift Levers - Before |
 |
| Schwinn Le Tour Luxe - Bar End Shift Levers - Polished |
 |
Schwinn Le Tour Luxe - Bar End
Shift Levers - Installed |
 |
| Schwinn Le Tour Luxe - Brooks Handlebar Tape Installed |
 |
| Schwinn Le Tour Luxe - Brooks Handlebar Tape Installed |
 |
Schwinn Le Tour Luxe - Front Brake
Cable Run |
 |
Schwinn Le Tour Luxe - Rear Brake
Cable Run |
 |
| Schwinn Le Tour Luxe - Front Rack - Installed |
 |
Schwinn Le Tour Luxe - Front Rack Installed
Some of the Hardware - Aluminum Spacer |
 |
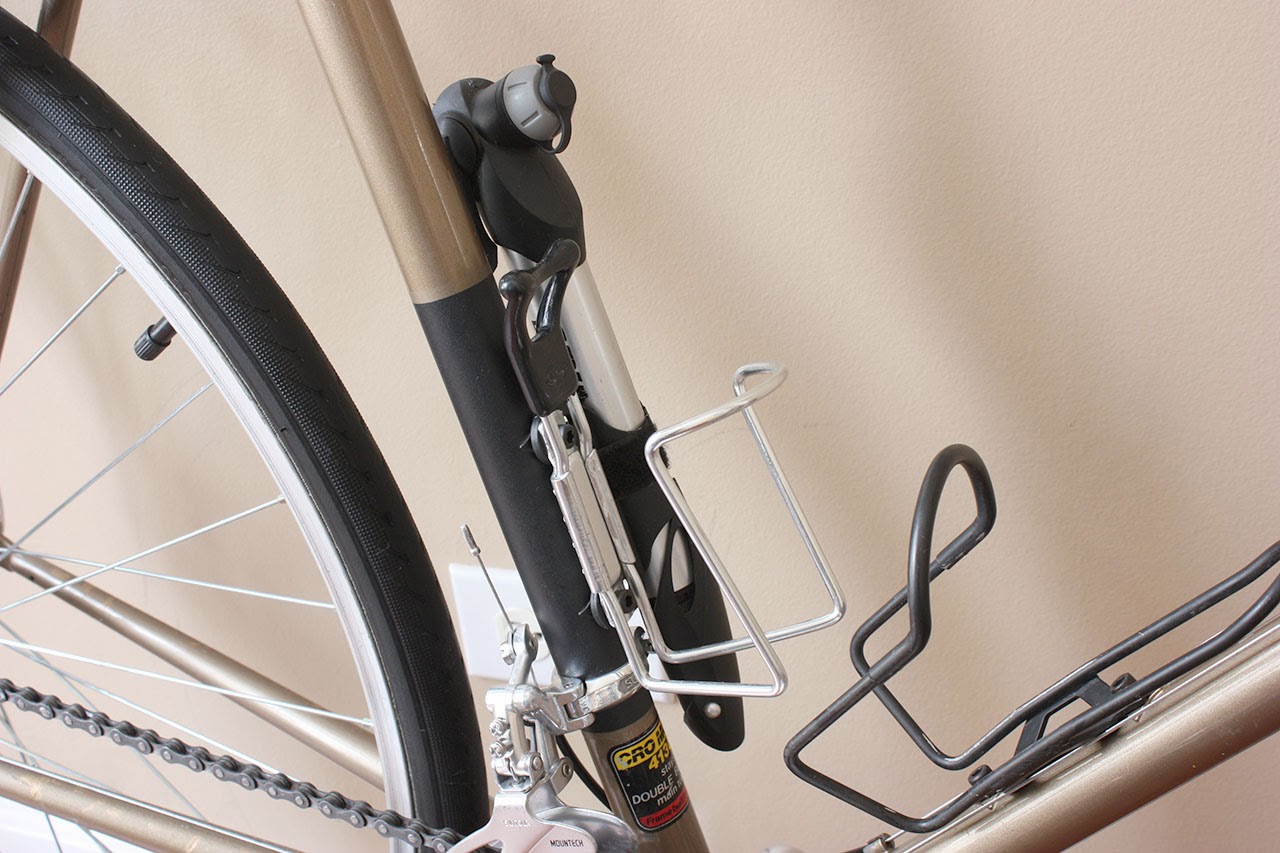
Schwinn Le Tour Luxe - Water Bottle Cages
& Pump - Installed |
 |
| Schwinn Le Tour Luxe - Bike 99% Complete |
I will finish the post shortly when the touch up spray is complete, it was hardly anything that needed touch up but if I did not it would drive me crazy so for my sanity I have too. Peddles are not installed in the photo above, they are complete but the toe clips would bang on the shelf that the stand is attached to while tuning, so I wait.
The rear rack is complete and looks fantastic. I installed the rack and gave the Le Tour Luxe one last stand tuning. The rear derailleur cage need a lot of fine tuning for there was a little twist in it. The Le Tour is very well stand tuned, I wish I could ride it and tune it, their is a difference between stand tuning and ride tuning, a good stand tuning could be crap when actually peddling force is added to the bicycle, that is why a lot of tuneups at shops feel like crap because they only stand tune a bicycle, pedaling force magnifies all problems.
Today's temp was -9 when I took the final photos so again they are taken indoors. I am so happy with the Le Tour Luxe, I am very happy with the new brazings, the black flat paint for the brazing stripe and the fork turned out fantastic, the new stem makes the bicycle a lot more practical, the rear rack also turned out fantastic and brings the le Tour luxe all together matching the black on the frame and fork and front rack. he actual restoration of the bicycle really turned out nice also, the alloy and chrome shines.
Touring bicycles are my favorite, they represent total self reliance and freedom, I love touring on a bicycle, there is nothing like it. I am love the Le Tour Luxe and its new modifications.
|
| Schwinn Le Tour Luxe - Bicycle Complete |
 |
| Schwinn Le Tour Luxe - Bicycle Complete - Angle |
 |
| Schwinn Le Tour Luxe - Bicycle Complete - Handlebars |
 |
| Schwinn Le Tour Luxe - Bicycle Complete - Front Brake |
 |
| Schwinn Le Tour Luxe - Bicycle complete - Stem |
 |
Schwinn Le Tour Luxe - Bicycle Complete
Front Half |
 |
| Schwinn Le Tour Luxe - Bicycle Complete - Fork Paint |
 |
| Schwinn Le Tour Luxe - Bicycle Complete - Drive Train |
 |
| Schwinn Le Tour Luxe - Bicycle Complete - Rear Rack |
 |
| Schwinn Le Tour Luxe - Bicycle Complete - Rear Brake |
 |
| Schwinn Le Tour Luxe - Bicycle Complete - Water bottle Cages |
Thanks for looking,
John Z.


Absolutely amazing. I still want to know how you polish the metal so looks like new. I have an '84 Schwinn Le tour mixte variant [double-butted cro-mo] I'm restoring. She's in decent shape but the wheels needed replacing, the decals were gone, and her rear derailleur was bent [that has been fixed].
ReplyDeleteNice website, good writing and some great shots! You are a good photographer with a passion about Restoration and Modification .
ReplyDeleteHeavy Duty steel Casters & Steel Caster Wheels
Great informative blog .Thanks so much for posting a lot of this awesome content! Looking forward to checking out more.
ReplyDeletesitges rentals & holiday rentals sitges
Liz, I use mother's mag and aluminum polish for the components. Gives a mirror finish.
ReplyDeleteJohn,
ReplyDeleteI've had this post saved for awhile. I have an opportunity to buy this exact model in my size. The stem is my only concern. Can you please tell me where you found the stem? Was it NOS or a new model?
Thanks!
-Mike
Hi John, great work, love the polishing.
ReplyDeleteI'm after an '83 Luxe myself, as it appears to be the ideal 68cm/27" frame for a large tire size. Are those 27" or 700c rims? Any guesses on what the largest tire that would fit in there would be?
Regards,
Graham
I have the same model and would like to restore the decals, any ideas where I can find some?
ReplyDeleteHey! Did you get the original rear derailleur fixed or did you need to utilize a new one? I have bent/broken rear derailleur on my 80's Le Tour Luxe and was curious what I might be able to do!
ReplyDelete