Thursday, July 26, 2012

My Mom's Schwinn Super LeTour Overhaul/Restoration Updated

     When I work on a bike, especially when I restore a bike, I think of the history of the bike.  I think who has owned it, how many miles it has ridden, what it has seen, did it bring joy to the owner or owners.  I know this bike's complete history.  This is my Mom's bike and before her my Grandmother's bike.  It is a 1987 Schwinn Super LeTour.  In 1987 my grandparents traveled from our home town of Escanaba in Upper Michigan to Chicago to specifically get these bikes.  My dad currently has my Grandfather's 1987 Schwinn Super LeTour III.  For there first half of the bikes life my Grandparents rode these bikes around Escanaba and also took them on trips with them.  About 10 years ago my parents got the bikes and have been riding them since.  One of my most vivid memories of my Grandfather is of him riding the Green colored Super LeTour around town, and also when I was quite young getting rides home riding on the crossbar, not very comfortable.  My Grandfather's bike is next on the list for a restoration, I will post photos when I pick it up.
     My Mom's bike is in soar need of a restoration.  The bearing grease is very dry and the bearing cones have been over tightened.  The derailleurs are caked with grime and the bike is not shifting well at all.  All cables are rusted and need to be replaced.  The bottom bracket and headset are in rough shape.  Everything else is covered with grime and rust.
   

Schwinn Mixtie Super LeTour before Restoration


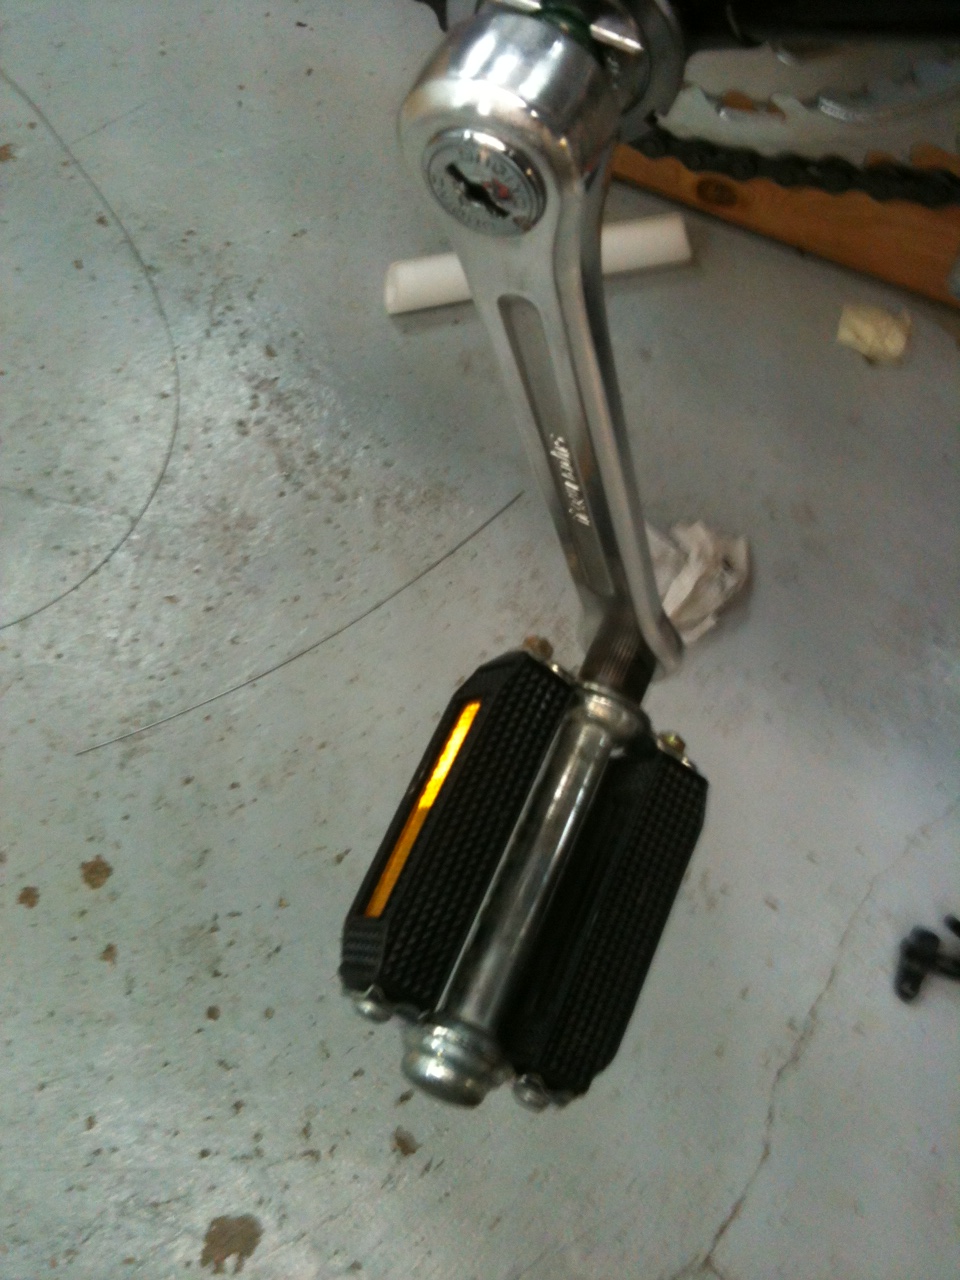
Front Derailleur & Crank Before Restoration


Rear Derailleur Before Restoration


Headset Before Restoration


Front Wheel & Fork Before Restoration
Updated August 1, 2012.


     Sorry for the delay in finishing this post.  My computer died and for some reason Google won't allow me to upload photos from my Ipad.  I left off at the before photos of the bike.  I stripped all the parts off the bike and polished the frame.  I then started on the Bottom Bracket.  The bottom bracket was dry and had a little wear to the cups.  It took a good cleaning and polishing of the cups, it now turns smoothly and looks great polished.
     With the Bottom Bracket complete I moved on to the Headset.  The headset was in rough shape.  There was a lot of grind when turning and the grease was dry.  I was worried it was not going to be usable.  But other then being set to tight and dry grease it shows no wear at all.  I polished all the Headset components, greased and installed it.  It looks great polished and turn very smoothly.


Frame Stripped & Polished


Bottom Bracket Dry & Rusty


BB Components Before


BB Complete


Headset Complete

     With the Headset & Bottom Bracket complete I moved my attention to the Crankset.  The crankset is a Suguno Super Mighty Allow crank, a very nice crank that is light and will polish up nicely.  I completely disassembled the crank and polished the arms, bushings, bolts, spacers and chain rings.  I am very pleased with the results and I think the photo shows why. 


Crankset before


Crankset Polished & Installed

     With the Crankset installed i started work on the Stem and Handlebars.  The stem and bars where dull and dirty but otherwise in good shape.  I cleaned both with soapy water and a scrub brush then moved on to the buffer.  Aluminum stems and bars usually polish up easy and nicely.
    I then moved on to the front wheel.  The Bearing Cones where tightened way to tightly and the grease was almost nonexistent, even with that there was very little wear.  I cleaned all the components by soaking them in a crock pot with soap water for a couple of hours.  This always does good work on dried grease.  I then greased and packed the bearings.  I polished the hub and rims and they shine nicely.  The wheels are pretty lite for the time period and the alloy rims polished nicely.  The wheel spins extremely smooth.  It spins for many minutes on the stand before it stops.    I am now at what I like to think of as the half way point.


Stem Before Cleaning & Polishing


Stem Polished & Installed


Handlebars Polished & Installed


Front Wheel Before

Rim Polished


Bike Half Way Point

     I always feel like I am making good progress when i get to this point and the rest of the bike goes quicker then I expect.  It was time to start on the rear wheel.  I removed the cassette and wheel components.  The drive side grease was dry and the non drive side grease was fresh and dirty.  I cleaned all the components in the crock pot and brushed the cassette clean.  I then repacked the bearing, installed the cassette and polished & installed the axle and skewer.
     Now its time to get the drive train up and running.  I started with the derailleurs.  The derailleurs where covered in grime and grease.  It took a lot of scrubbing with soapy water to get them clean.  They where in such good shape after cleaning they did not require any polishing.  I am always amazed at the preserving power of thick grime and grease.   I then installed the derailleurs on the bike.  I love the shine of the derailleurs and crankset.


Rear Wheel Hub & Cassette Before


Rear Wheel Hub Grease


Front Derailleur Before


Rear Derailleur Before


Front Derailleur Installed - Nice Shine


Rear Derailleur Installed


     With the derailleurs installed it was time to clean and polish the gear levers.  They where almost frozen in place.  I completely disassembled the levers, cleaned and polished the components and greased the moving parts.  They now work very smoothly.  I installed the shift levers and ran the cable housing and cables.  I do not have new red cable housing on hand so I cleaned and oiled the old housing.  It was in good shape and with new cables should work very well.  The gears now shift wonderfully.
     Next I worked on the brake calipers.  I disassembled the calipers and polished all the components on the buffer.  When I assembled the calipers I greased the pivot points.  The calipers look great polished.  I also installed new Jagwire brake pads.  With the calipers finished I cleaned and polished the city brake levers and installed them onto the bars.  Next I ran new brake cables and oiled and cleaned the red cable housing.  I am very pleased with the brakes, they stop very quick for the time period they come from and look great polished with the red cable housings.
    Next i finished up small parts here and there.  I cleaned and polished the seat components and saddle.  Polished and cleaned the kickstand, bar grips, rear rack, peddles, dust caps and reflectors.  I had such a good work rhythm going that I forgot to take a lot of photos.  What I remembered is below.


Peddles Cleaned & Installed


Front Brake Polished & Installed


Rear Derailleur Cable in Place - Like the Red &  Black

Front Wheel Polished & Installed

     I am super happy with the results of this restoration.  I love that it is my Mom's bike and that I know the entire history of the bike.  I also like the Mixtie City style bikes, there is a nice shape to them, so much better then a Mixtie with drop bars.
     The bike rides so smooth,  one of the better Schwinns I have ever ridden.  I remember from in the past when my Grandfathers bike, now my fathers bike was in good condition how nice it rode, and this one is right up there.   I will think of more to write shortly.  i will be updating the Specialized build soon.


Schwinn Super LeTour Mixtie


Schwinn Super LeTour Mixtie - Crank


Schwinn Super LeTour Mixtie - Front View


Schwinn Super LeTour Mixtie - Love the Red


Schwinn Super LeTour Mixtie - Rear View

Monday, July 23, 2012

Raleigh Fixie hit by Pickup Truck

Hello,
    Well,  I was riding and 12 miles into the first ride of the Restored/Reincarnated Raleigh Fixie this went bad.  A Pickup Truck cut me off in the bike lane, I went smashing into the side of the truck bed, flipped over into the bed and landed hard, and that was after being able to reduce my speed by half in a 2 foot distance.  I have some bruised ribs but survived fine, but the bike did not.  The down tub is buckled, the top tube less buckled, the headtube compressed and the top headtube lug actually split in the back.  Amazing the front wheel is dead straight and all other bits and pieces survived.
     I can not explain how sad I am about this bike.  It fit just perfect for a fixie, just on the smaller end of my size range, which made it nimble for me.  It rode so smooth and quick, and easy.  I had plans to ride it from my home here in Racine to my true home town in Upper Michigan.  I loved this bike and I knew that after only 12 miles.  The looks worked very well with the classic design, the ride, everything.
     I am going to take the parts and put them on a old Schwinn world that I also really like that is set up as original.  I just do not ride it much so I will give this frame a try.  If it is as good I will powder coat the frame the same burgundy of the Raleigh when I get the powder coating up and running soon.


Crashed


Bent Down Tube


Trying to Transfer Soul to Schwinn World

Thursday, July 12, 2012

Raleigh Fixie / Single Speed Conversion & Restore Finished 7-19-12

     Hello,

     I finally caught up on customer bikes and have a free day to work on what I choose.  The Specialized Hard Rock is not back from the Powder Coater.  It is taking a little longer because they needed to order the color I wanted and the 4th of July Holiday messed shipping up and also its been 100+ degrees here for a while, not so bad this week though.  So I am going to start work on a mid-seventies Raleigh Record.  When I found it someone started or did a cheap single speed conversion on it, and by cheap I mean they removed the derailleurs removed all but one cog and called it a single speed.  I will restore the bike and keep it a single speed but I will do it right and also add a flip flop hub for fixie & freewheel.  My goal is to go light as possible on a budget.
     The paint is in pretty bad shape, plus its an ugly yellow and black bumble bee scheme, I think I will repaint it.  I have a flip flop hub 27" wheel on order.  I have a new 46 tooth single speed crank on hand that I will be using along with a new sealed Bottom Bracket.  I will be replacing the bar tape, tires, tubes, adding a cross style front brake lever and replacing the front brake with something lighter and stronger.  I will also be removing all the cable stops.  


Raleigh Record - Rough & Ugly


Raleigh Record - Still Rough & Ugly


Before Wheels


Bike on Stand


Before Bottom Bracket View

     With the bike torn down to the frame I started the paint stripping processes.  I use a spray on foaming paint stripper that I get from Wal-Mart for $6 a can.  I really do not like using chemicals of any kind, but for this it does work faster then sanding.  A sand blaster is one of the next major purchases I am going to make.
I take as much precautions as I can, safety glasses, gloves that almost go to my shoulders and ventilator.  I spray a thick coat of the stripper on and then wit about 20 minutes, I then take a wire grill brush and carefully brush off as much as I can.  I then add a second coat of stripper and give the frame one more brushing.  There will be a few spots that will require sanding, but it will not take much time.  With the frame bare I used a metal chisel and a grinding wheel in the Dremil to remove all the cable stops.  Tomorrow I will give the bike a quick wet sanding to smooth things out and remove any oxidation, then I will give everything a wipe down with mineral spirits and spray the first coat of primer.


Frame After 10 Minutes of Paint Stripper


Down Tube Paint Peeling


Down Tube Paint Peeling


Bare Frame - One of Favorite Sites - Blank Slate


Bare Frame - Some Sanding Yet to Do.


Update July 15, 2012

Hello,
     I have updated the Raleigh Fixie Restore & Specialized Hard Rock posts today.  With the frame sanded and cleaned I started on priming.  It is probably to hot and humid to do the painting now, but I am going to go with it anyways because I want the bike ready for a special ride next weekend.  I start with a red colored sandable primer and then wet sand any thick or rough spots to make it completely smooth.  If in sanding i expose any metal I clean it again with mineral spirits and spray it again with red primer.  I then let the red primer dry in the sun for a couple of hours.  With the red primer dry I then apply a coat of black sandleable primer and allow that to dry, I then wet send the black primer smooth and allow that to dry in the sun for a whole day.  It is really hot here and the sun really bakes the paint nicely.  I use two different colored primers because when I sand the black primer I can see when I get to the red primer and stop before I get to bare metal.
     With the primer dry and smooth I put a thin coat of the primary color on.  Here I have chosen a deep burgundy color.  I wait a few minutes and then check the primer color coat, if everything is good I add a second coat of burgundy.  With the primary color done I let that bake in the sun for a day.  I had to move it in and out a couple of times because we had some rain storms.  (much need rain, I believe we are now classified as a severe drought here in South Eastern Wisconsin.)
     This morning with the burgundy dry I added to coats of a gloss clear coat.  I should probably have waited for a cooler day, I have a few rough spots that are going to require some fine wet sanding and buffing, but that will have to wait until after quite a few days of baking in the sun.
     I am ok with the paint so far, I would have waited for better weather If I did not want the bike for the up coming weekend.  If I sell the bike I will defiantly powder coat it before selling.
     I think I have to upload a few of the paint process photos, but I will post what I have now and load the rest shortly.


Red Primer - Dry


Black Primer - Dry


     I have to upload the rest of the pictures.  Sneaking a few minutes here and there in between customer bikes I worked on the handle bars and front wheel.  I will be replacing the front wheel with something lighter, but for now I will be using the original front wheel.  The wheel went easy, the only thing that caught my eye was the visual design of the axle and components.  It reminded me of all the instruments in my grandfather's dental office, they always caught my eye as having a very elegant Art Deco feel to them.  He retired in 1990 so it may explain the design of the instruments and the age.


Before Front Wheel


Before Front Rim


Before Front Wheel Axle & Components


Front Wheel Components Polished


     I weighed the front bars and components before stating work.  The bars had the old suicide levers, plastic ugly yellow bar tape,  a mounting bracket for the old stem shift levers and very heavy bell.  The total weight came in at 2lbs 10oz.  I stripped everything off and removed the stem.  I then buffed the bars and stem out on the bench top buffer.  I keep it in a booth in the garage to keep all the mess contained.  I am super thrilled with the bars and stem polished.  With the bars stripped they come to 15 3/4oz, I still need to add the bar tape and one cross brake lever, but that is still a nice weight reduction.  I will post more soon.  Thanks


Handle Bars Before


Handle Bar Weight Before


Handle Bar Weight After


Handle Bar & Stem Polished


Update 7-19-2012


Hello,
     I finished the bike today,  I left off at the handle bars polished.  The photos are not complete, some are missing.  I spent some time in the hospital about 2 weeks back and lost my I-Phone.  I use my IPhone for all my photos so the last 2 weeks I was using an old digital camera and there was about 20 steps per photo to get it on the blog.  i just got my IPhone back so there are a few photos on the camera I am not going to bother with.  I am missing the photos of the frame with final paint, clear and sanding.  I am pretty happy with the paint on the frame, I probably will polish it out one more time.
     With the frame painting complete I started work on the head set.  I have a Velo Orange Headset on order, but it will not be here in time for this weekend when I want the bike for a special ride, so I will overhaul the original for now.  This is not my favorite headset to work on, all the bearings are loose and there are fifty bearings.  That is a Raleigh headset for you.  I polished all the pieces on the buffer and degreased everything.  The grease was like glue, had to use a wire wheel in a drill.  In the end it looks good, but is heavy and has a pretty bad gouge in the top cap.


Crown Race Ram - Fits & Works Well


Headset Cups Pressed


Headset Bearings - Top 25


Headset Complete


Stem Greased


Bars Installed


     With the Headset and Handle Bars Installed I moved on to the Bottom Bracket and Crank.  I do not know what I was thinking, I usually install the Bottom Bracket and Crank before the headset and bars.  I 6'-4" and lanky.  I do not fit well below the bars and I will hit my head at least 10 times now.
     I am replacing the old cotter Bottom Bracket with a Shimano UN55 a nice mid range bracket.  The new Bottom Bracket weighs a pound and a half less the the old.  Easy weight reduction.  The crank is a 46 tooth 1/8" square taper crankset.  Another mid range product.  Everything went well with the installation.  Always remember to clean the frame threads and to always grease the Bottom Bracket threads, a thin coat of grease on the bracket body wont hurt either to help prevent corrosion.


Non Drive BB Cup - Plastic Be Careful


 Drive Side & BB Tool


Bottom Bracket Installed


46 Tooth Chain Ring 


Crank Set Installed


     From here the photos are going to be a little thin.  Most are on the digital camera.  I started by installing the front wheel.  I put on new Kenda Gum wall tires for the classic look.  I have a new front wheel on order, I am hoping it gets here by the weekend, but for now I have to go with the old front wheel.  Next I worked on the rear wheel.  It is a new wheel with a flip flop hub and some really nice alloy rims.  I installed a 18 tooth Surly fixed cog and an 18 tooth Shimano freewheel.  I have just about every size cog there is, but for the ride this weekend I know I am going to need at least an 18 tooth if not bigger.  I then installed the wheel onto the bike and the 1/8" chain.  The chain line is just about perfect.
     Next I installed a side pull Shimano brake caliper from the 80's, new brake pads and new Jagwire cable housing.  I also installed the old city style brake lever on the right side under the bar flat.  I know front brake levers usually go on the left, but I have always like it on the right if I am having just one brake.  With the brake installed I installed some Salsa Gel Cork deep clay colored handle bar tape.  I think the bar tape is perfect for the color of the bike.  And with the gum wall tires it all has a very classic look.  I do have a Guidonnet Brake lever on order From Velo Orange.  The curve should match the handle bar curve nicely.
     Only thing left to do is install the seat.  I have a Brooks Saddle on order but for this weekends ride I had to pick the least Ugly of what I have around the shop.  It looks all right, but the Brooks Saddle will pop on this bike.


Front Wheel Installed


Rear Wheel Installed


Rear Wheel Cog View


Front Brake Installed


Handle Bar Tape Installed


Complete Bike on Stand


Raleigh Fixed Gear/Single Speed Restored - Side View


Raleigh Fixed Gear/Single Speed Restored - Front View


Raleigh Fixed Gear/Single Speed Restored - Rear 


Raleigh Fixed Gear/Single Speed Restored 

I will be finishing the write up shortly with some things that I will change and other details.

I received the new front wheel this afternoon. It was quick work to change over the tire, tube and rim liner. I did not weigh the old and new wheel, but the new wheel feels considerably lighter. With the new wheel on it was time for a test ride. WOW! What a ride. I did not want to get off the bike, so smooth and responsive. I have ridden many fixed gear bikes, but this is the best by far. Over all I think this is my best work and design yet. I am not sure design is the correct word, but I guess it is. I think it is design picking out parts and having an overall look in mind.

I would like a better paint job. I am in the process of setting up my own media blasting and powder coating facility. I built my own blasting cabinet and with my Dads collaboration we are designing and building a powder coat oven, at a small fraction of the cost of a commercially bought oven. It should all be up and running by the end of September or early October if I get the time to work on it.

With the powder coat I would keep the same color and finish, but I would also powder the head tube white, I think the white head tube would give it nice pop.

I will add more photos and updates as the new parts come in. (Headset, bake lever, Brooks Saddle, ect..) That is if you can get me off the bike.

Thanks,
John